Menu
|
Overview For this style, I used a pre-curled wig just like in Episode 1, but this style does not require curling your hair first. As always, I welcome trying this hairstyle on any and all hair textures and would love to see what you create! This style looks simple, but as with most simple hairstyles, any and all imperfections tend to stick out like a sore thumb. While I do not wish to scare away beginners from trying this style, I want to warn intermediate & beginner levels alike not to underestimate its difficulty. Even I struggled to get this look in under 5 minutes and I have done it many times. Here are the basic steps I will expand upon below covered in this episode:
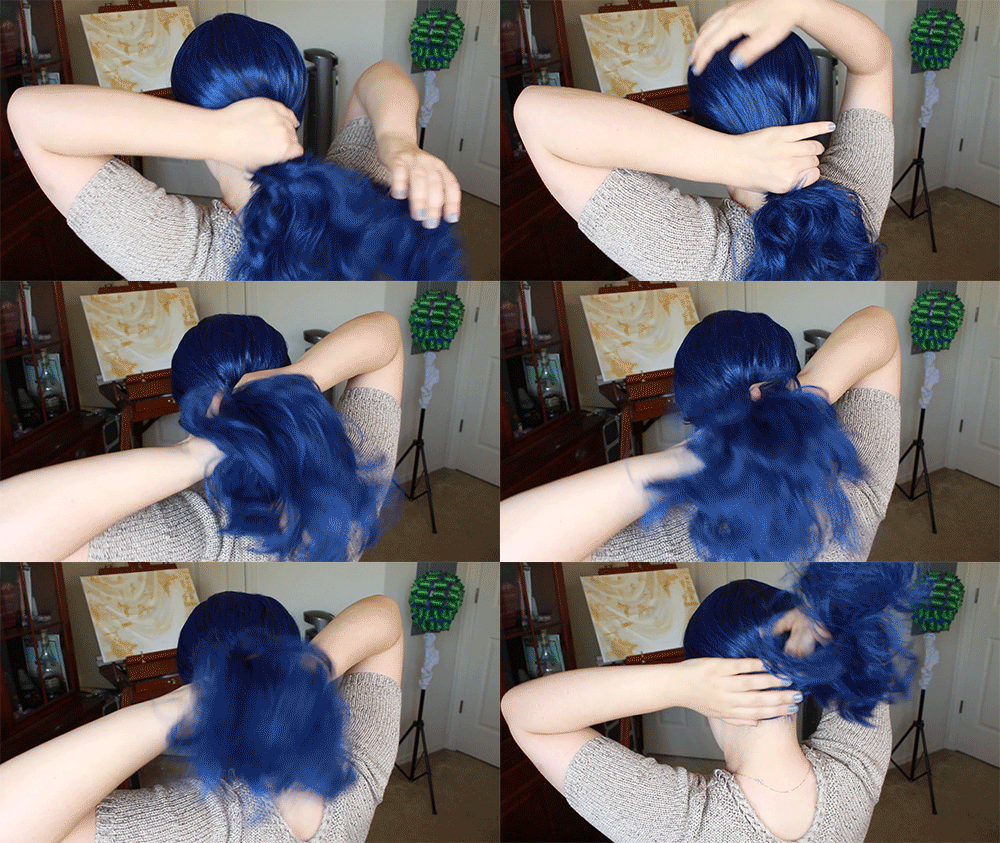
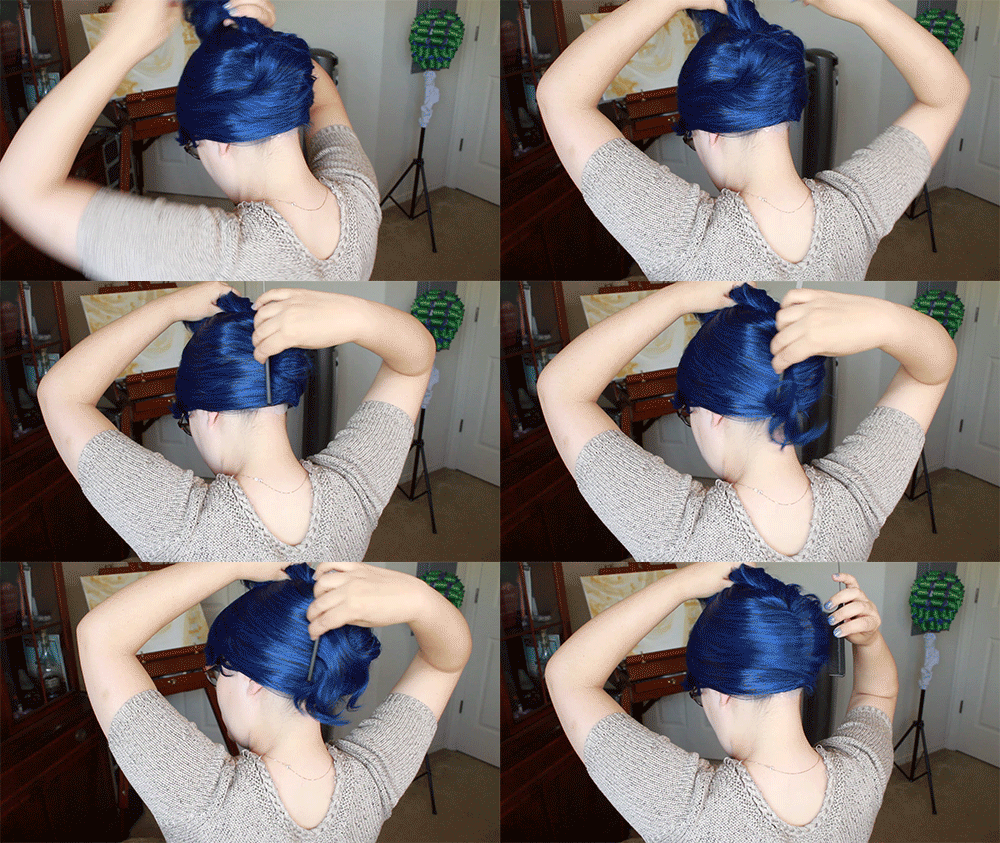
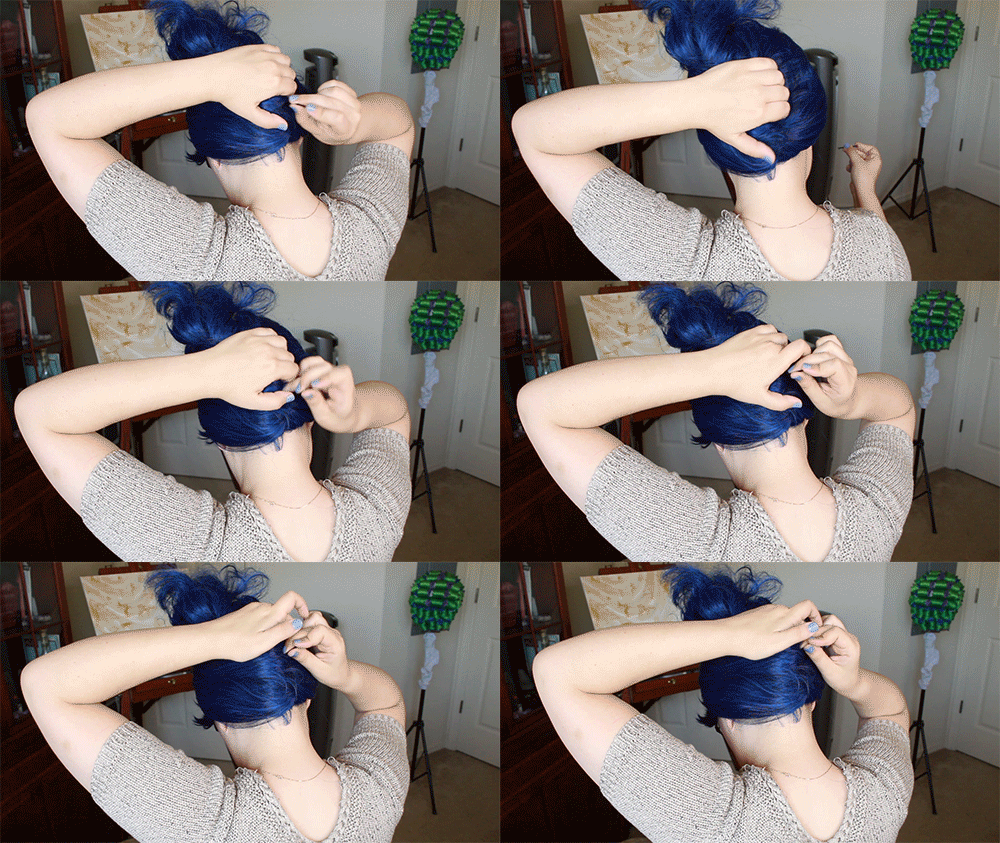
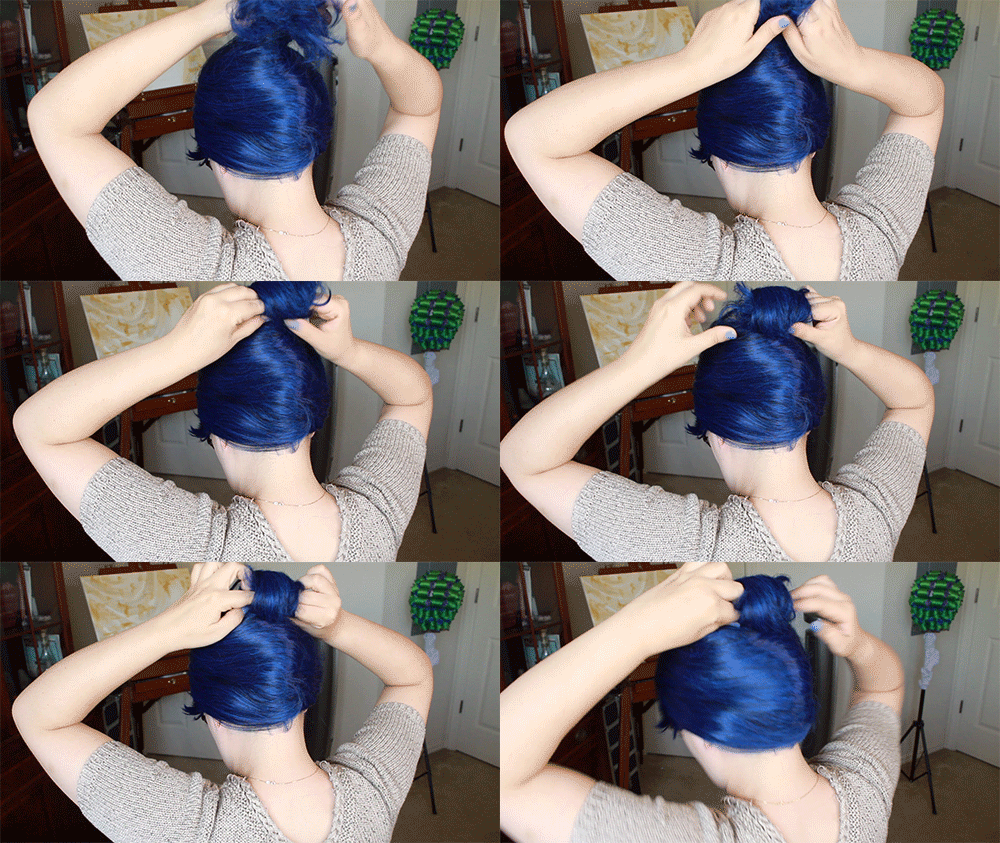
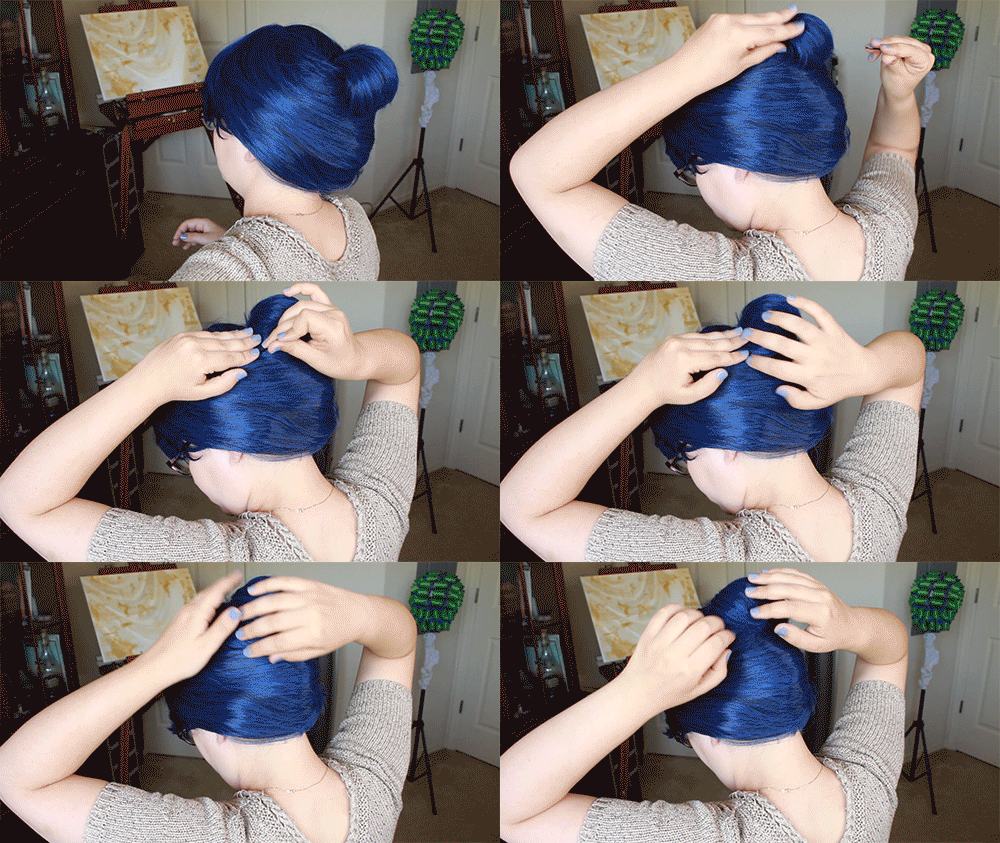
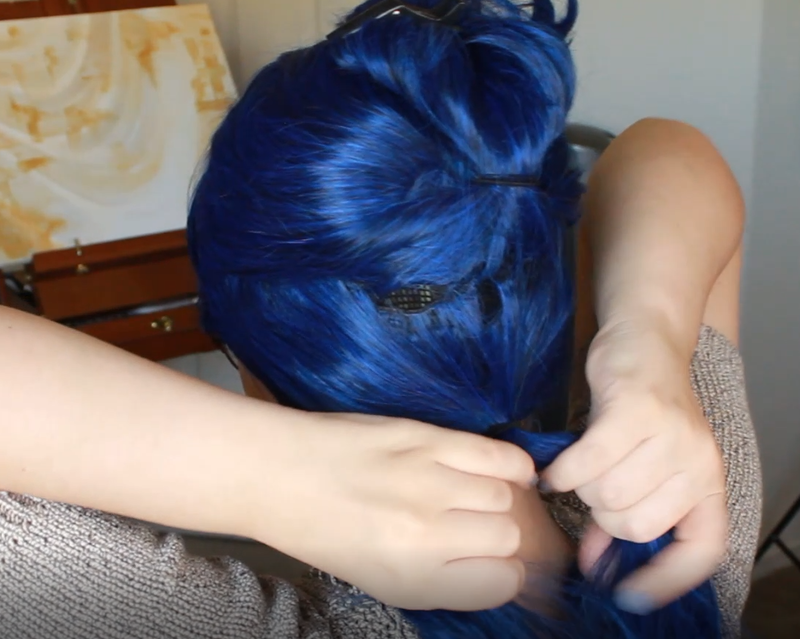
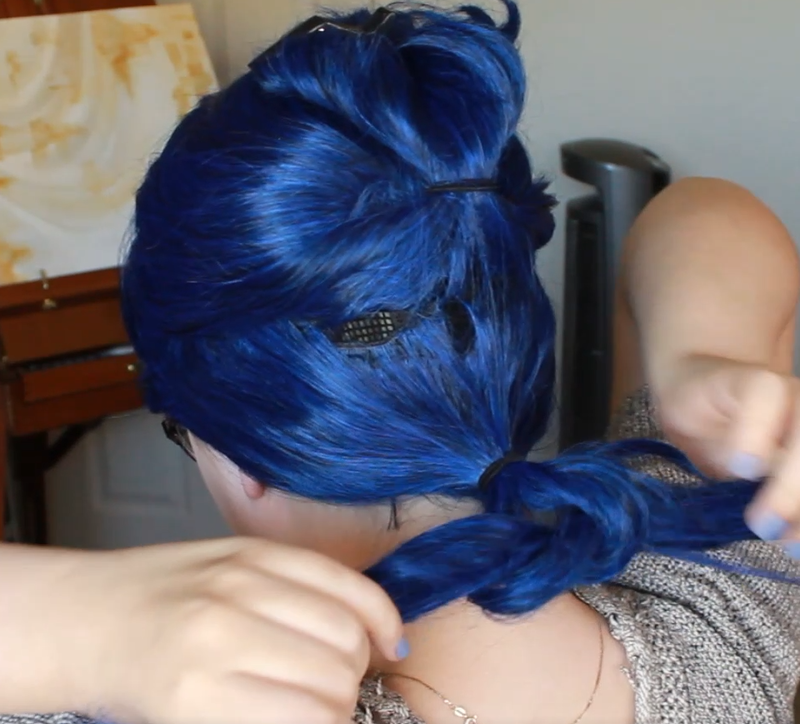
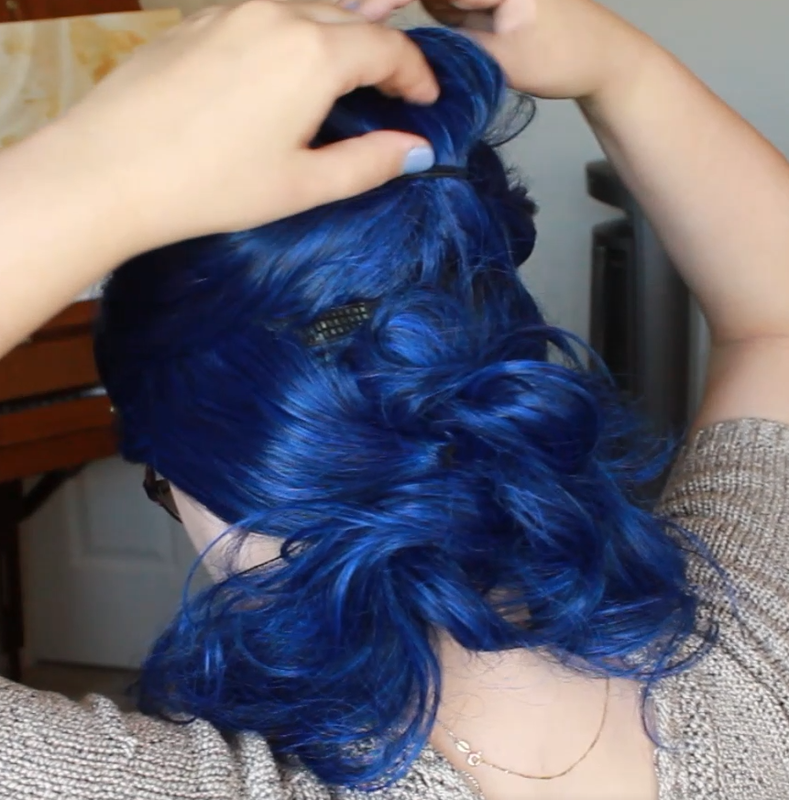
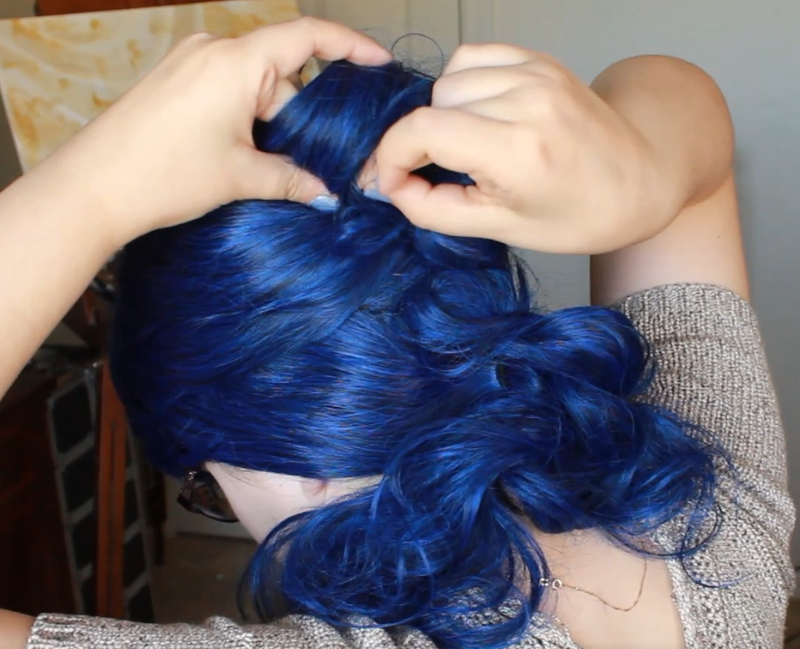
1. Gather hair as if to make a low ponytail & twist Make sure you keep the twist tight as this will help the pins grip in step 3. Keep note of the direction you twist in for the next step. For example, I twist over to the left which will be reversed when the twist is flipped up. 2. Place twist vertically along back of head & smooth hair over twist As mentioned previously, when I place the twist vertically, the direction of hair is reversed from the direction shown in the first step so now I am combing over to the right. 3. Pin twist into place keeping the ends out at the top Place the pin tip between the twist and head without prying the pin open. This will grab the perfect amount of hair to secure the twist to the head without having to use too many pins. 4. Comb out ends & roll into a horizontal barrel curl If you have the length for it, some light teasing on the underside of you hair before forming the barrel curl will help with the next step by reducing the gaps when spreading the hair and increasing pin grip. 5. Smooth barrel curl & pin down on the sides In addition to smoothing the curl, you also need to spread it out so it fans down at the sides. The teasing mentioned in the previous step will help so that no holes appear. Since the wig's ends were hard to detangle, I did not need to do any teasing for this look, so keep in mind that different textures will require different techniques. That's all there is to it! Click the button above to see the final product. Let me know if you have any questions or what other kinds of styles you might like to see.
I look forward to seeing the versions you create!
1 Comment
Overview For this style, I used a pre-curled wig just like in Episode 1, but this style does not require curling your hair first. I welcome trying this hairstyle on any and all hair textures and would love to see what you create! This might be a technique better suited to beginners since it can be as simple or as complex as the wearer likes. Here are the basic steps I will expand upon below covered in this episode:
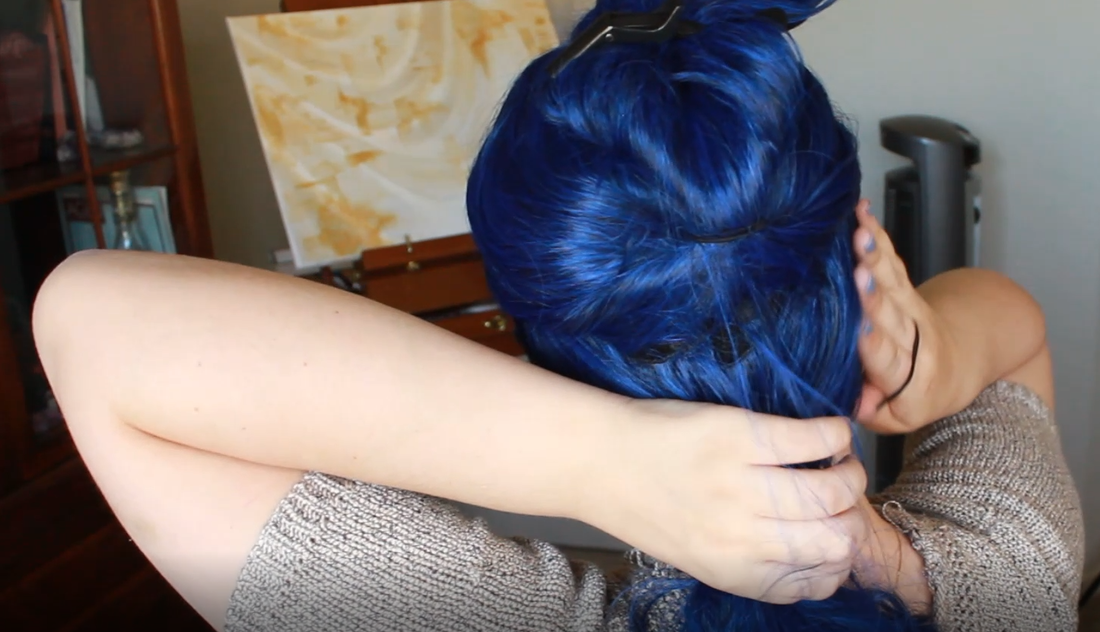
1. Section your hair into 2 parts & tie into ponytails I have said it before and I will say it again: every good hairstyle starts off with a plan, and sectioning is the best way to create a template for your plan. In this video, I decided to place one knot vertically above the other so that is where I tied my ponytails. Try experimenting with different knot placements! It's fun to come up with different designs just by placing your ponytail base in a different spot. 2. Separate a ponytail into 2 pieces and tie a "knot" This part is pretty self-explanatory. I tie my knots very simply whereas I have seen others tie their knots into square knots before pinning or using the ends of each knot to tie more knots. Tying more knots may be a good way to shore up longer hair or get more intricacy if you have more or thicker hair. 3. Pull the knot a bit loose and pin into place Do not tighten your knot! In fact, the whole point of this look is to have effortless volume, so a tight knot would only destroy the volume you are hoping to achieve. I am sure a series of tight knots would look really cool as a braid and probably has been done before, but that is a style for another video! For now, loose knots are the way to go. Place your pins on opposite sides of the knot for the greatest efficiency in holding it secure. 4. Repeat steps 2 & 3 for the other ponytail Now, it's just a matter of doing it all again for your other ponytail(s) - maybe you want to make more than two?! Who knows what you're capable of! 5. Pin the ends of each knot into place Again, I am going to encourage you to try new things for how you pin in the ends of your knots. Sometimes for looks like this, I make cleaner barrel curls, but for this one, I started making barrel curls and then just pinned them where I thought it felt right. Maybe you like some ends to show in order to create a more piece-y look or maybe you prefer a really clean look with everything tucked in - there are all kinds of combinations to try! That's all there is to it! Let me know if you have any questions or what other kinds of styles you might like to see.
I look forward to seeing the versions you create! |
AuthorArda Wigs' Iron Wig 2020 3rd Place Winner with wiggy ideas to share. Want to know more? Check out the About Emily page or get in touch! Categories
All
Archives
May 2021
|
Proudly powered by Weebly
 RSS Feed