 Overview For this style, I used a pre-curled wig just like in Episode 1, but this style does not require curling your hair first. As always, I welcome trying this hairstyle on any and all hair textures and would love to see what you create! This style looks simple, but as with most simple hairstyles, any and all imperfections tend to stick out like a sore thumb. While I do not wish to scare away beginners from trying this style, I want to warn intermediate & beginner levels alike not to underestimate its difficulty. Even I struggled to get this look in under 5 minutes and I have done it many times. Here are the basic steps I will expand upon below covered in this episode:
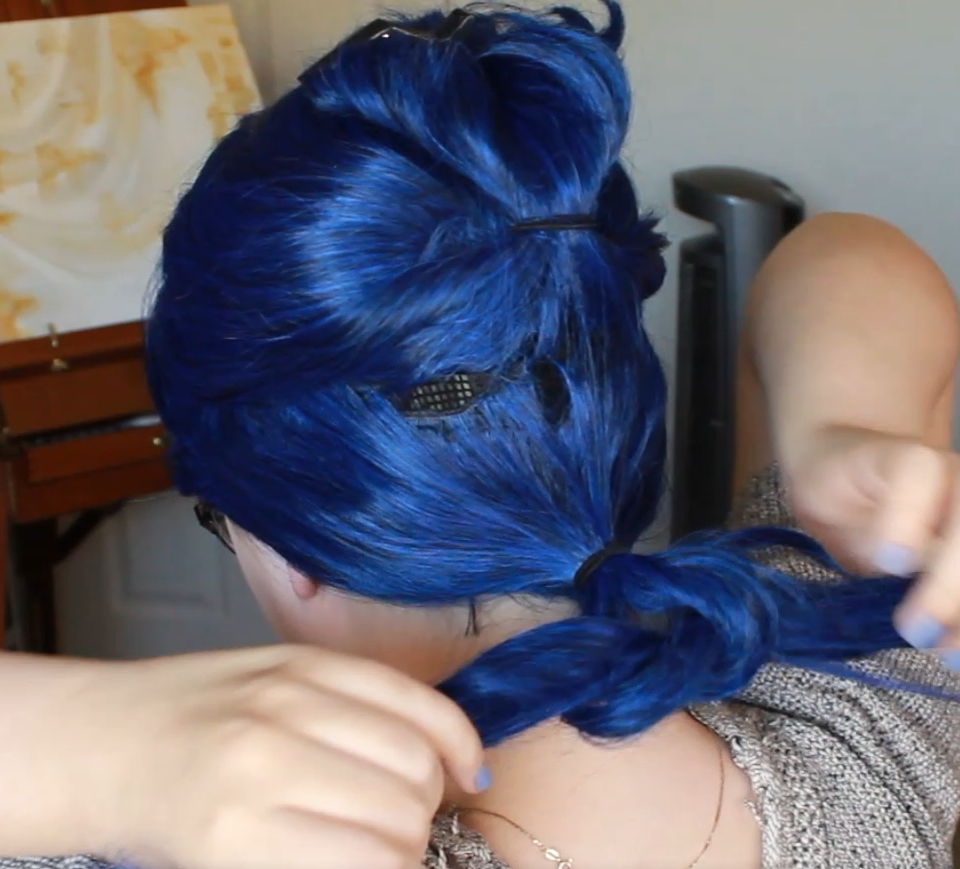
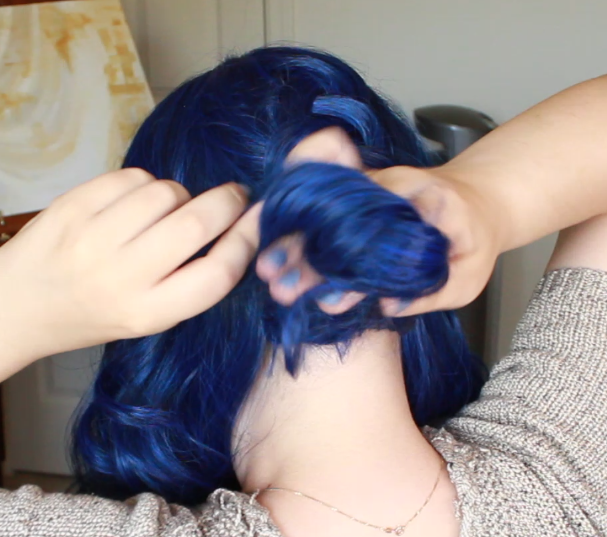
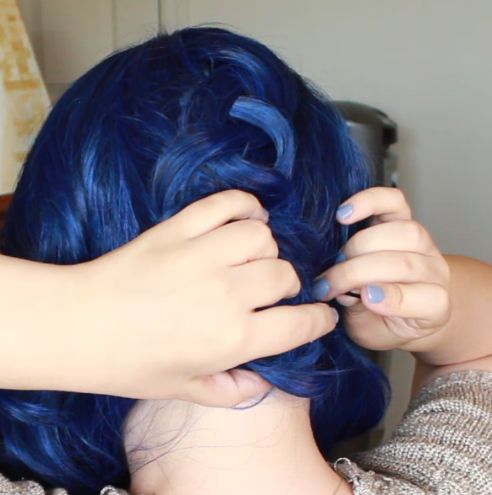
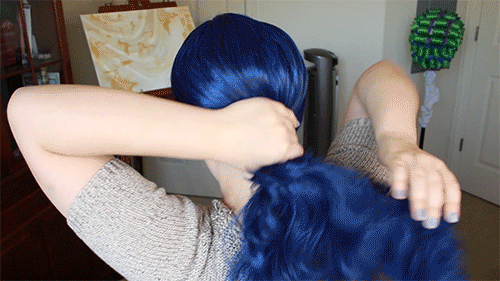 1. Gather hair as if to make a low ponytail & twist Make sure you keep the twist tight as this will help the pins grip in step 3. Keep note of the direction you twist in for the next step. For example, I twist over to the left which will be reversed when the twist is flipped up.  2. Place twist vertically along back of head & smooth hair over twist As mentioned previously, when I place the twist vertically, the direction of hair is reversed from the direction shown in the first step so now I am combing over to the right. 3. Pin twist into place keeping the ends out at the top Place the pin tip between the twist and head without prying the pin open. This will grab the perfect amount of hair to secure the twist to the head without having to use too many pins. 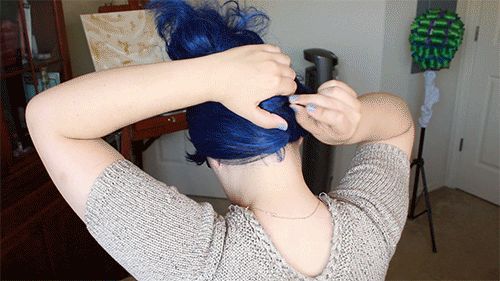 4. Comb out ends & roll into a horizontal barrel curl If you have the length for it, some light teasing on the underside of you hair before forming the barrel curl will help with the next step by reducing the gaps when spreading the hair and increasing pin grip. 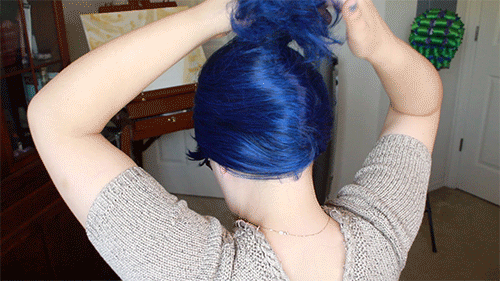 5. Smooth barrel curl & pin down on the sides In addition to smoothing the curl, you also need to spread it out so it fans down at the sides. The teasing mentioned in the previous step will help so that no holes appear. Since the wig's ends were hard to detangle, I did not need to do any teasing for this look, so keep in mind that different textures will require different techniques. 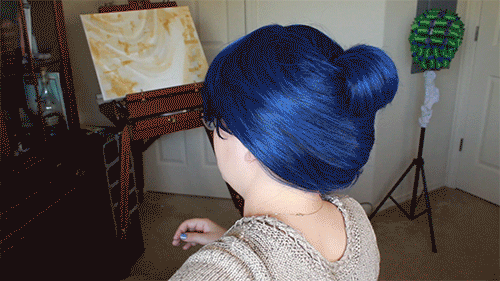 That's all there is to it! Click the button above to see the final product. Let me know if you have any questions or what other kinds of styles you might like to see.
I look forward to seeing the versions you create!
1 Comment
 Overview For this style, I used a pre-curled wig just like in Episode 1, but this style does not require curling your hair first. I welcome trying this hairstyle on any and all hair textures and would love to see what you create! This might be a technique better suited to beginners since it can be as simple or as complex as the wearer likes. Here are the basic steps I will expand upon below covered in this episode:
 1. Section your hair into 2 parts & tie into ponytails I have said it before and I will say it again: every good hairstyle starts off with a plan, and sectioning is the best way to create a template for your plan. In this video, I decided to place one knot vertically above the other so that is where I tied my ponytails. Try experimenting with different knot placements! It's fun to come up with different designs just by placing your ponytail base in a different spot. 2. Separate a ponytail into 2 pieces and tie a "knot" This part is pretty self-explanatory. I tie my knots very simply whereas I have seen others tie their knots into square knots before pinning or using the ends of each knot to tie more knots. Tying more knots may be a good way to shore up longer hair or get more intricacy if you have more or thicker hair. 3. Pull the knot a bit loose and pin into place Do not tighten your knot! In fact, the whole point of this look is to have effortless volume, so a tight knot would only destroy the volume you are hoping to achieve. I am sure a series of tight knots would look really cool as a braid and probably has been done before, but that is a style for another video! For now, loose knots are the way to go. Place your pins on opposite sides of the knot for the greatest efficiency in holding it secure. 4. Repeat steps 2 & 3 for the other ponytail Now, it's just a matter of doing it all again for your other ponytail(s) - maybe you want to make more than two?! Who knows what you're capable of! 5. Pin the ends of each knot into place Again, I am going to encourage you to try new things for how you pin in the ends of your knots. Sometimes for looks like this, I make cleaner barrel curls, but for this one, I started making barrel curls and then just pinned them where I thought it felt right. Maybe you like some ends to show in order to create a more piece-y look or maybe you prefer a really clean look with everything tucked in - there are all kinds of combinations to try! That's all there is to it! Let me know if you have any questions or what other kinds of styles you might like to see.
I look forward to seeing the versions you create! My idea came from hearing so many women say they are not sure what to do with their hair whether it be for work every day or to go to some kind of event like a wedding. I immediately thought about my mornings getting ready to go into the office (good times, right?) and how I would challenge myself to finish styling my hair in as little time as possible. I like to think I got pretty good at it. So fast forward to starting the YouTube channel, needing more content, and the continued refrain of so many women who might not be aware that good style does not need to take an eternity; this video series now seems like a no brainer.
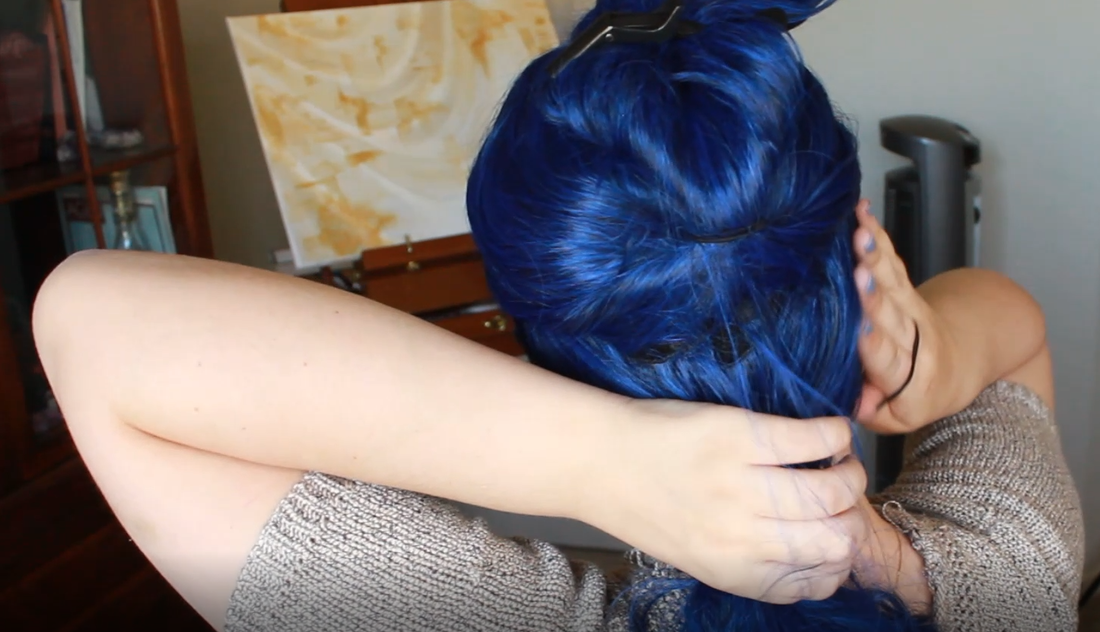
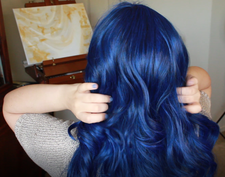
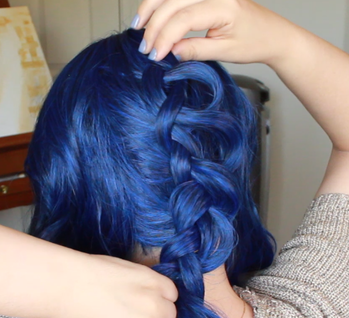
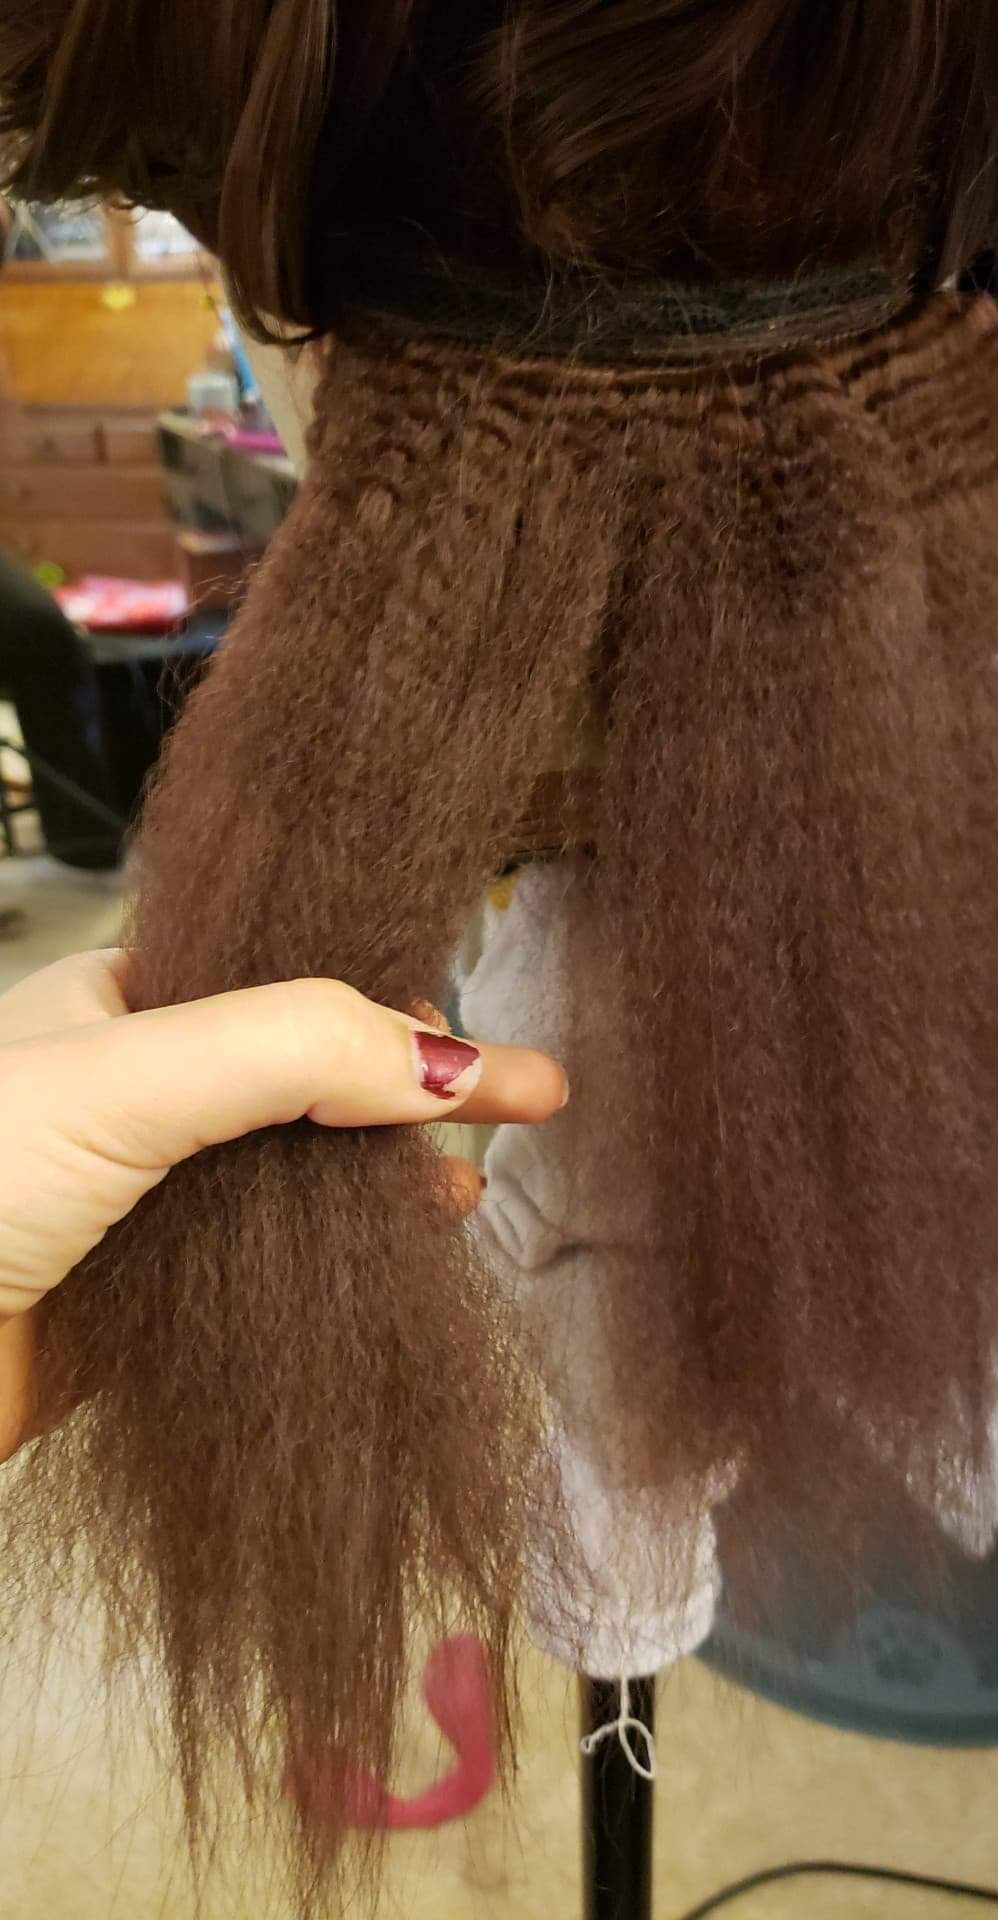
I hope you enjoy the series and the breakdowns that I plan on accompanying each new episode. In all likelihood, these videos will not be enough to teach complete beginners how to make elegant styles in as little time as I do. My main purpose for this series is to show that with enough practice and patience, it's possible to do quite a bit in not much time at all. I hope to inspire others to challenge themselves, have fun, and create new hairstyles they can be proud of and show off in any setting or venue. Over the course of the series, I will aim to provide something for everyone. If you have any questions, I would love to know how I can be more informative on this topic! I also want to see your creations and inspirations that might be a result from watching this series.  Overview For this style, I used a pre-curled wig, but this style does not require curling your hair first. It might make it easier to make the rolls at the end, but I will demonstrate straight hair styles in other videos. I welcome trying this hairstyle on any and all hair textures and would love to see what you create! Not shown in the video is the time I spent detangling the hair. This wig tended to re-tangle no matter how much I brushed it out ahead of time, but some detangler or light use of hair oil should help prevent this for real hair. I did not really use a mirror for the majority of this style, but feel free to when trying this out for the first time and checking your work to make sure no ends or weird bits stick out. If you are totally new to braiding, you may want to start off with more simple versions of this hairstyle or simply practice braiding for awhile before attempting this style. Keep an eye out for future videos to see a range of styles for more experience levels. Here are the basic steps I will expand upon below covered in this episode:
 Step 1: Section your hair into 3 parts Every good hairstyle starts off with a plan, and sectioning is the best way to create a template for your plan. It helps you to stay organized and gives you a better idea for how much more you have left to do. It also helps prevent you from putting too much hair into your braid and not having enough to add more twists and rolls. Step 2: Dutch braid down the center of the middle section until the nape of your neck I never braid until the end of my hair if I do not have to since it uses time for something that might not even show. If you have never done a Dutch braid before, it is like a French braid but instead of bringing the outside sections in over the braid, you bring them in under the braid. The result is a braid that sits on top of the hair instead of being folded inside of it. 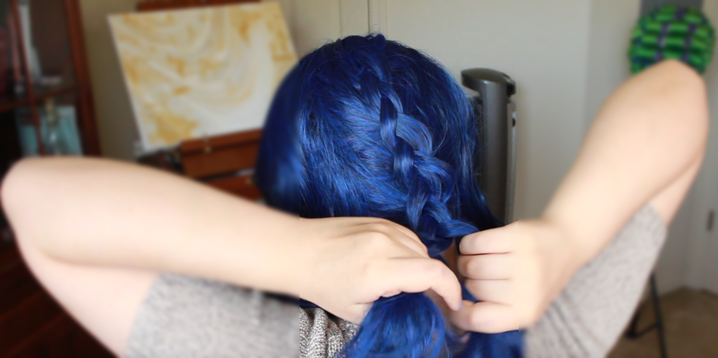 If you have never done either a Dutch or French braid before, the principle is the same, after the first 3 sections are braided, add in additional hair before braiding each new section. Ideally, each added section should be about the same size. It takes some practice to get used to this style of braiding, especially on yourself. If you are totally new to braiding, starting off with a simpler style to practice may be your best option before moving on to something like this.
Step 4: Wrap the end of the braid around your fingers and pin just off center at the nape of your neck This part will look cleaner if your hair is completely detangled beforehand and will be easier to do with curled hair. If you do not have time to curl your whole head, consider just curling the ends. Again, it's not necessary, but might give a better look at the end. I choose to do off center looks for these kinds of quick styles since I feel like it's easier than trying to find and style to the exact center of my head. Asymmetry is in fashion anyway, so you may as well go for it and do it on purpose. Step 5: Individually, twist the left & right sections toward the center, wrap the ends around your fingers, and pin to either side of the braided section Each side is done on their own and again, we are not trying to achieve perfect symmetry, but it is important to twist toward the center of your head, away from your face. This will provide the best silhouette from the front. As with the middle section, wrapping the hair and pinning the roll to your head, would be easiest with curled and detangled hair but only the latter of this is totally necessary for a sleek look. 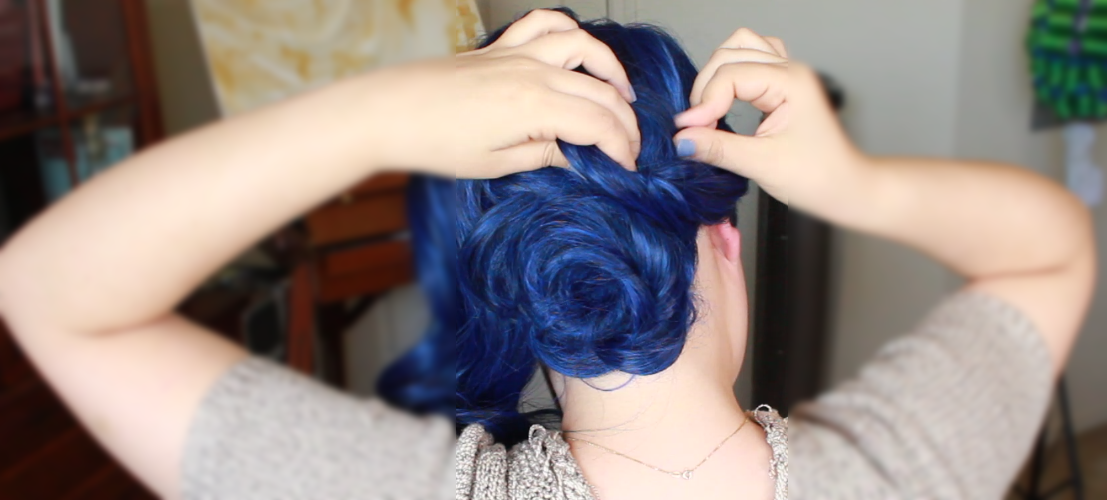 That's all there is to it! Let me know if you have any questions or what other kinds of styles you might like to see.
I look forward to seeing the versions you create! Challenge: I will link rules and results at the bottom of this post. TL;DR: In this challenge, contestants were asked to create a tutorial, either written or in a video, that shows a styling technique as part of an overall style. I chose to showcase styling pinup rolls and created a classic pinup hair ‘do to show off the technique. This was one part of the overall Final Round, which had 3 parts total. The Materials: Links to products used will also be provided at the bottom of this post. Arda gave us a bunch of stuff for the final round and of that haul I chose to use the following for this tutorial:
Results:
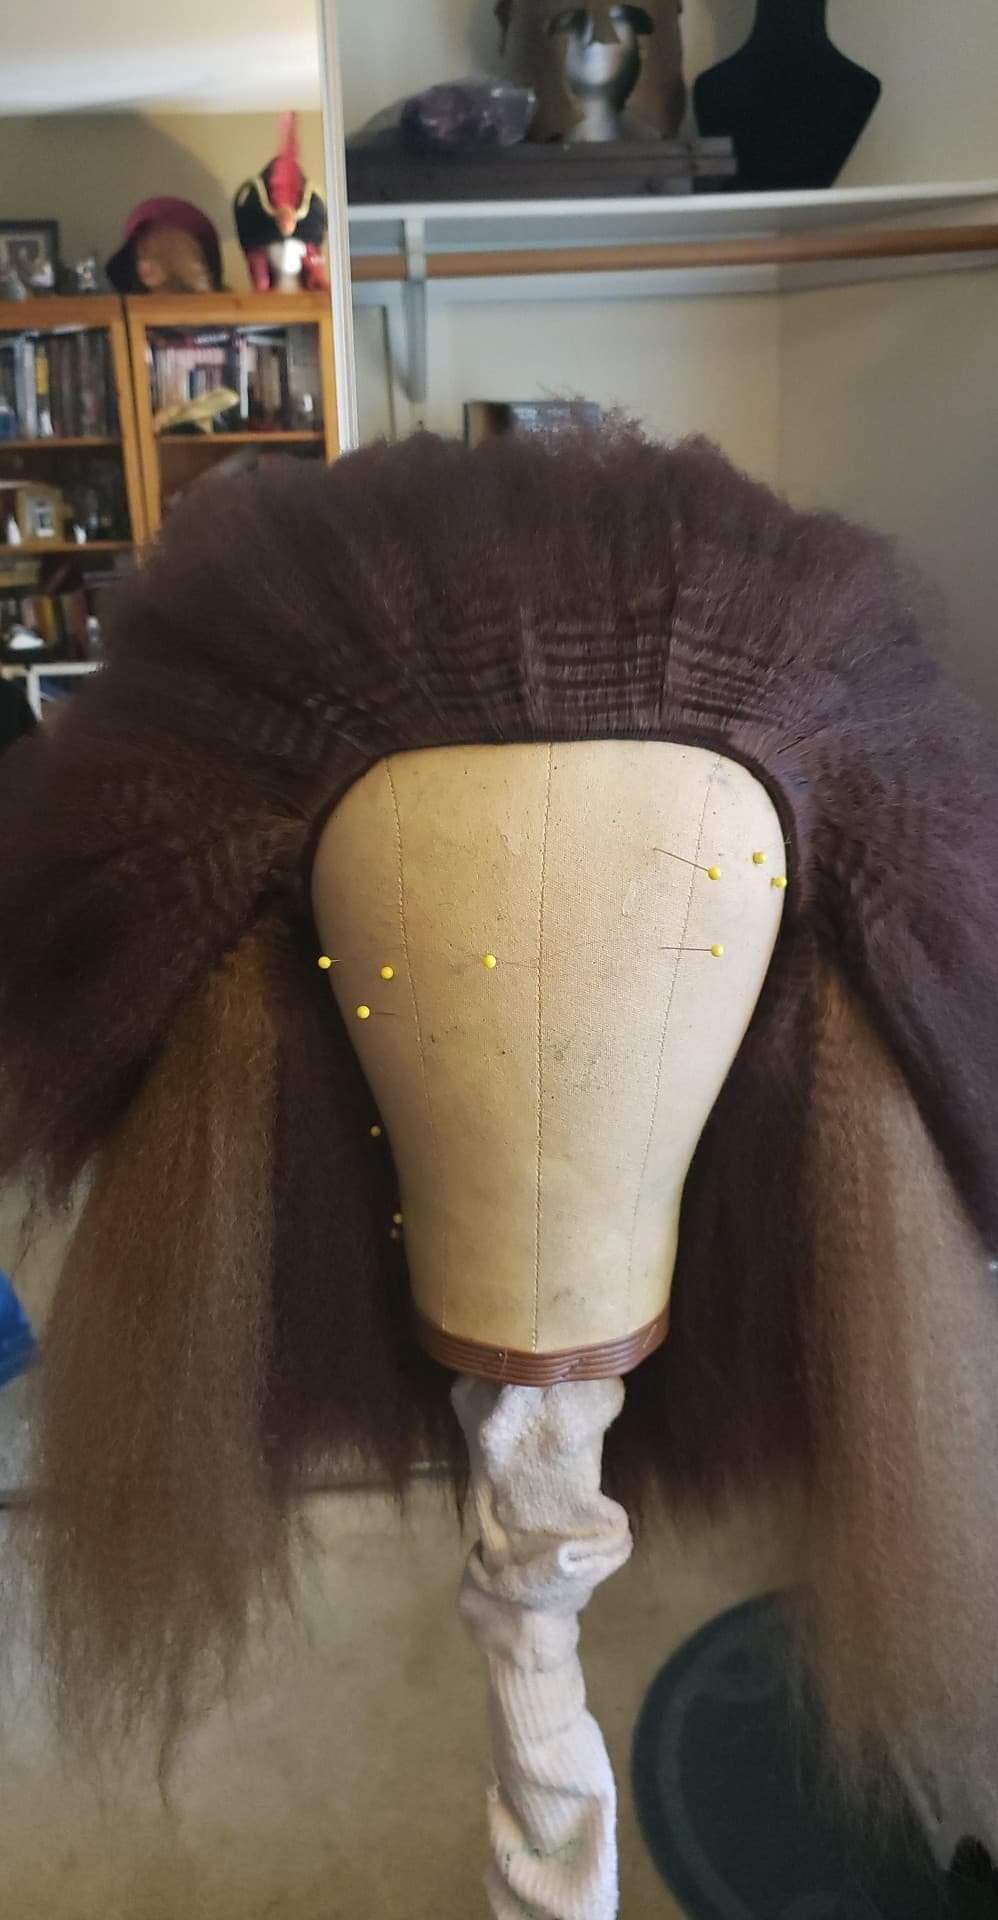
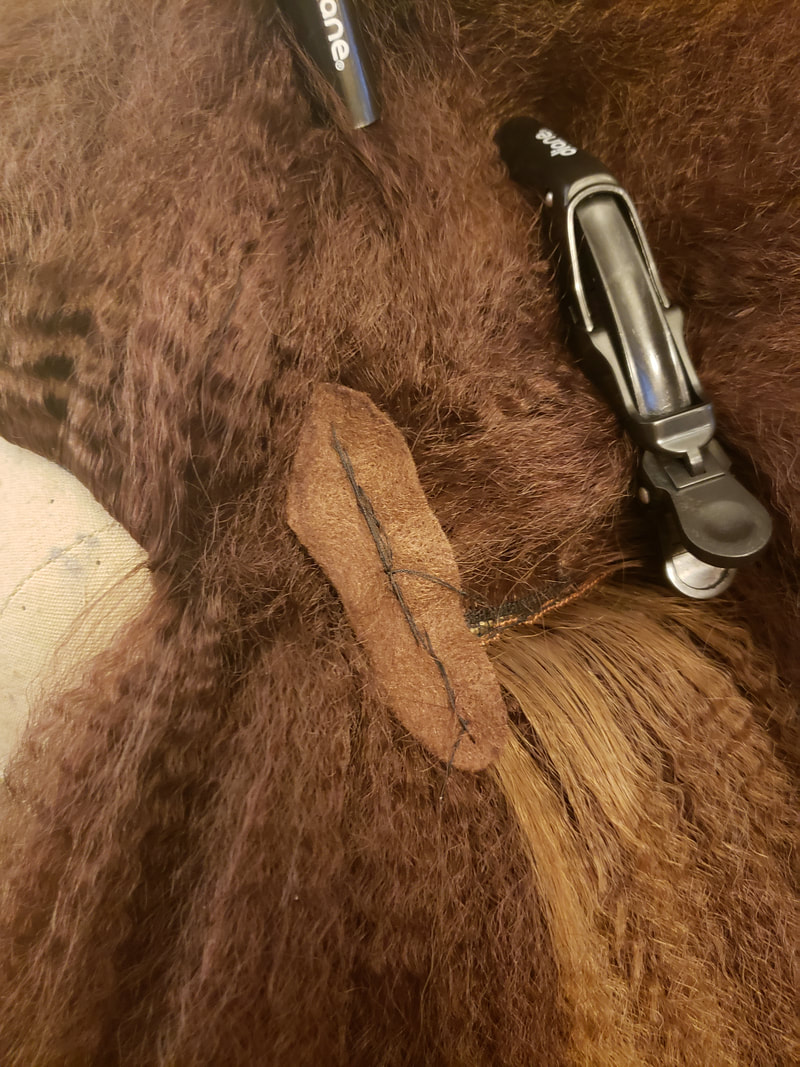
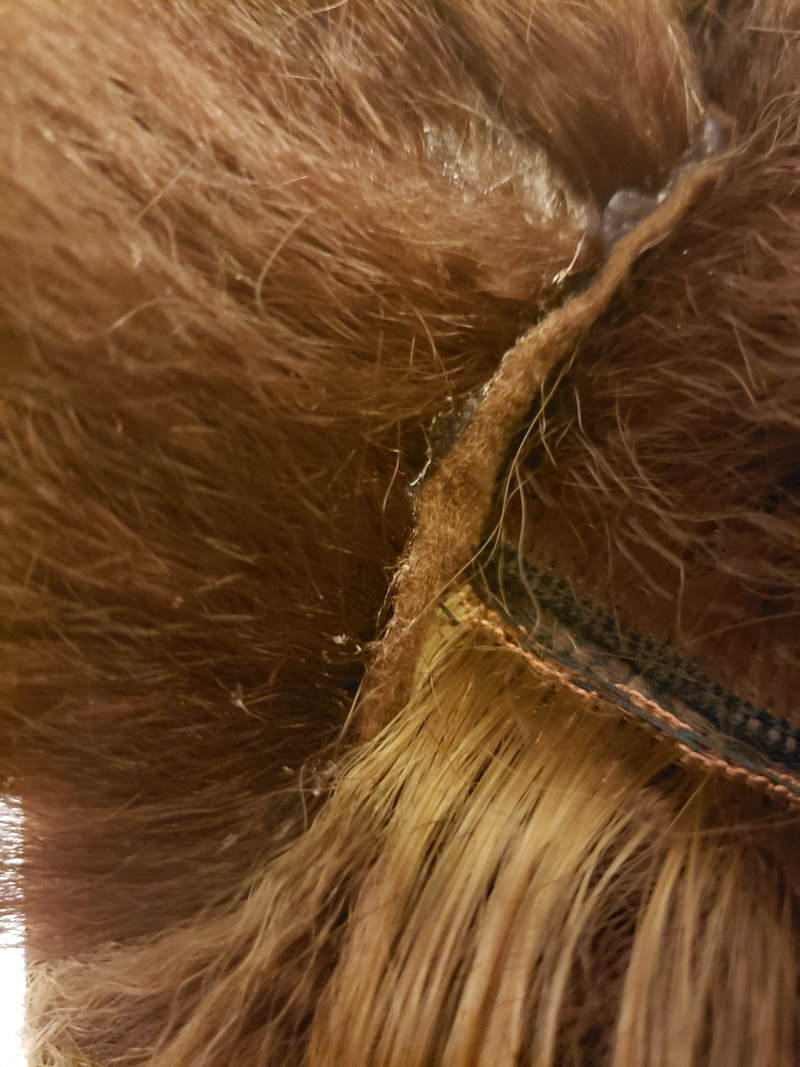
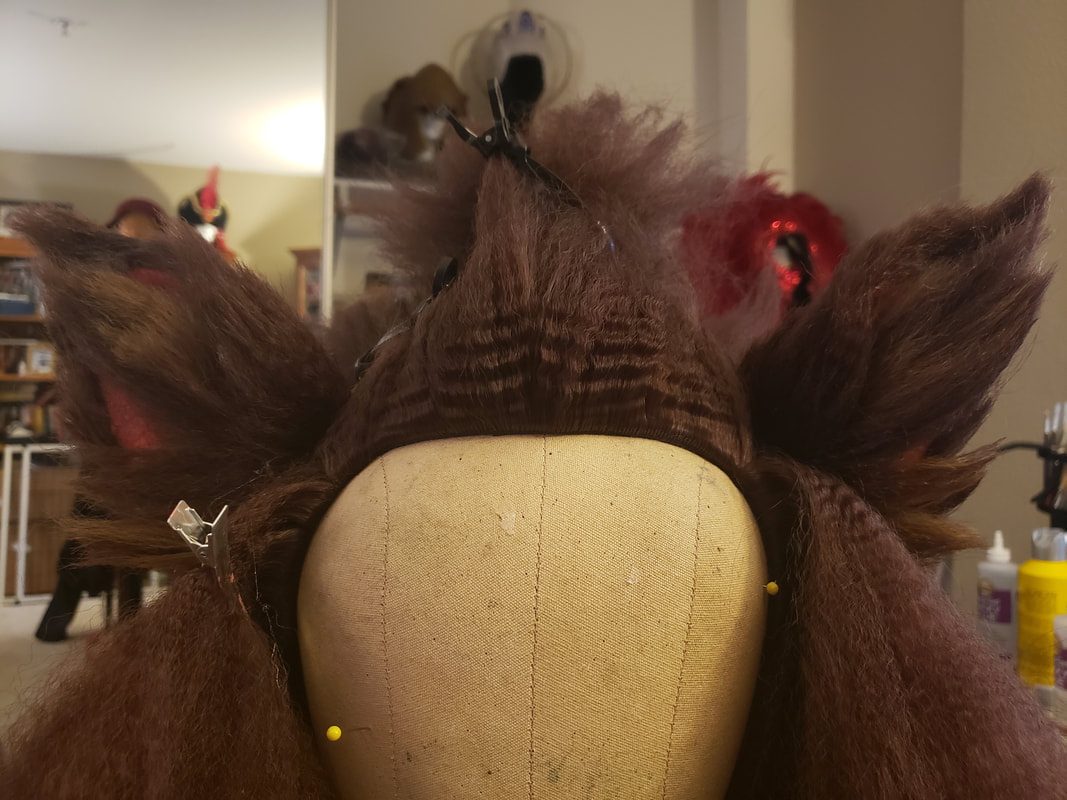
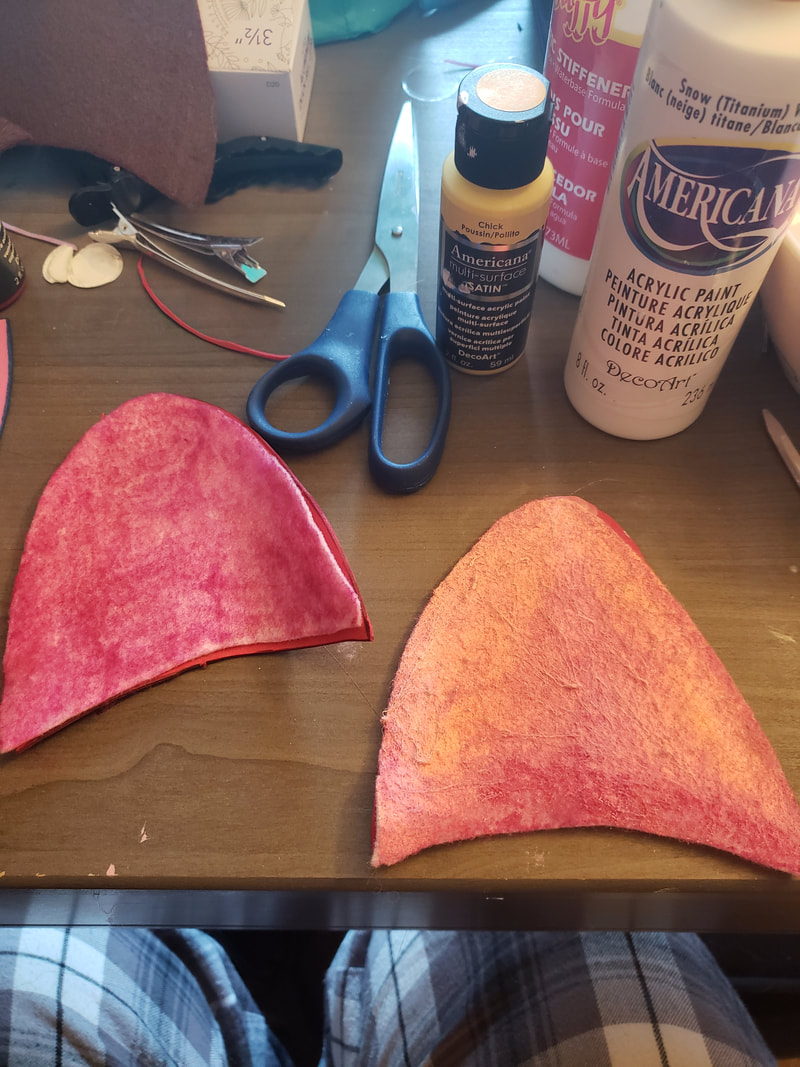
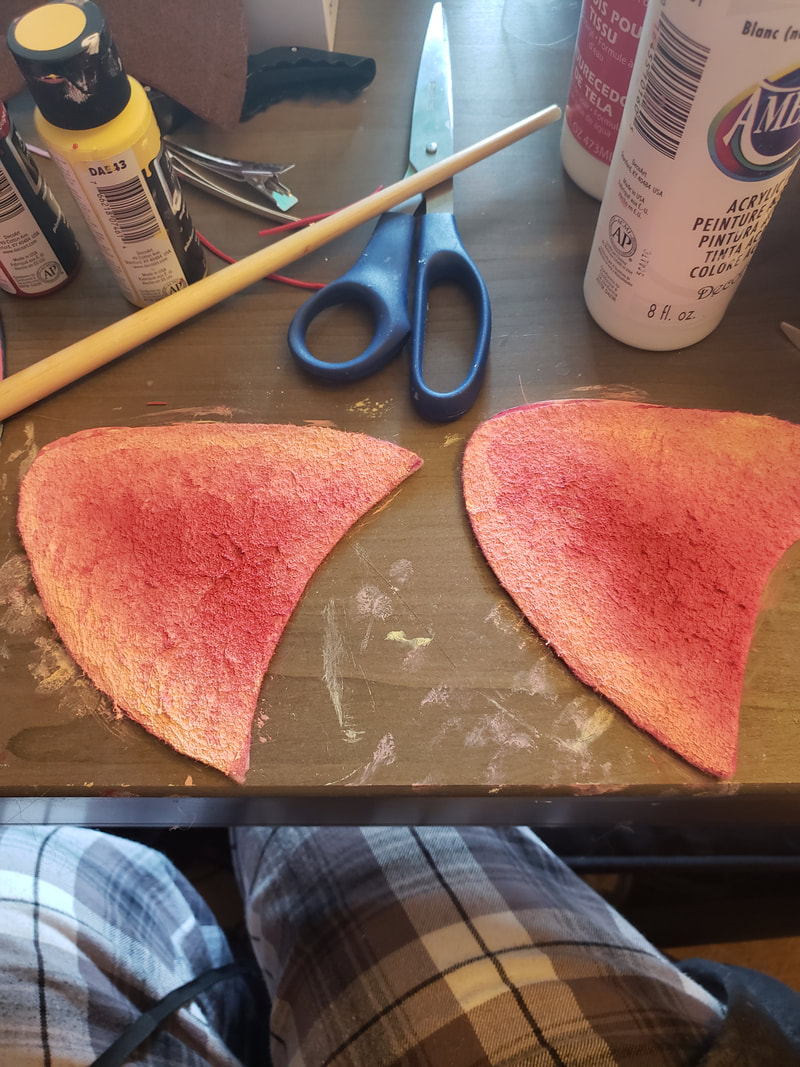
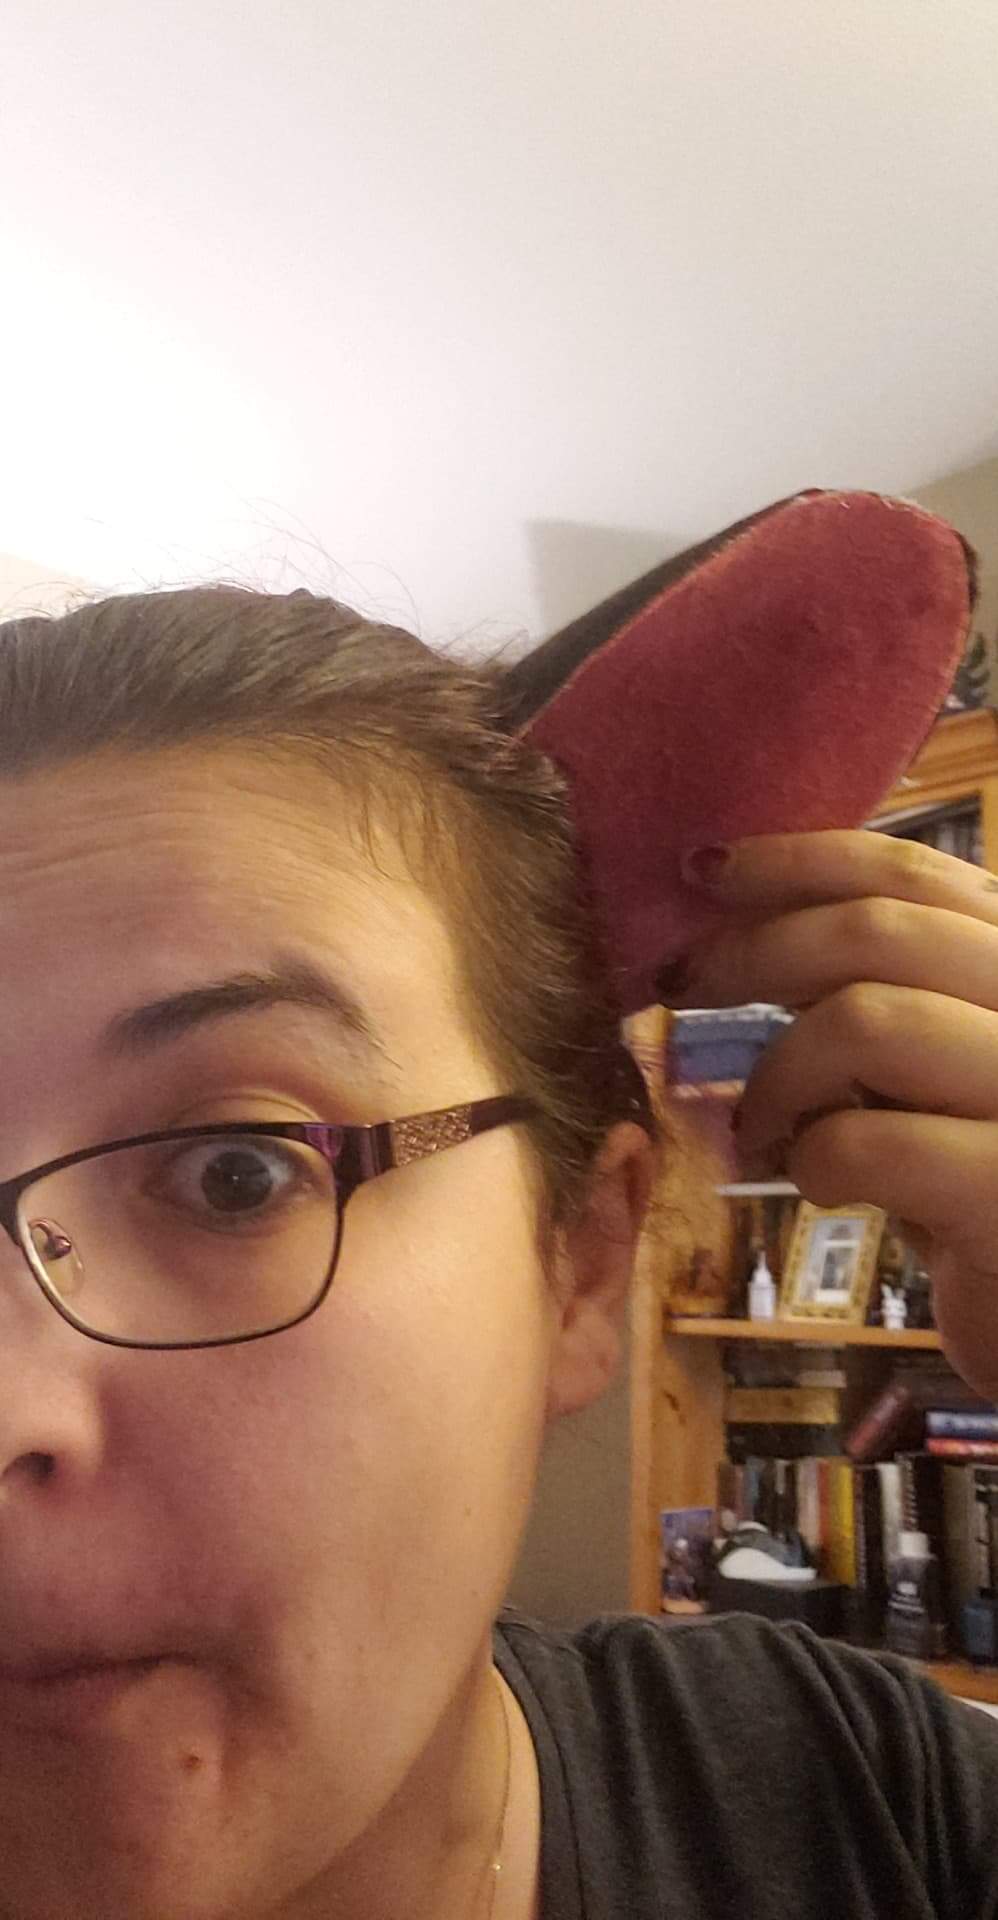
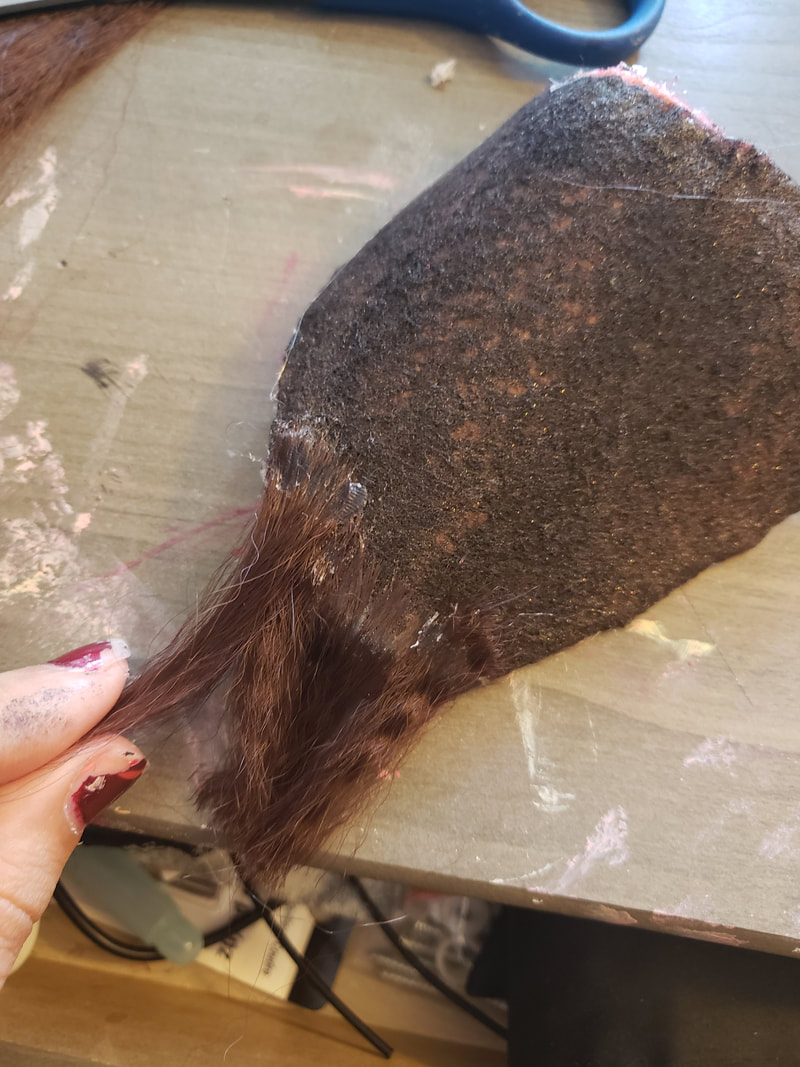
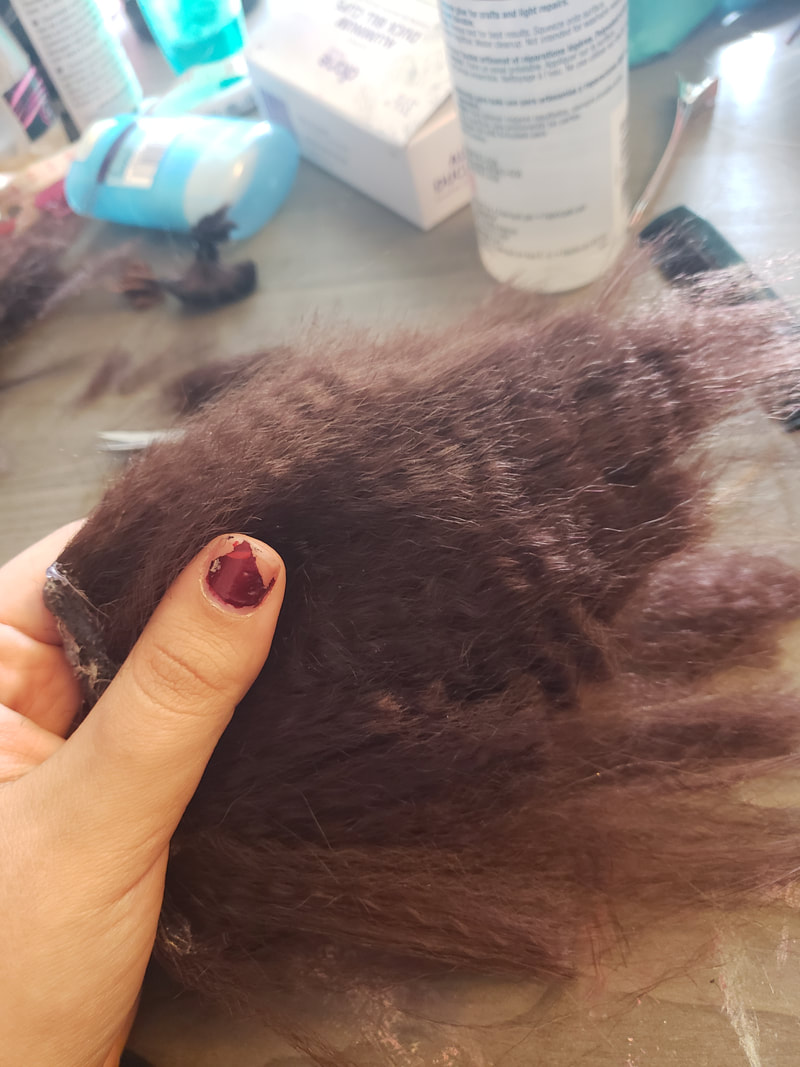
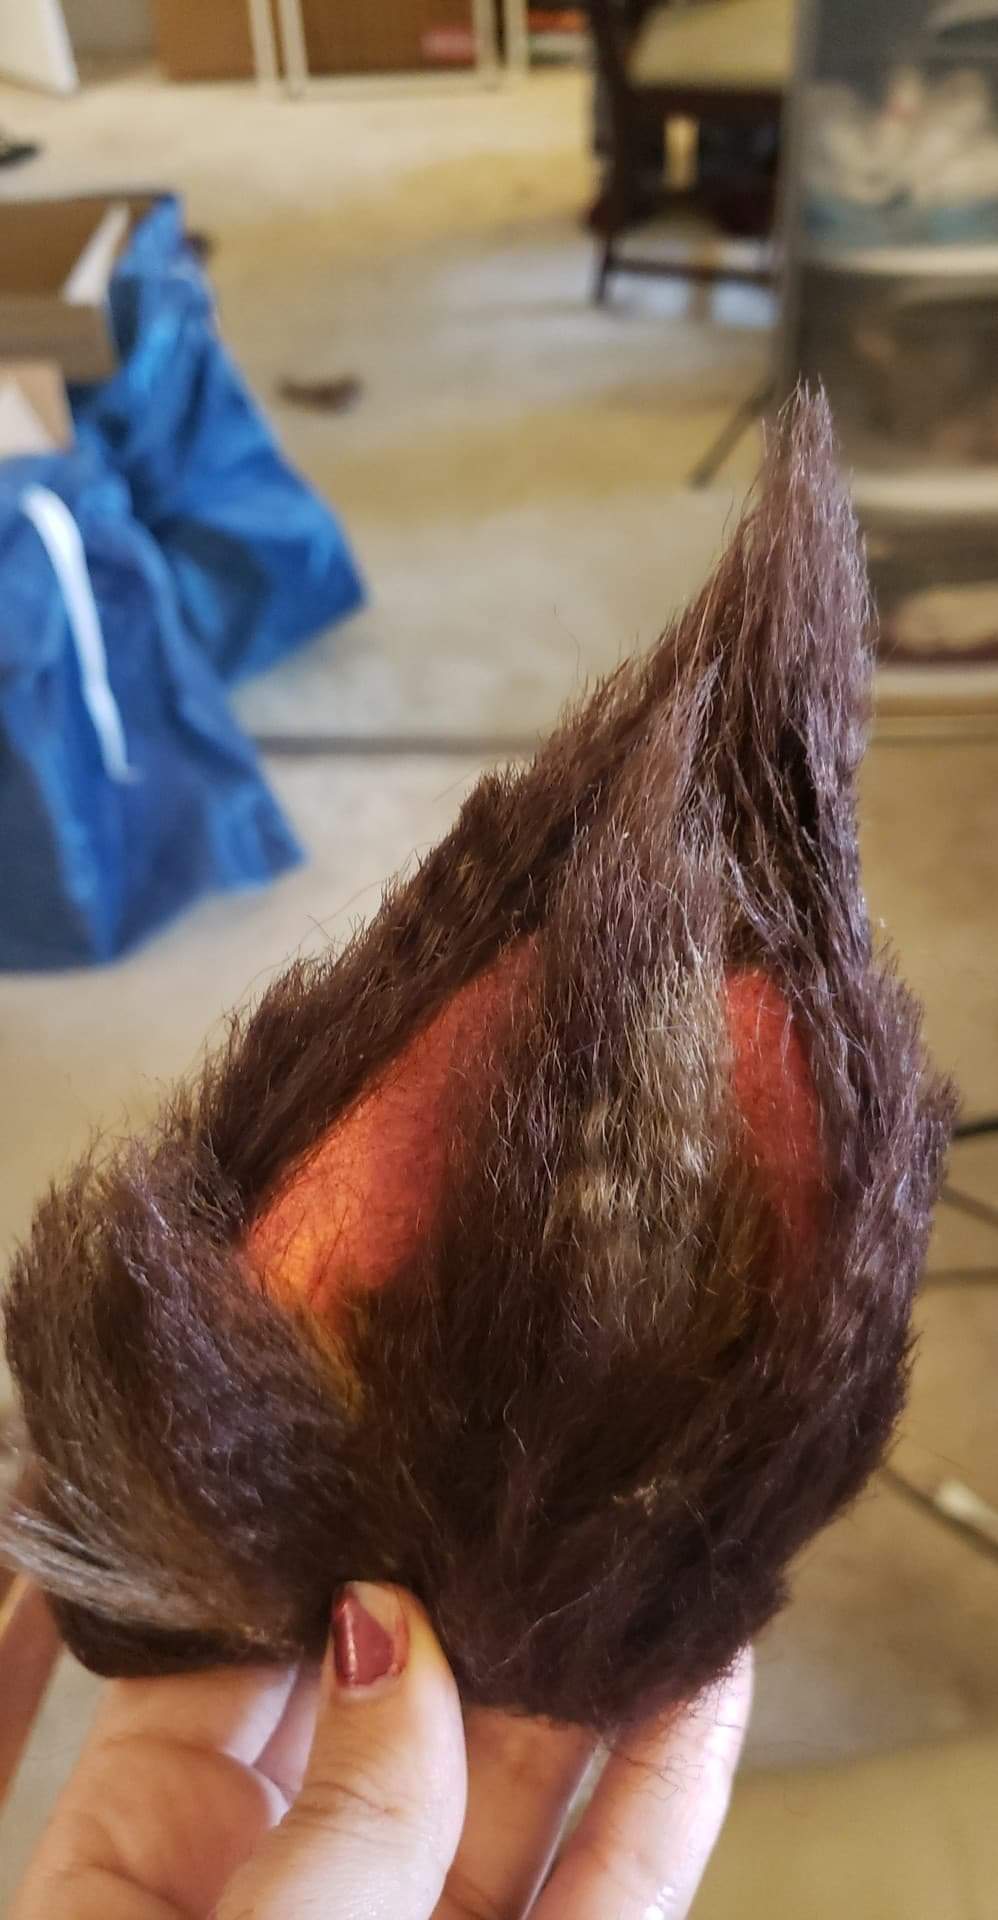
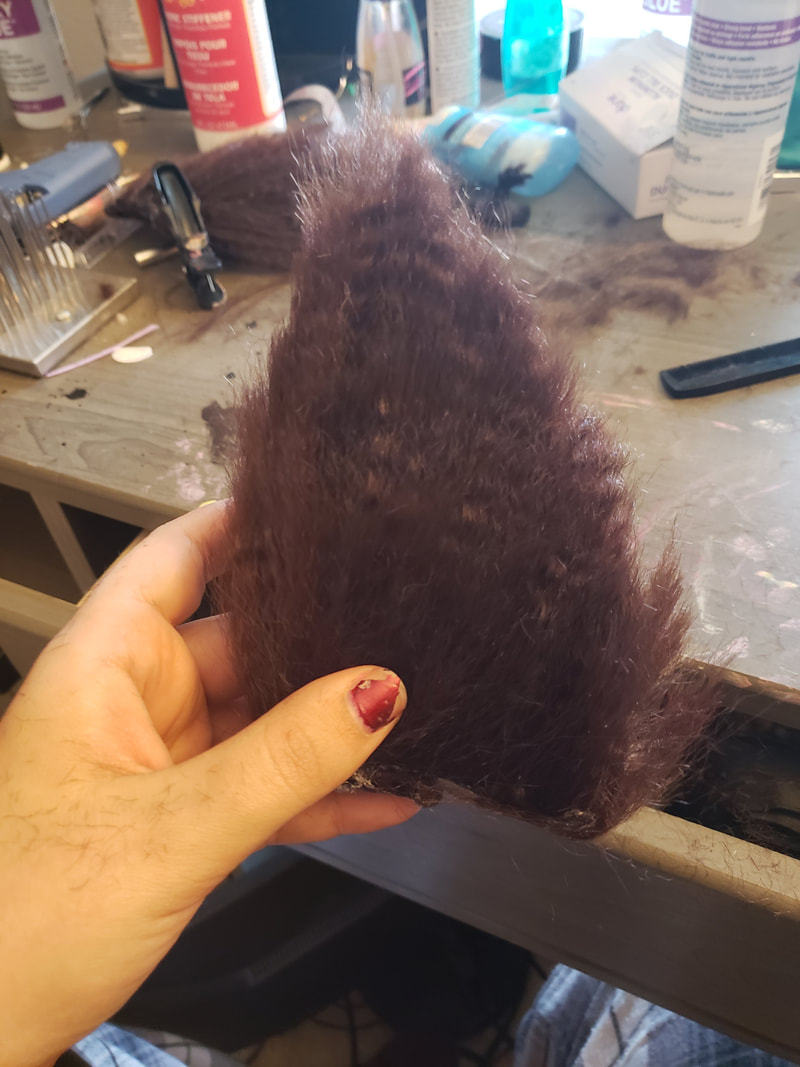
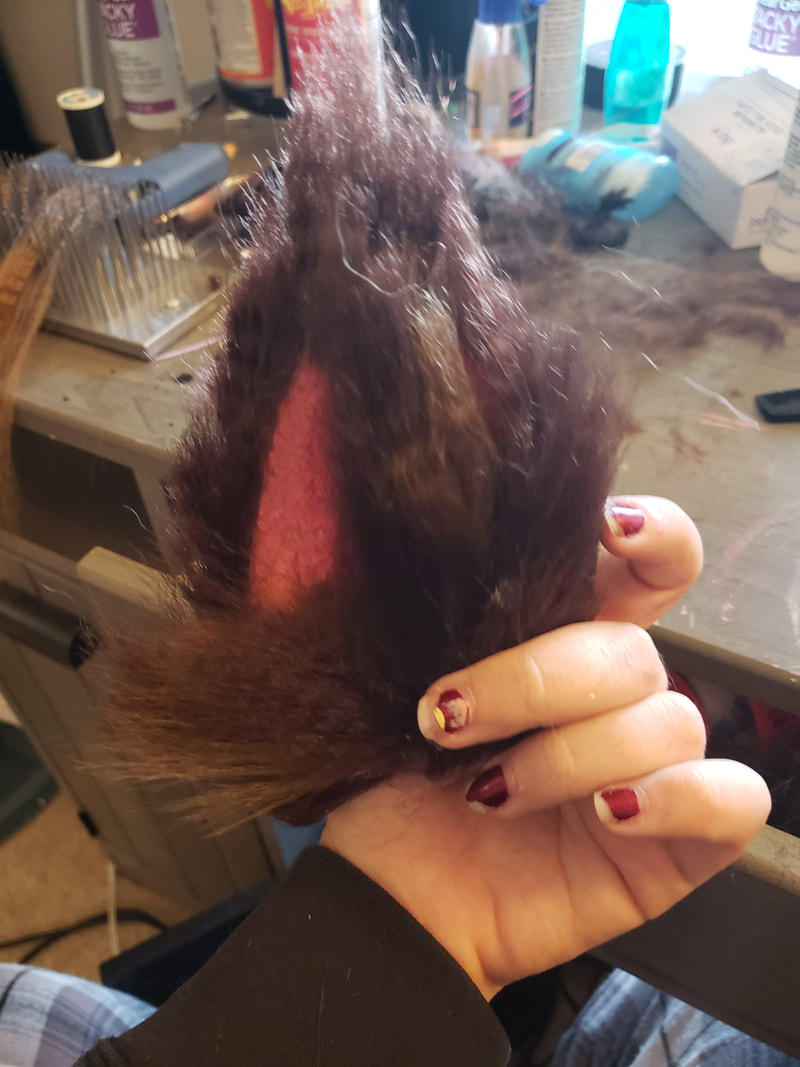
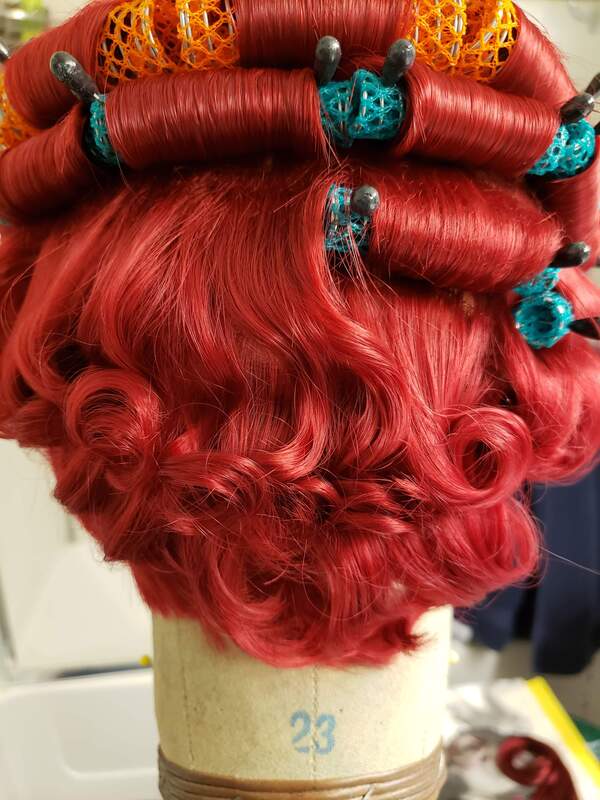
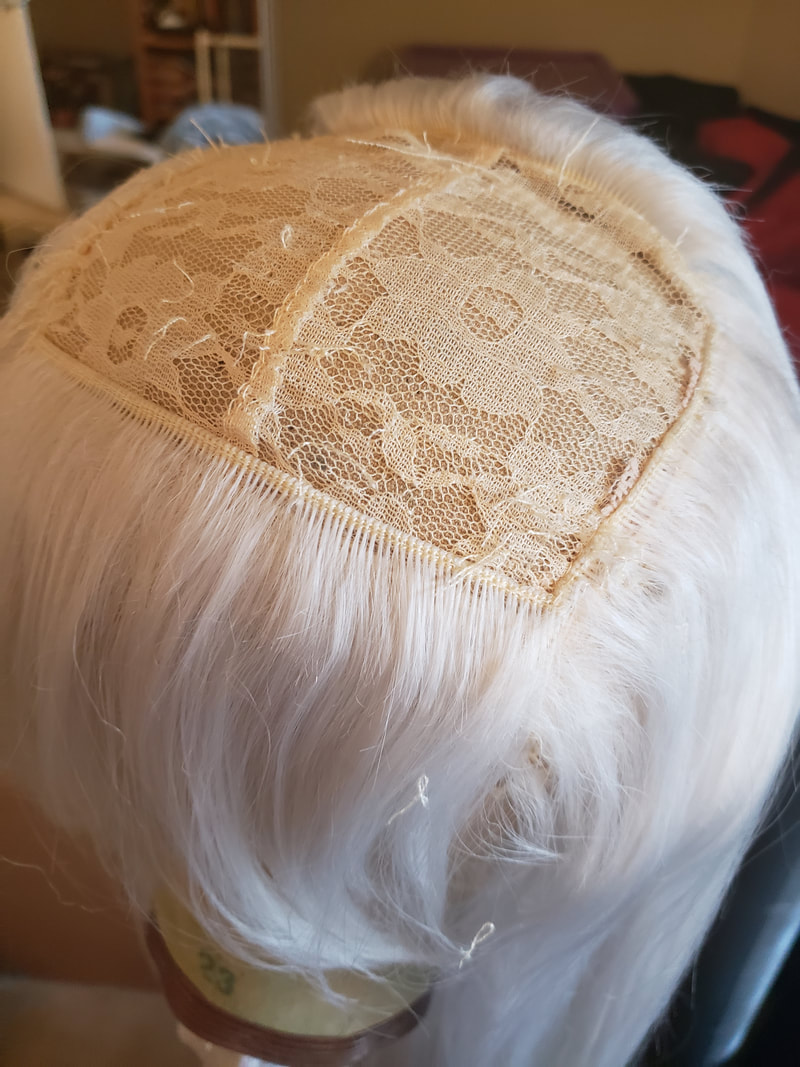
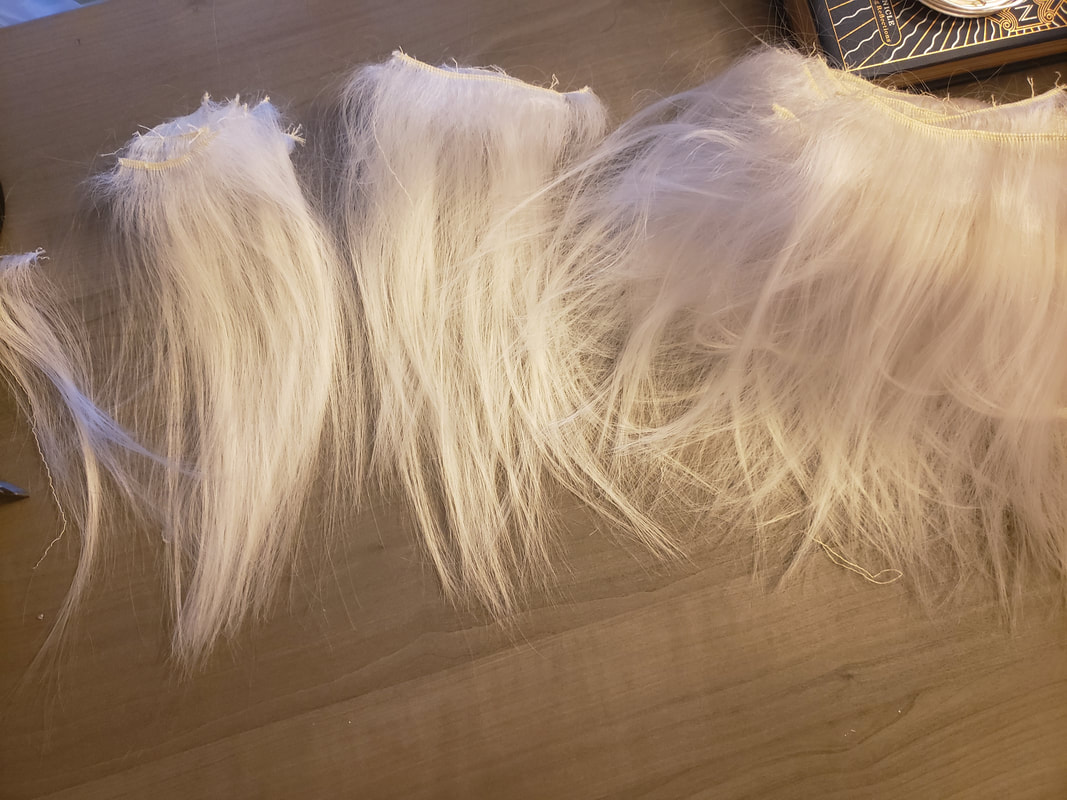
In terms of score, I did okay. I was rather proud of myself though for making my first tutorial video and learning a lot for my future tutorials. I was also happy that I managed to keep the overall video less than 20 minutes as well as just focus in on the core of what I wanted to teach. Challenge: I will link rules and results at the bottom of this post. TL;DR: In this challenge, contestants were asked to create a wig for the animated character Catra from She-Ra and the Princesses of Power. The Materials: Links to products used will also be provided at the bottom of this post. Arda gave us the following to use for this challenge
Results:
I'm not sure I scored better this round than previous rounds. The judges did not seem to respond well to the textured hair, but I also know the hairline could use some work. I plan on redoing the hairline with lace, and keeping the textured hair while making it more uniform throughout. This wig will be available for purchase at a later date. You read that right! We're officially open for business. Read below for information on How to Begin the Commission Process, or head on over to the Consultation Page to sign up for your consultation now! The first 10 people to sign up with have their consultation fee waived if they use the code FIRST10. This offer valid through the end of March. You'll want to hurry though since there are only 10 spots to fill!
We also have an FAQ & Terms of Service. Any information we don't already cover in our documentation can be cleared up by simply emailing us at [email protected]! We look forward to working with you :) Step 0: If you're unsure whether Commissions are open, check on the Commissions Page.
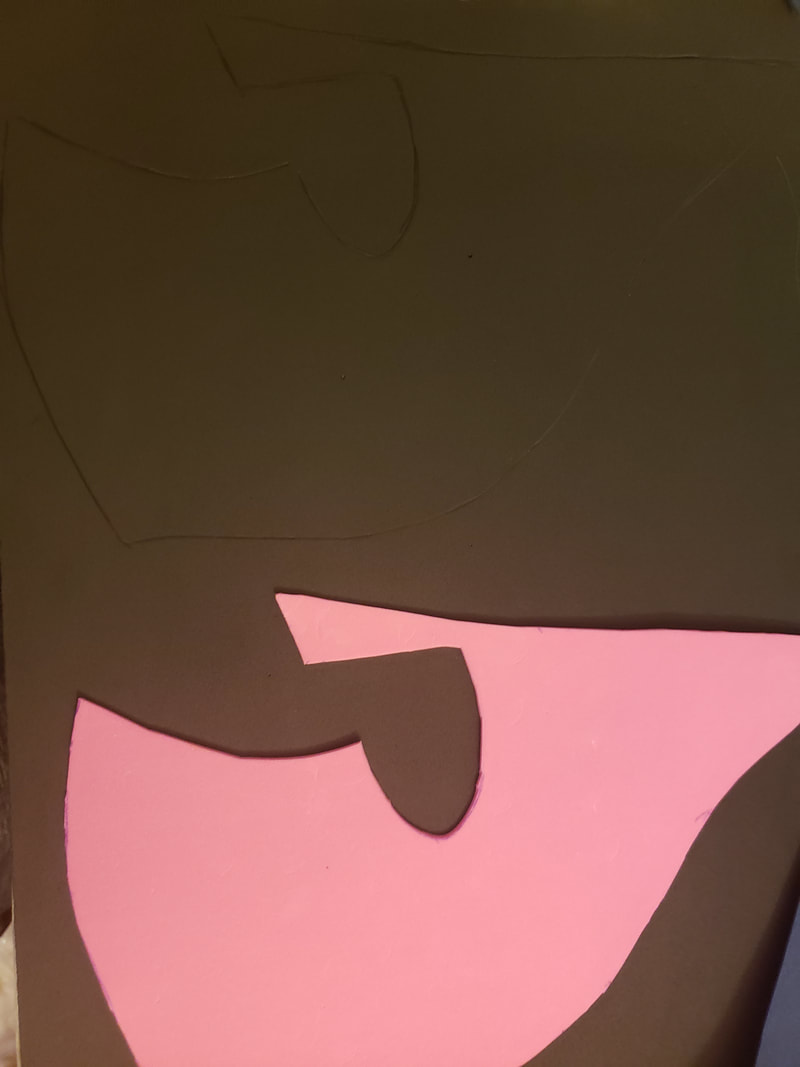
Step 1: If they're open, proceed to the Consultation Page to secure a commissions slot & pay the consultation fee. This fee acts as a sort of down payment on your commission if you choose to proceed with one at the end of the consultation. Fees will be reimbursed in the final invoice. Step 2: Within 1-2 business days of securing your spot, you will receive an email to schedule your session for 1 hour with one of our artists. Step 3: Prepare for your consultation by reviewing our FAQ & Terms of Service Pages! Step 4: Review the specifications for your custom order during the consultation and decide if we're the right fit for you. Step 5: The consultation will lay out anything you need to know regarding your project and when to expect to hear from us regarding the progress. We expect this will differ based on the project, so it's important to us you leave the consultation phase feeling good about your order. You will receive an invoice for materials after the consultation & before the supplies are ordered. Any minor changes can be requested without additional cost until your artist communicates they are past the "point of no return" for your piece. Step 6: Stay up to date with the progress of your project with your artist & get hyped for its arrival. You will receive a second and possibly final invoice for the time spent on the project as well as the shipping after the final photos of your wig are sent to you for final approval and before we ship the wig to you. Additional invoices may be sent if actual cost of shipping exceeds $10 from our flat rate for shipping (see FAQ for additional shipping information). Let us know if you have any questions by sending an email to [email protected]! We look forward to working with you :)  Challenge: I will link rules and results at the bottom of this post. TL;DR: In this challenge, contestants were asked to design a wig with a removable hat or accessory. We could color the fibers and create whatever design we wanted, but we could not add any additional hair besides that which was provided. The Materials: Links to products used will also be provided at the bottom of this post. Arda gave us the following to use for this challenge
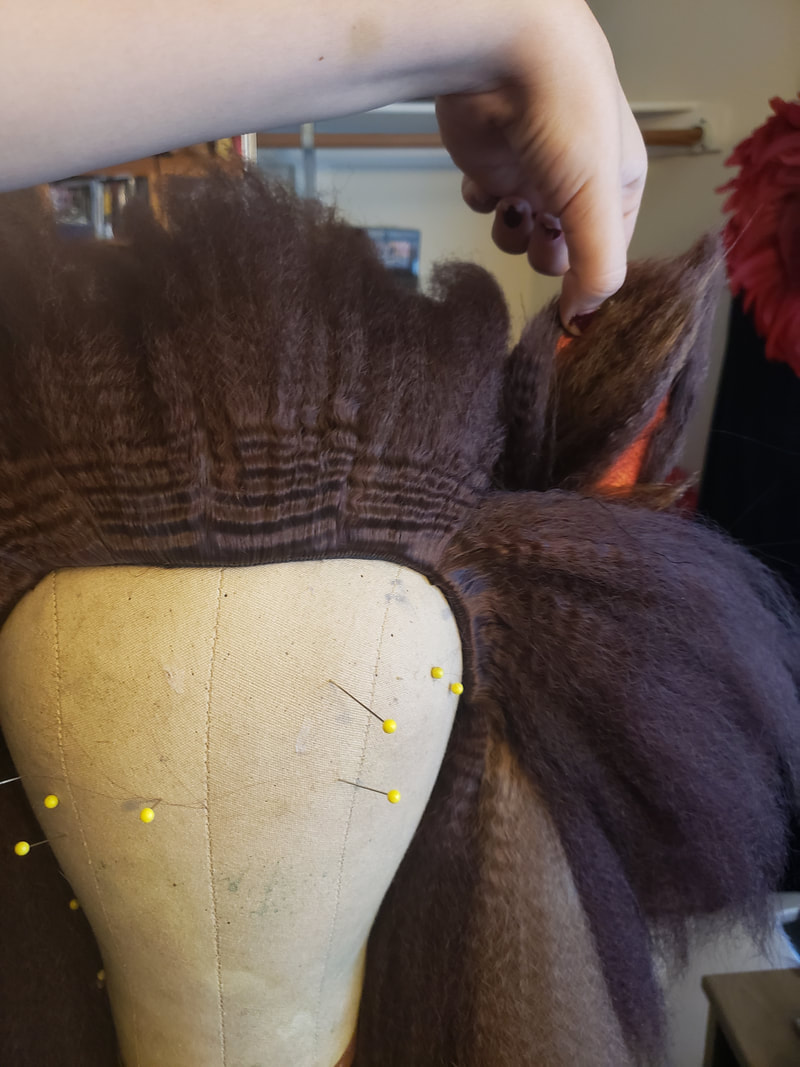
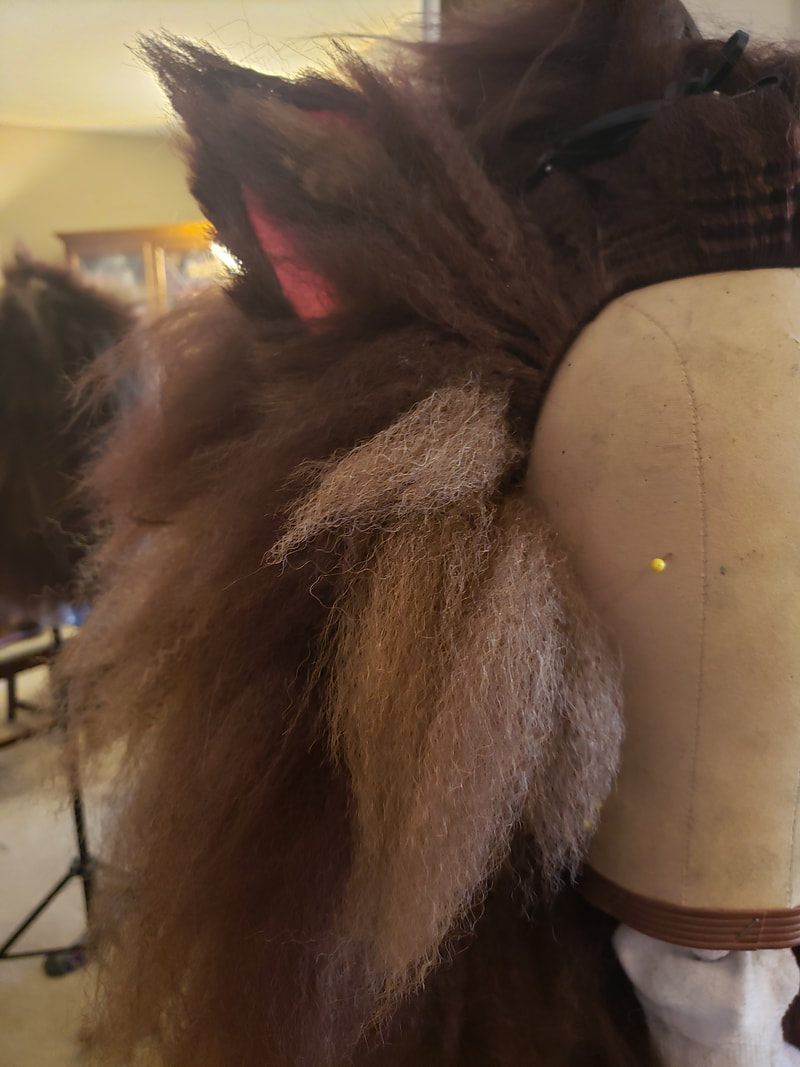
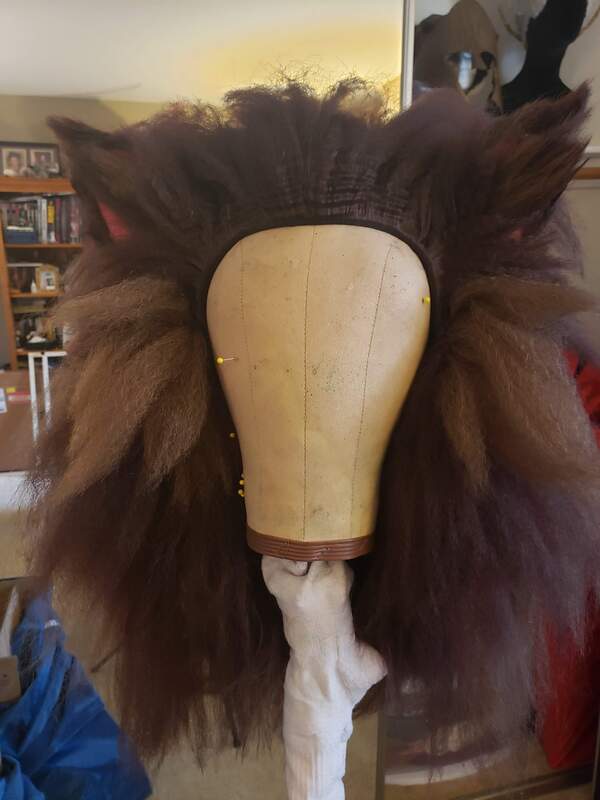
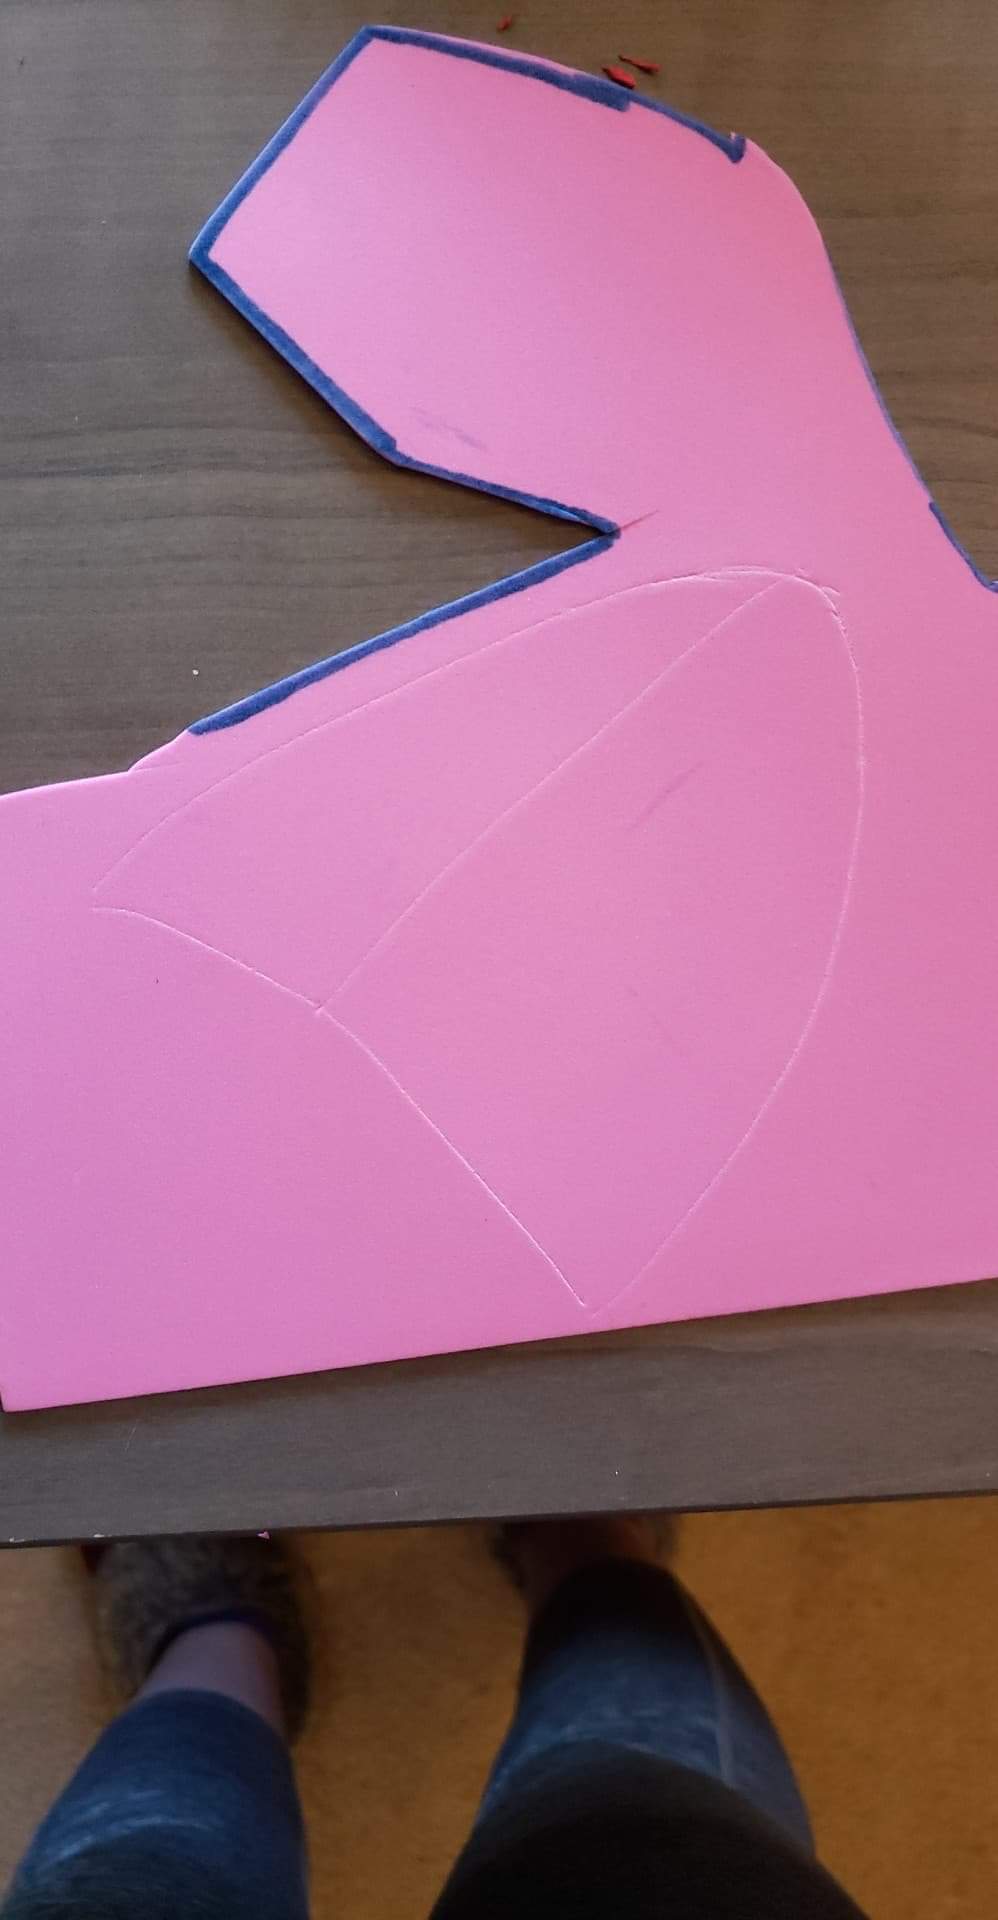
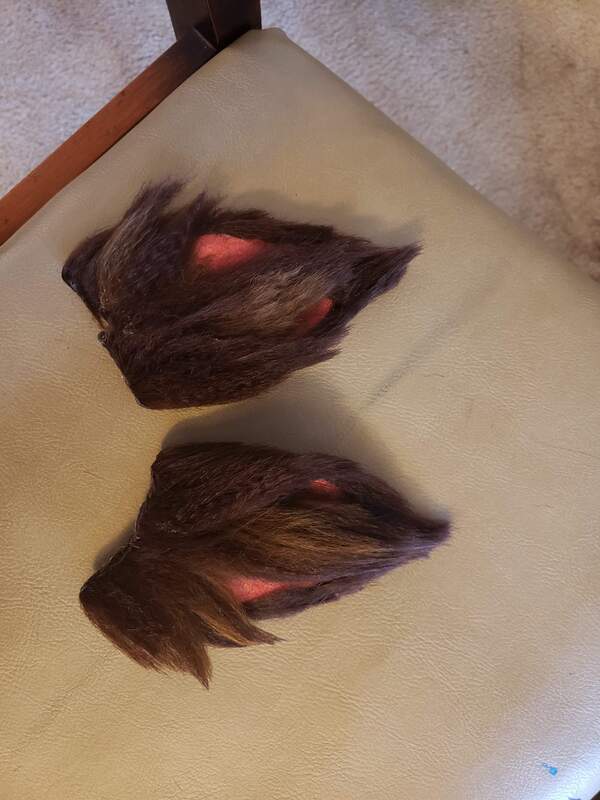
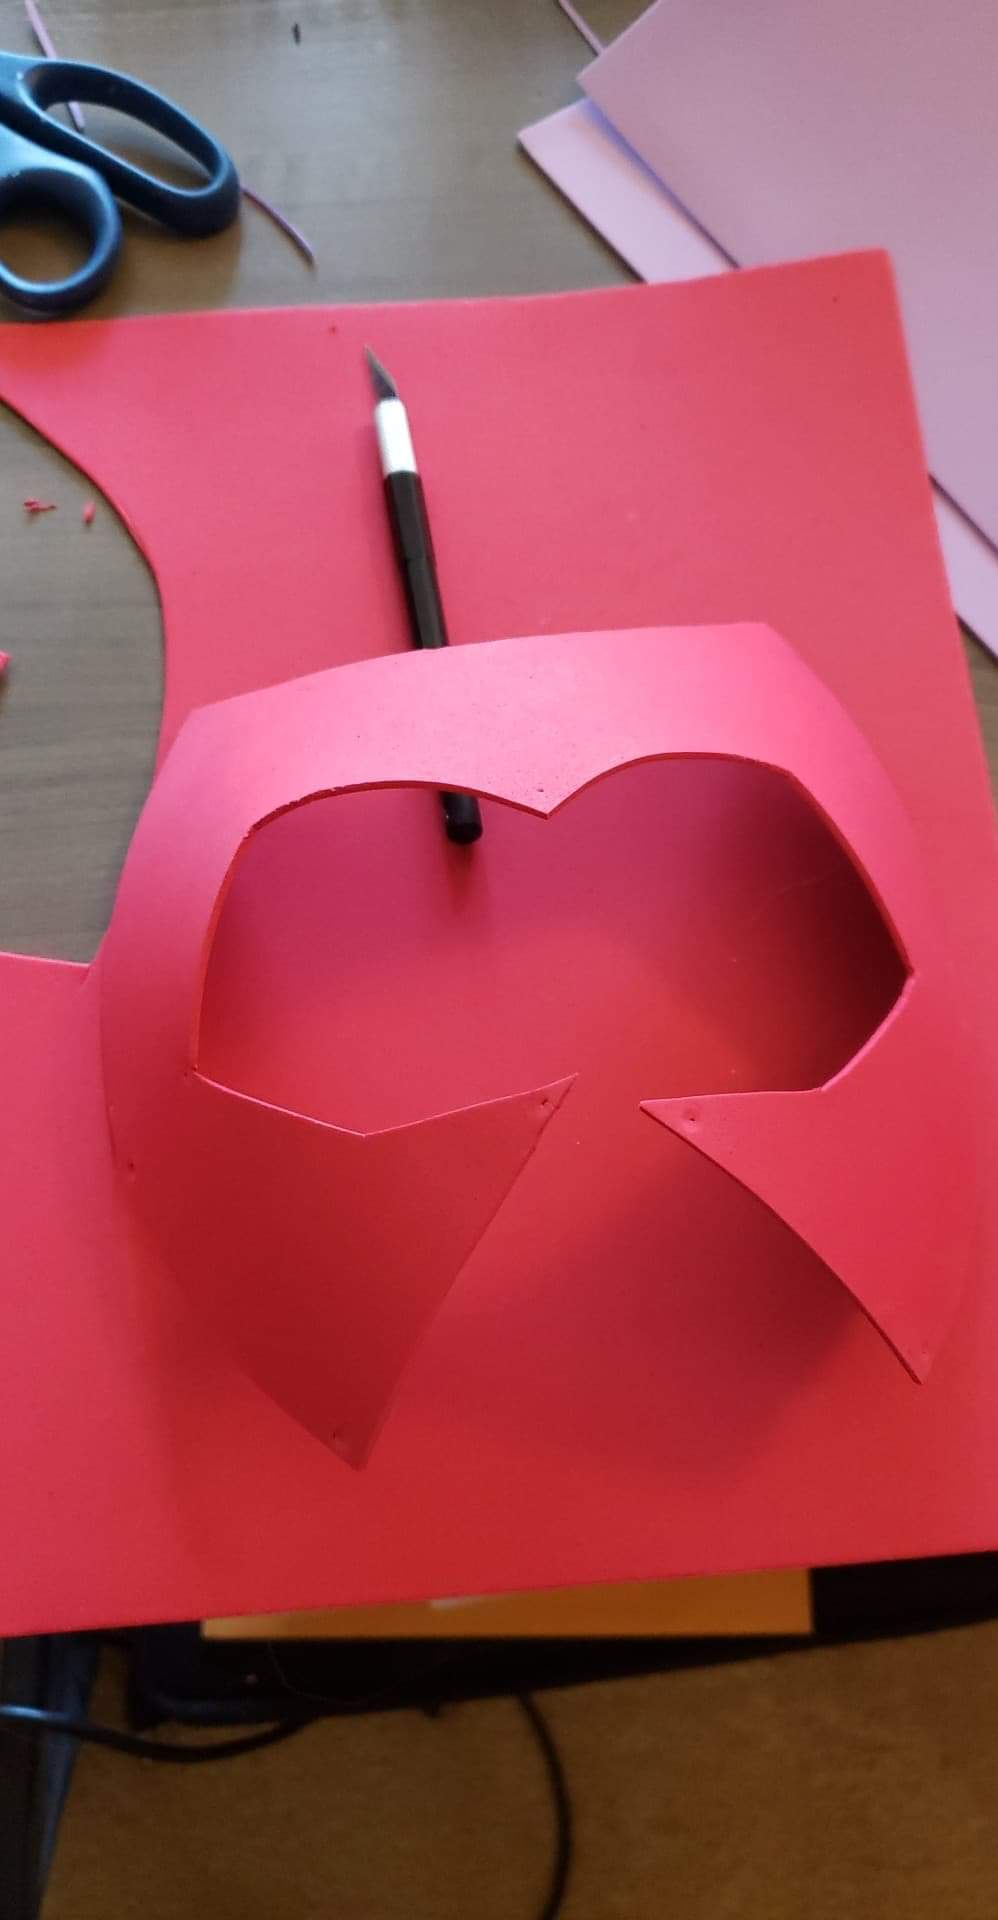
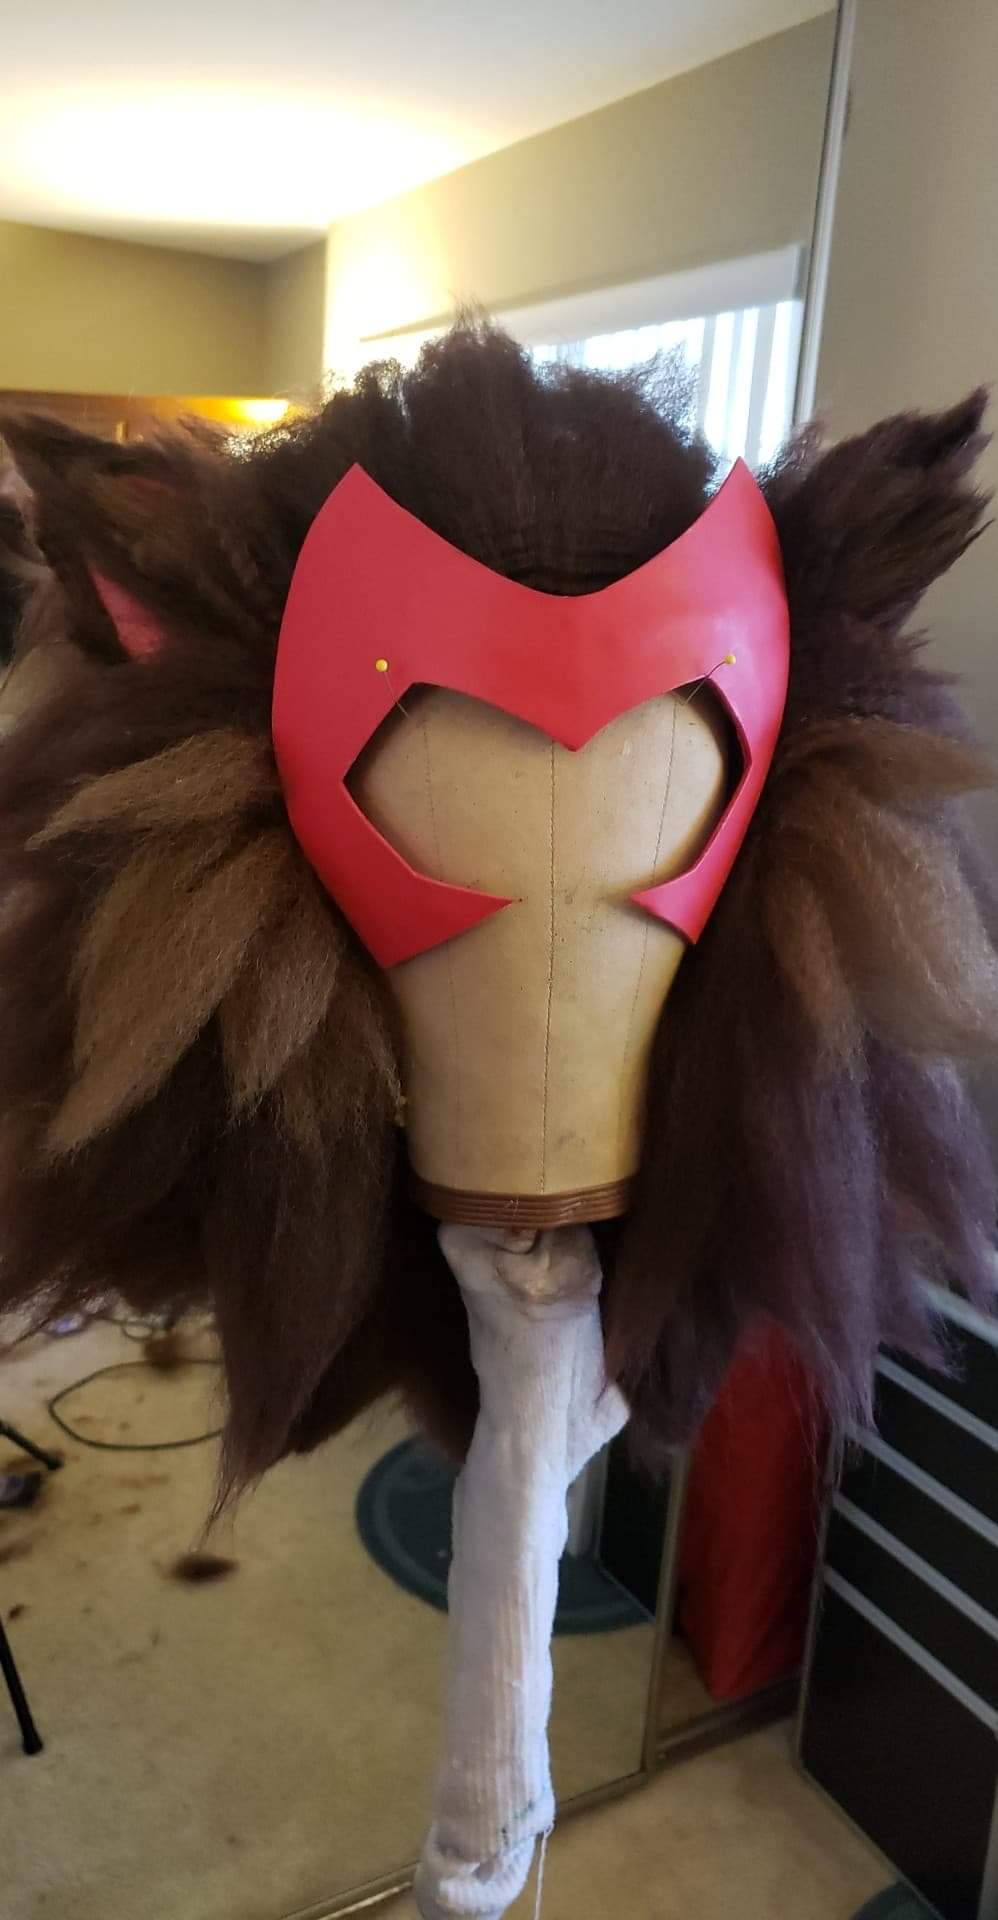
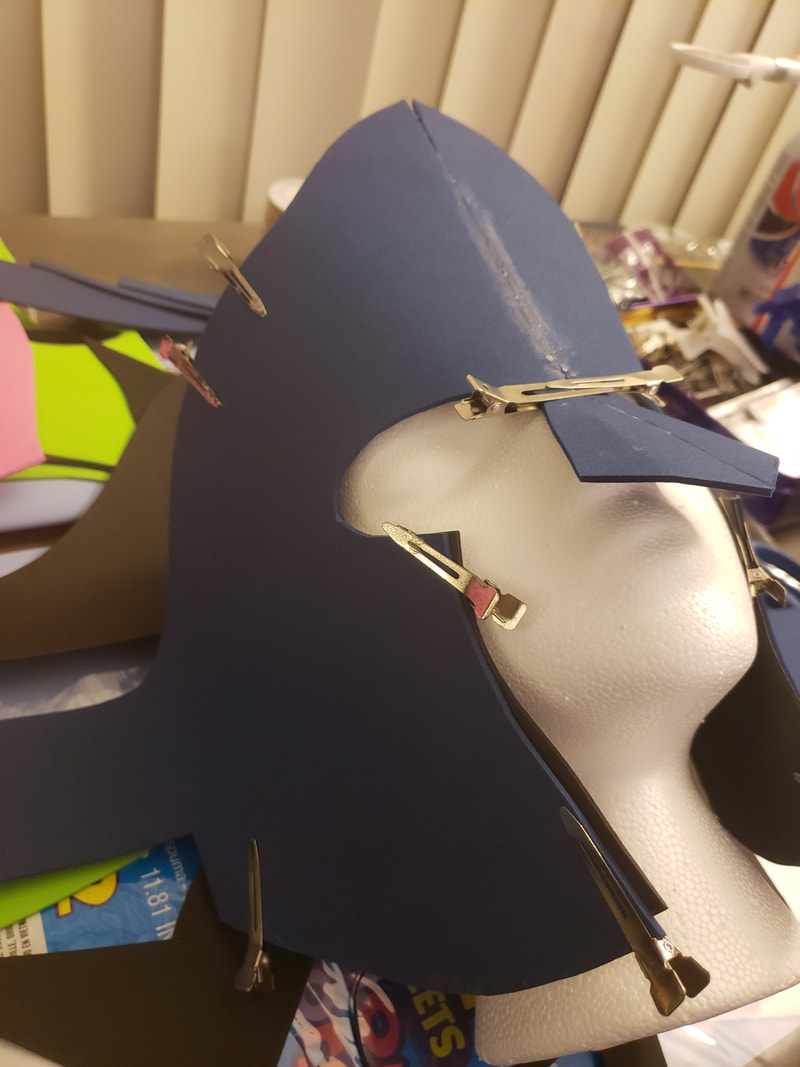
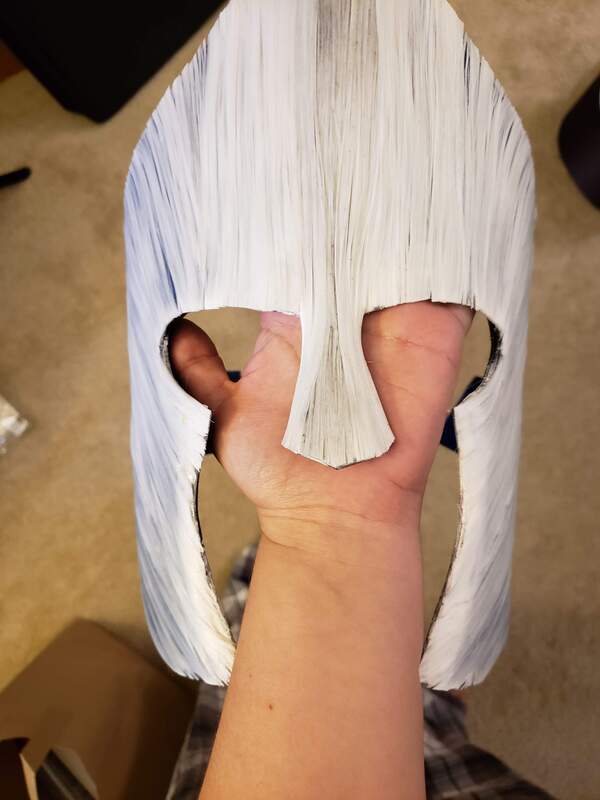
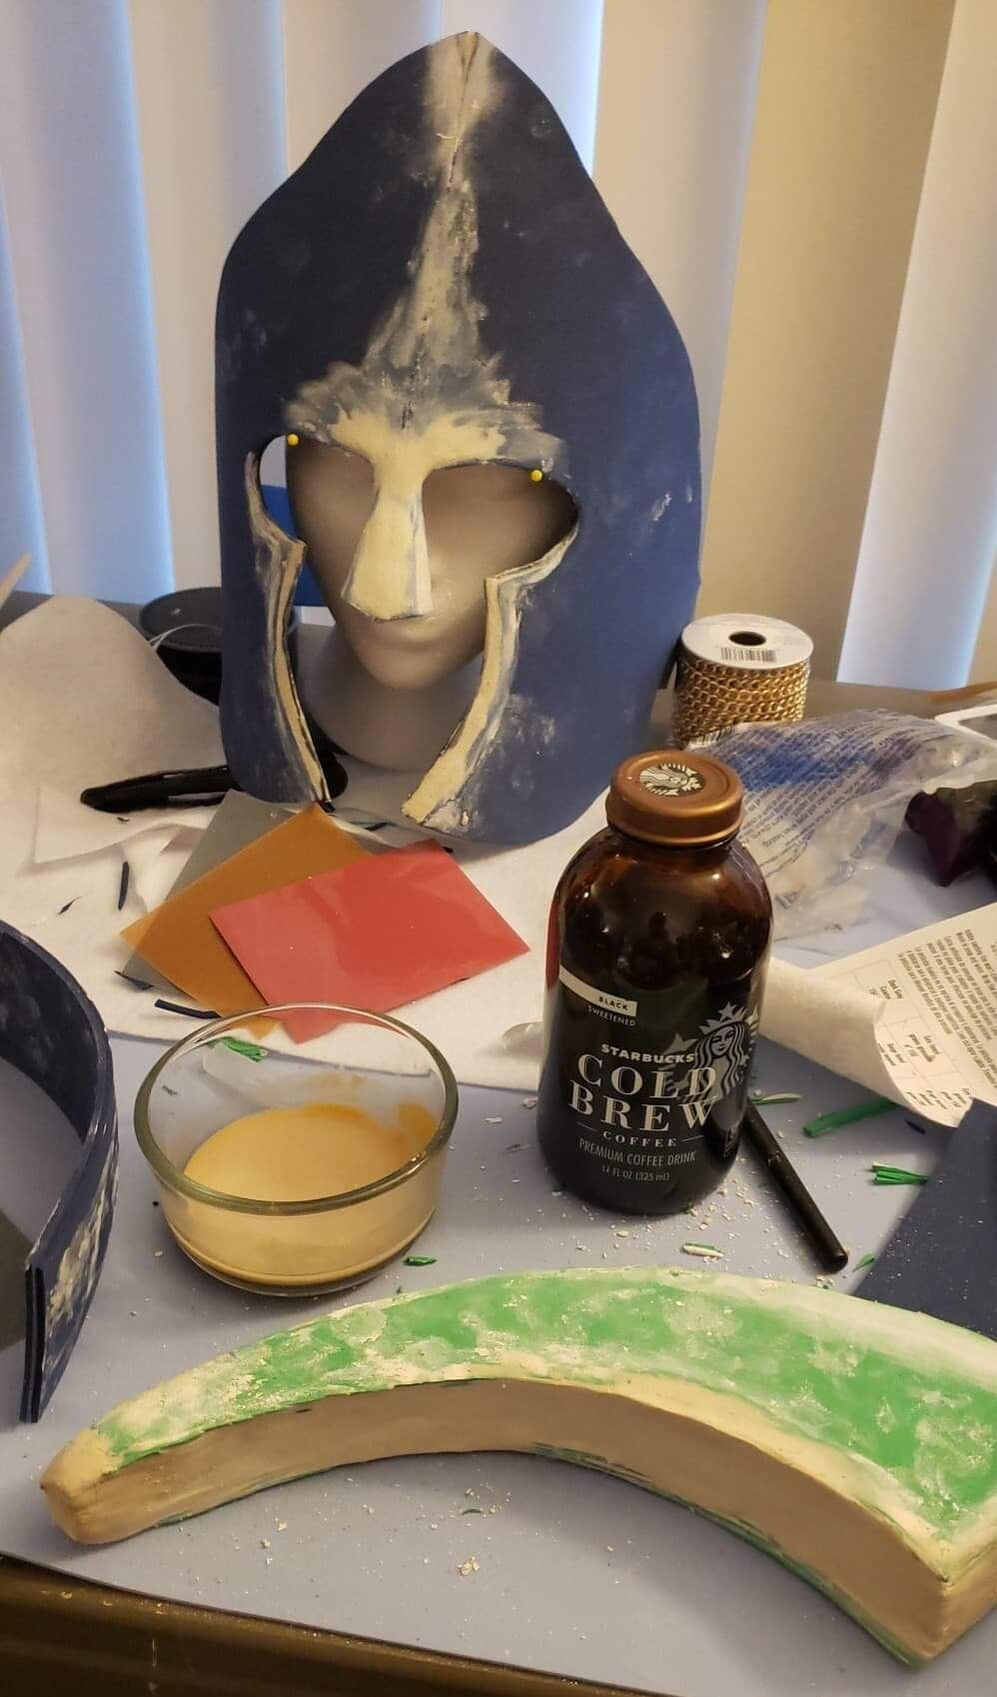
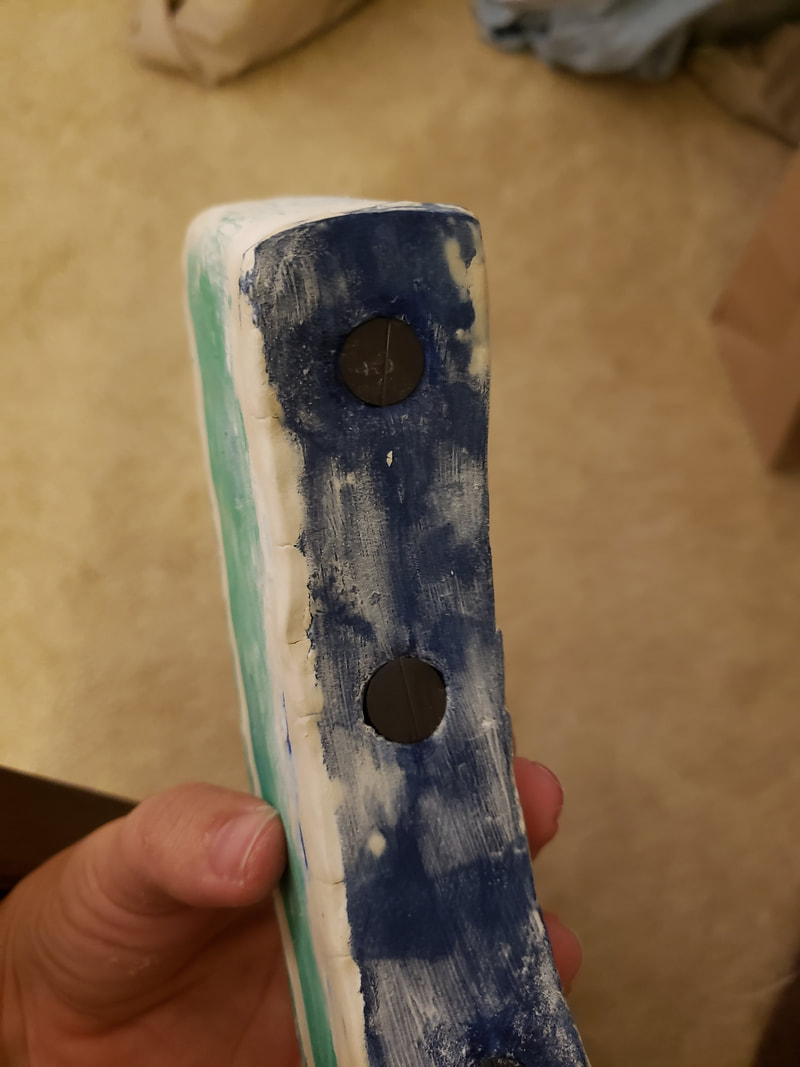
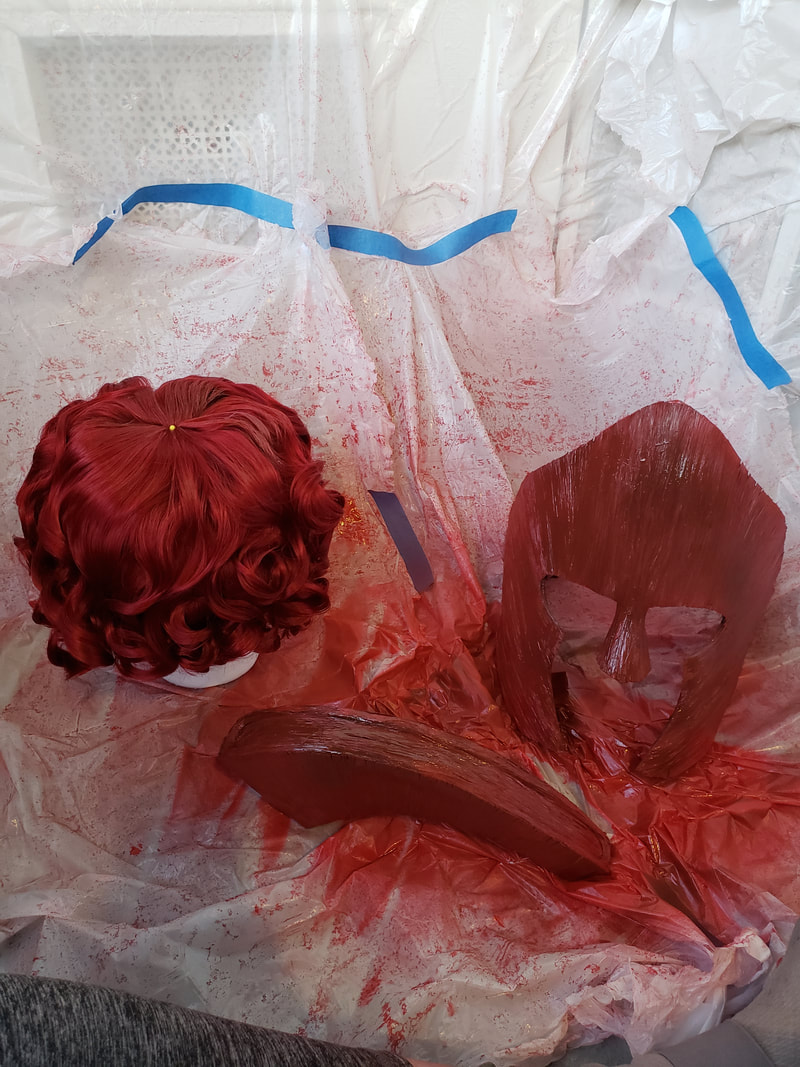
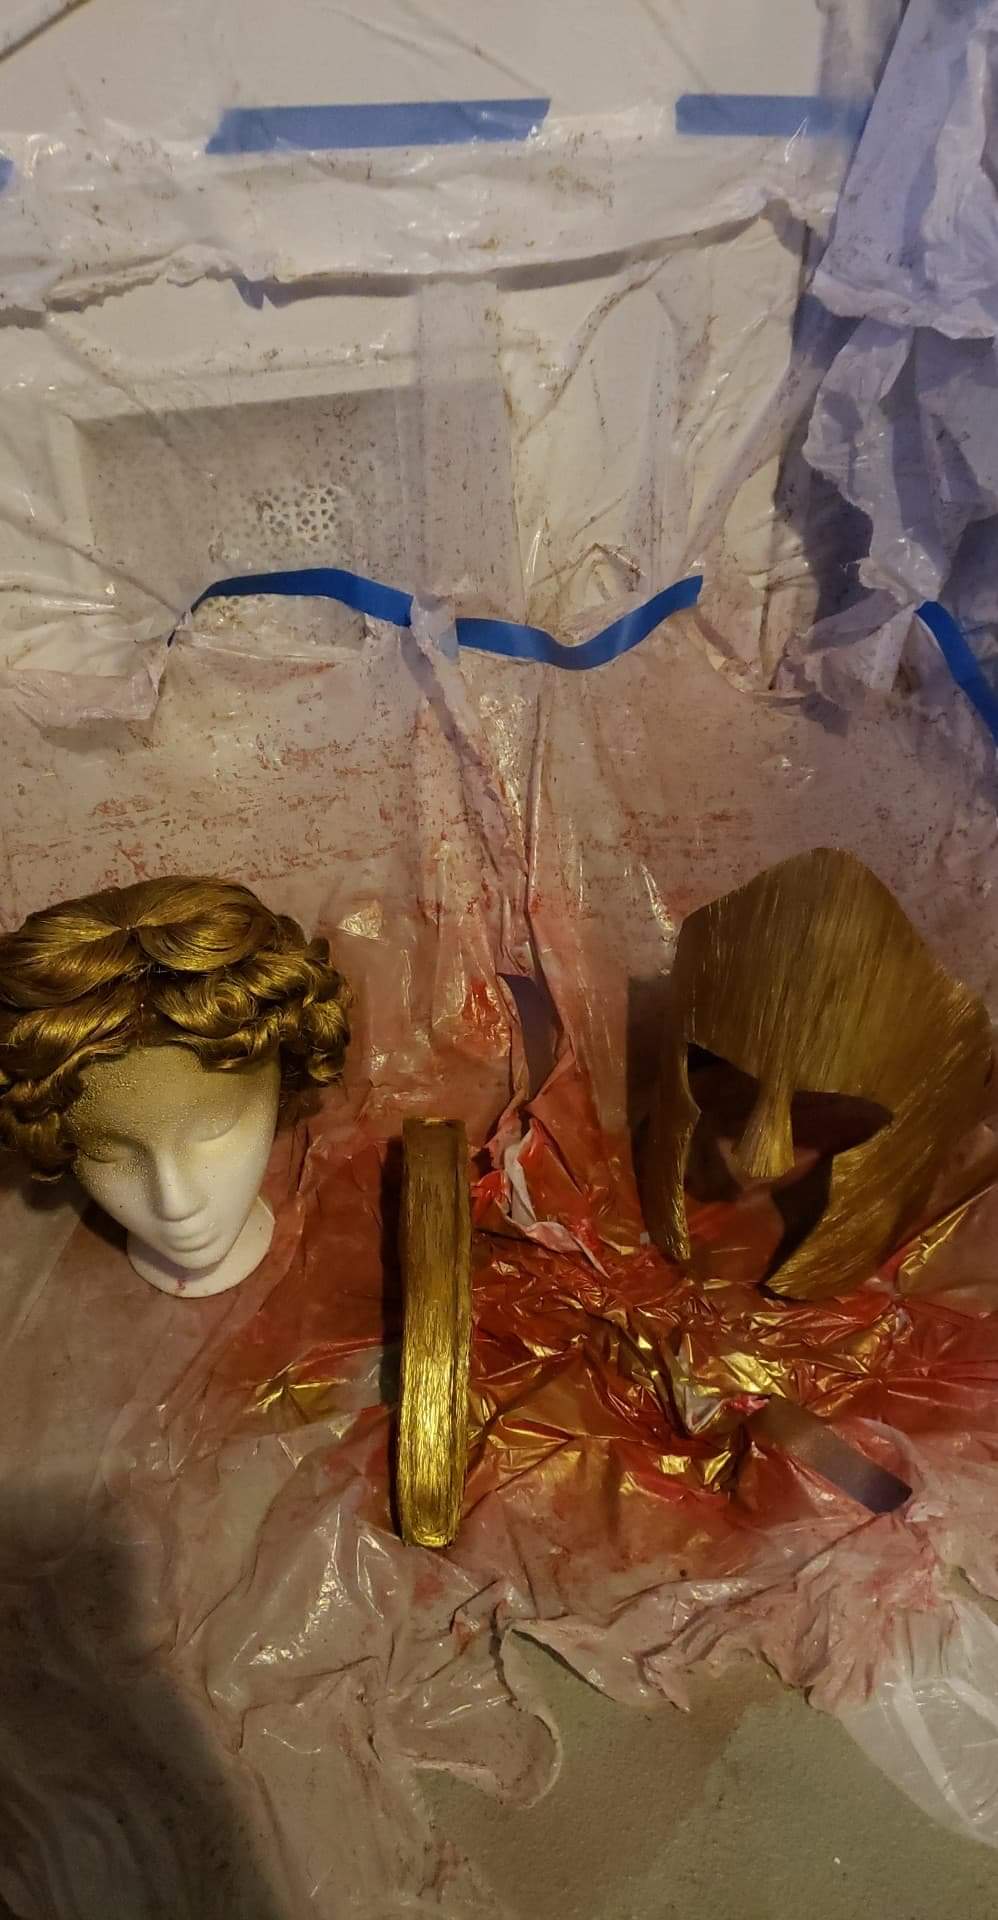
Inspiration: I am not sure what put the idea into my head, but my first concept of this project was centered around a silly idea of making a literal hair helmet. As the idea grew, I realized that I had not seen very many submissions to past Iron Wig rounds in which the face had been obscured. I felt making some kind of masked helmet would be new and if done right, exciting once people realized it was made entirely of hair. I set out to make something structured that was simultaneously regal and strong, and eventually landed on a design for a Spartan helmet. I mainly focused on the face plate and and the mohawk aspects of the Spartan’s helmet design and made the base of the helmet look more like hair typically found on an ancient Greek statue. As absurd as it may sound, I decided I wanted a hair design that looked like a helmet rather than a helmet made of hair. In order to meet the requirements of the challenge, I made the mowhawk and face plate removable. I wanted each stage to be a separate look as follows:
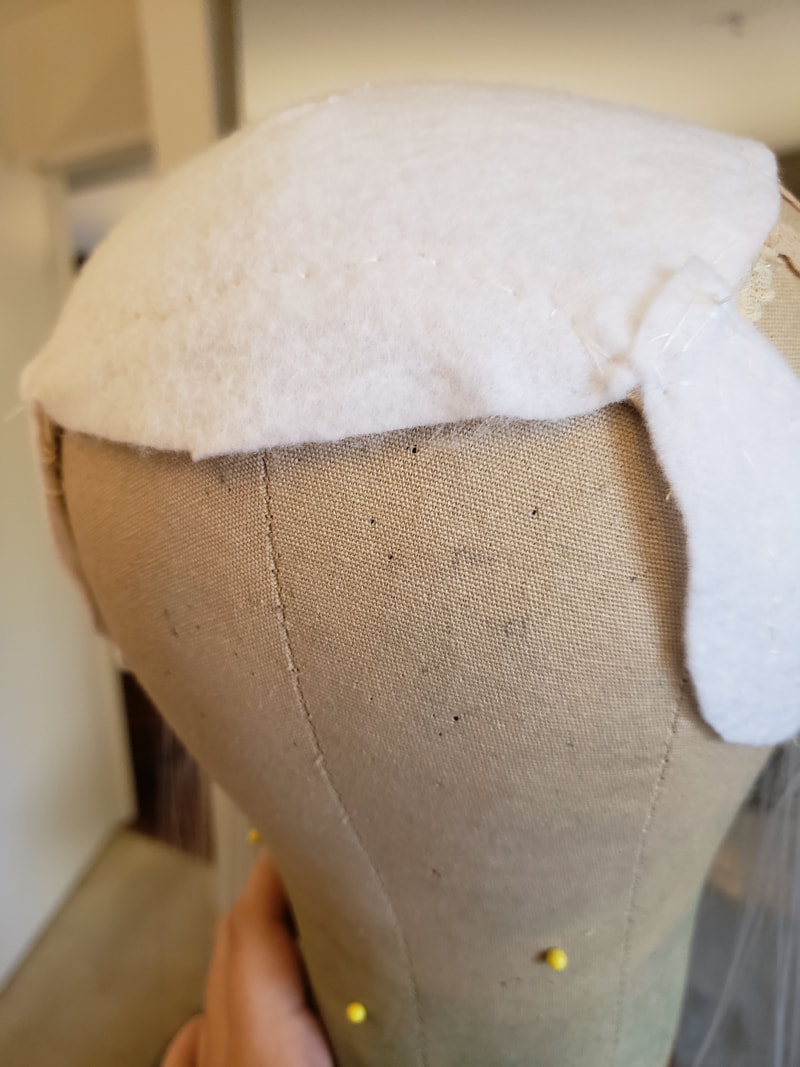
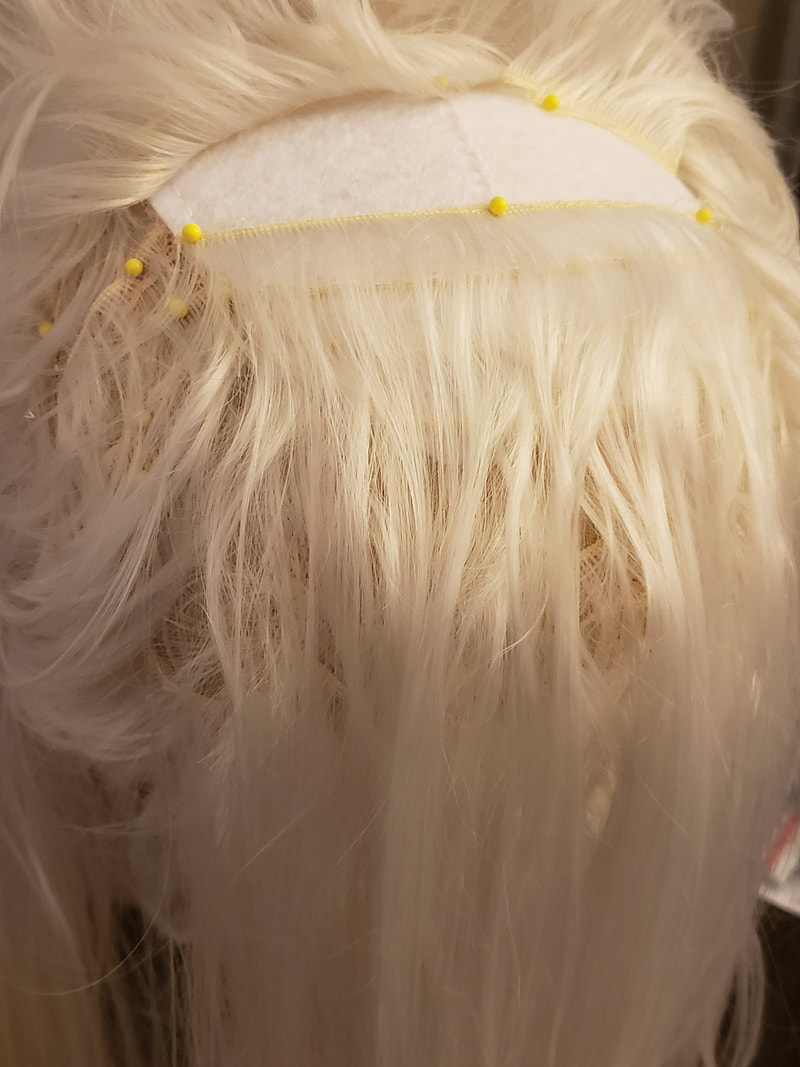
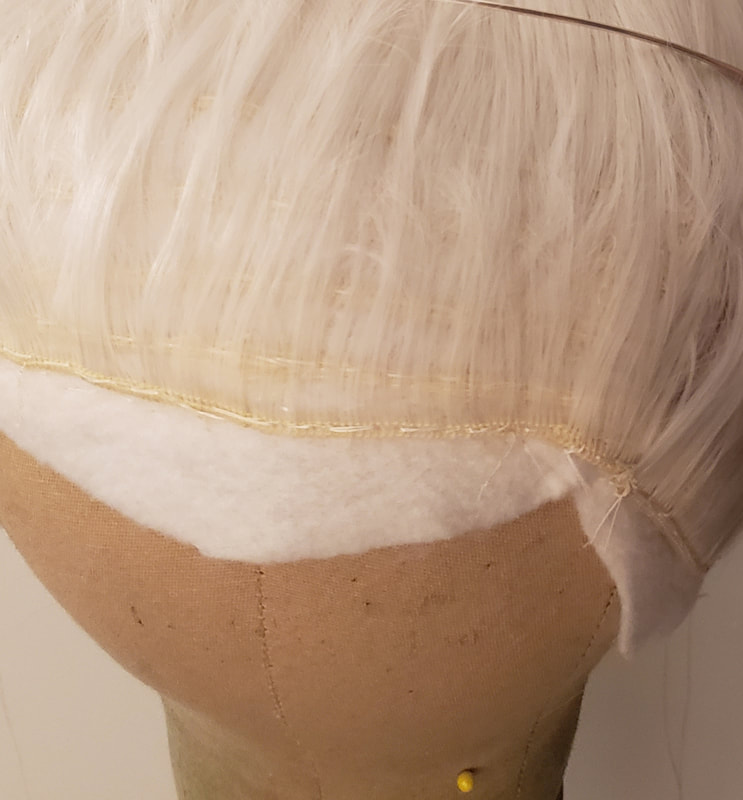
In the end, I only showed that the mohawk was removable as I did not like the look of the curly hair by itself. In retrospect, I'm not sure if this hurt or helped my final score. Process: Base Wig:
Face Plate:
Results: I did better this round than the previous round! Each new round, I am not sure if I will actually win, but my goal is to at least beat my previous score. I managed to accomplish this, place higher, and do better in the Cleanliness section which was my ultimate goal. While I would like to win, and I am trying my hardest to, I also know that I will get more out of this competition if I make it more about improving my own skills and less about beating my competition. Links:
Here is the promised link to the rules. You can see the scores here. Here is the promised product list:
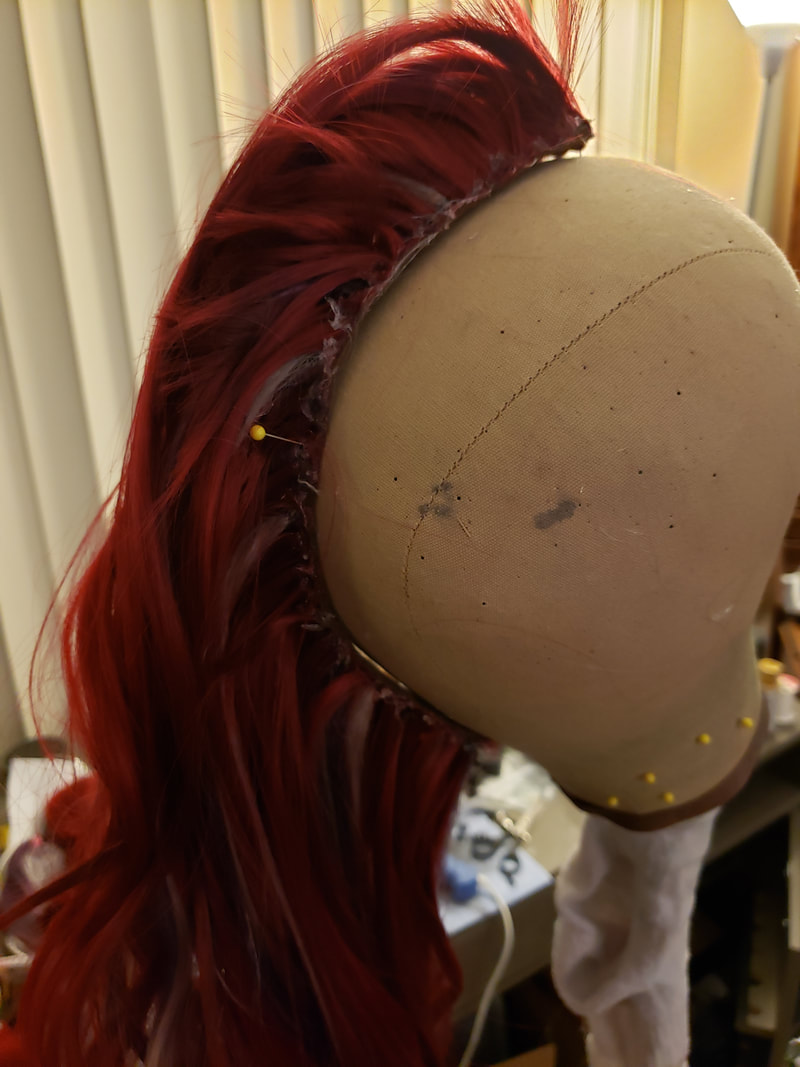
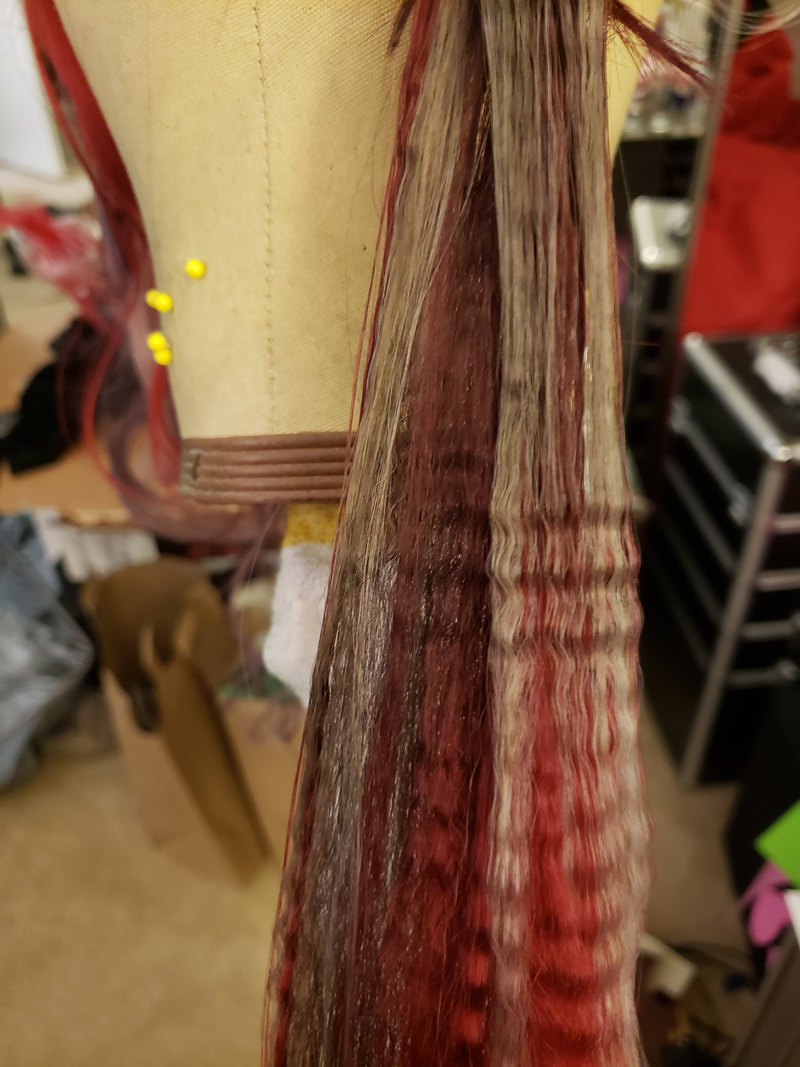
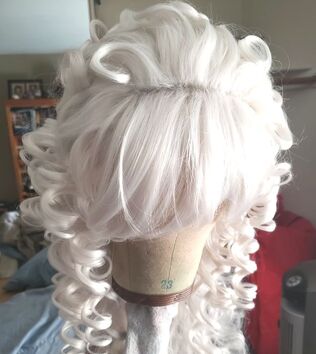
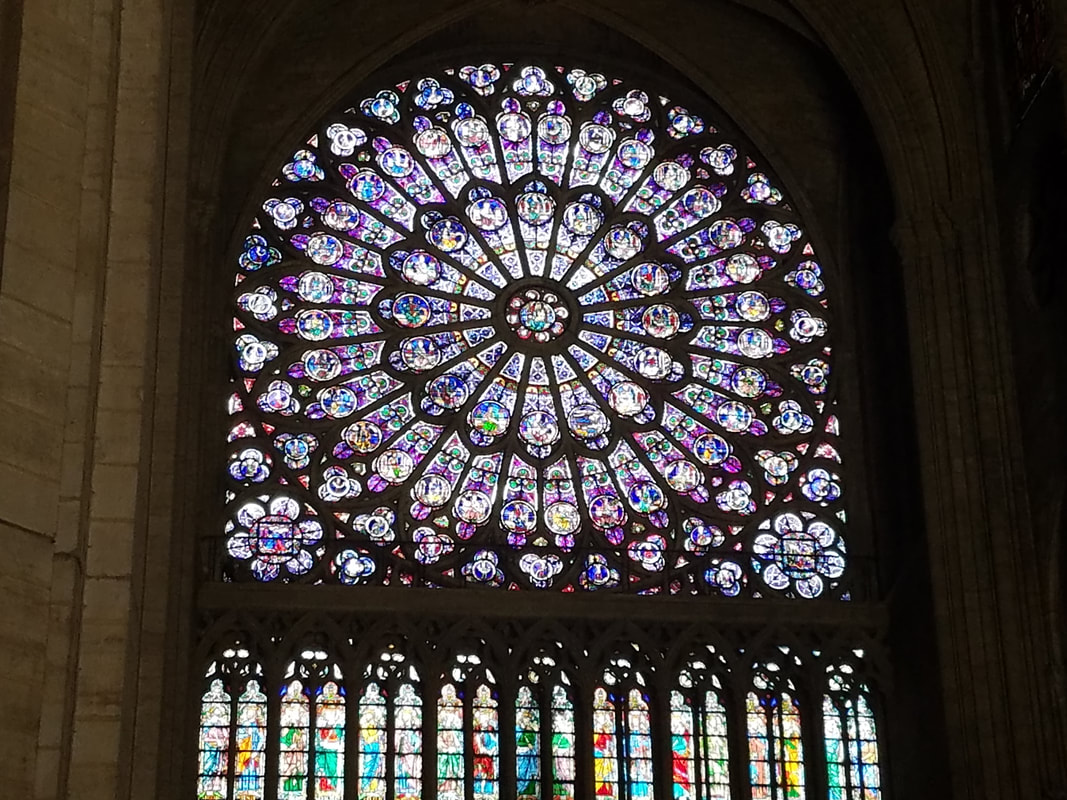
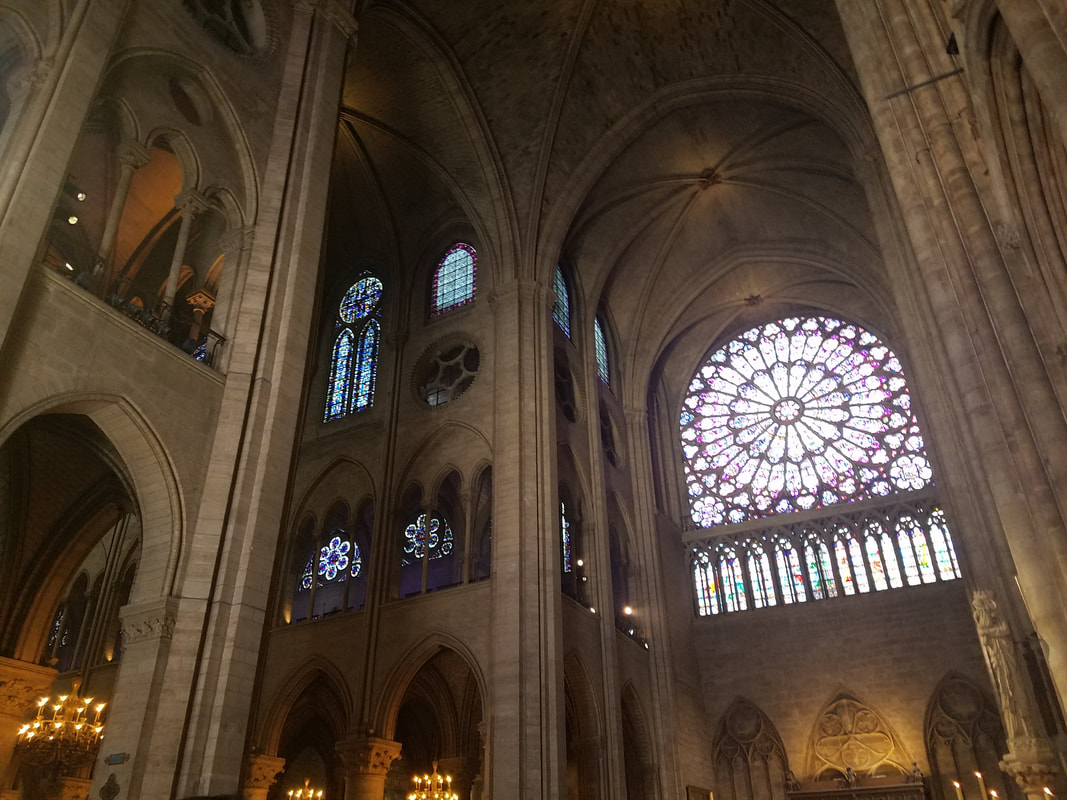
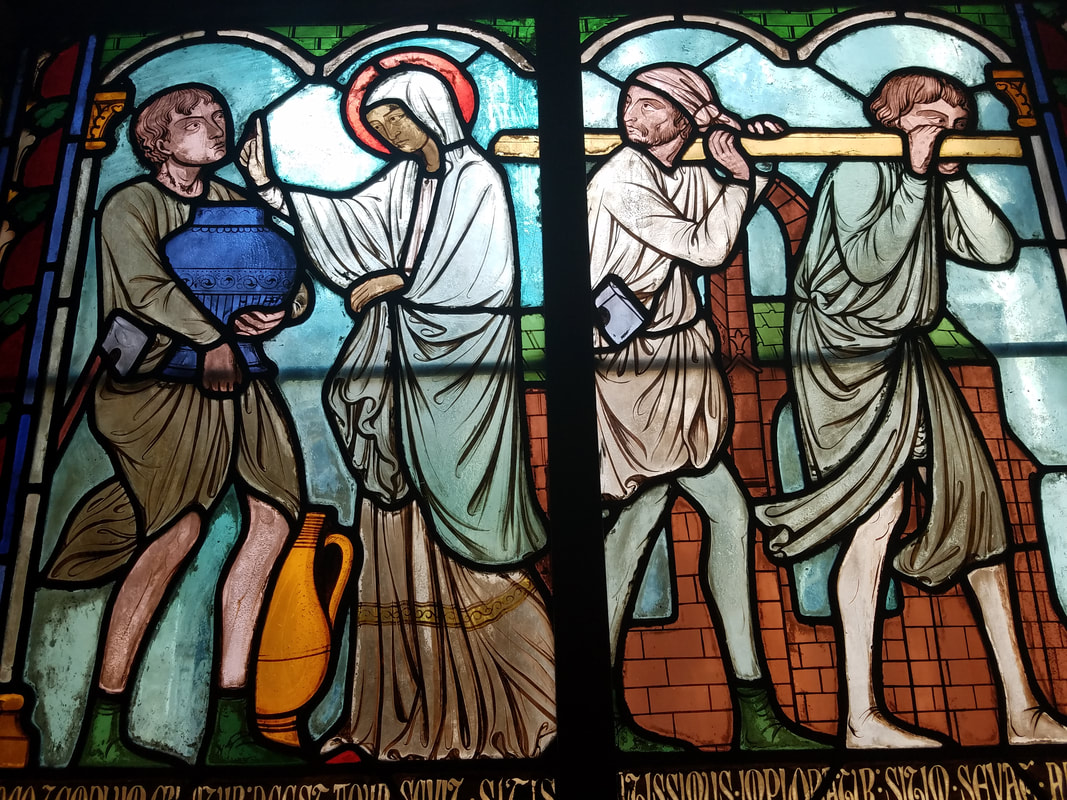
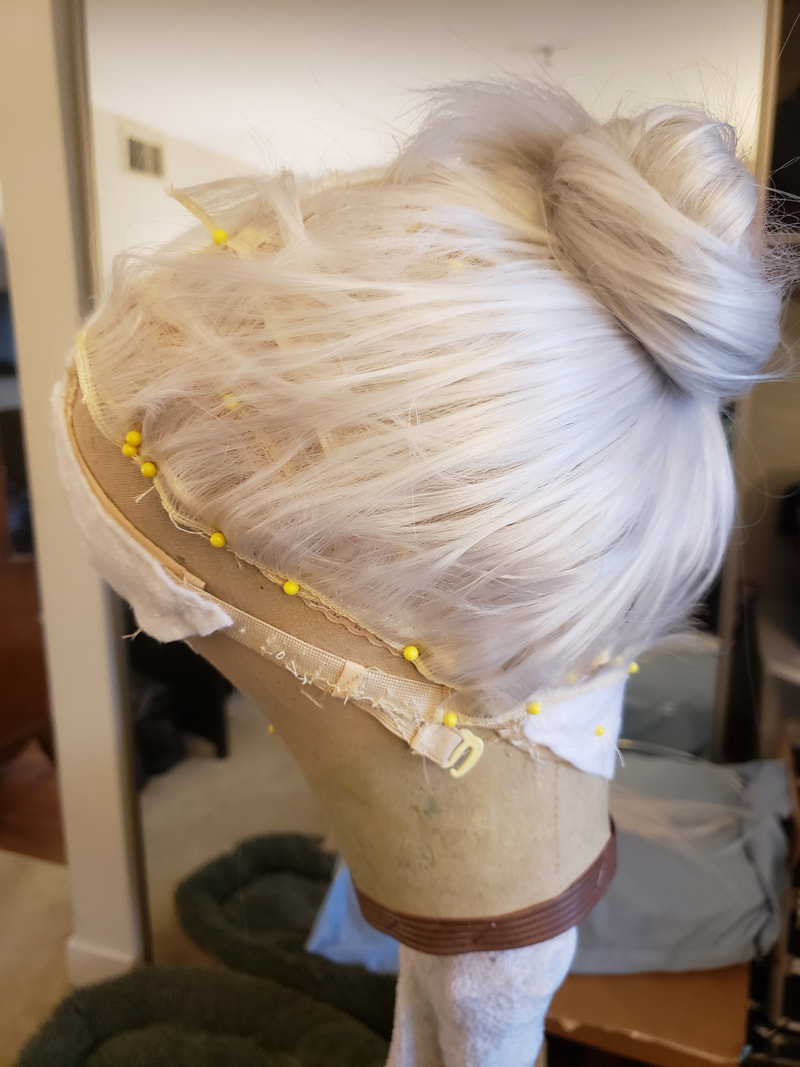
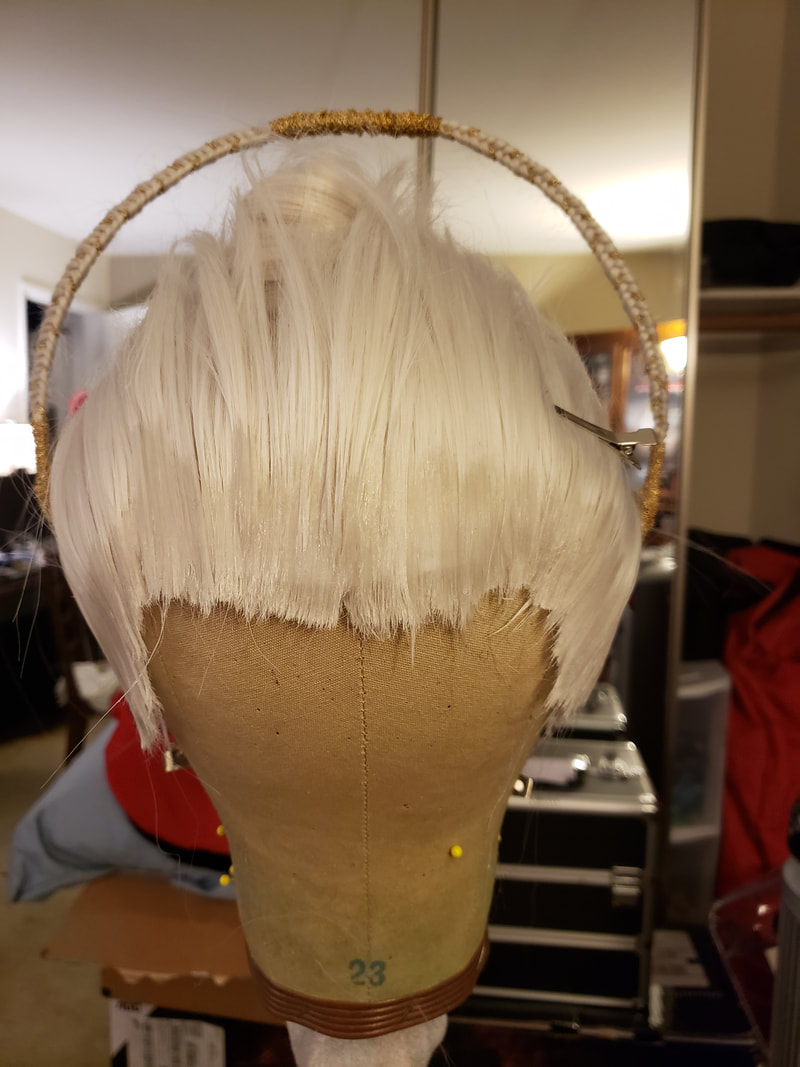
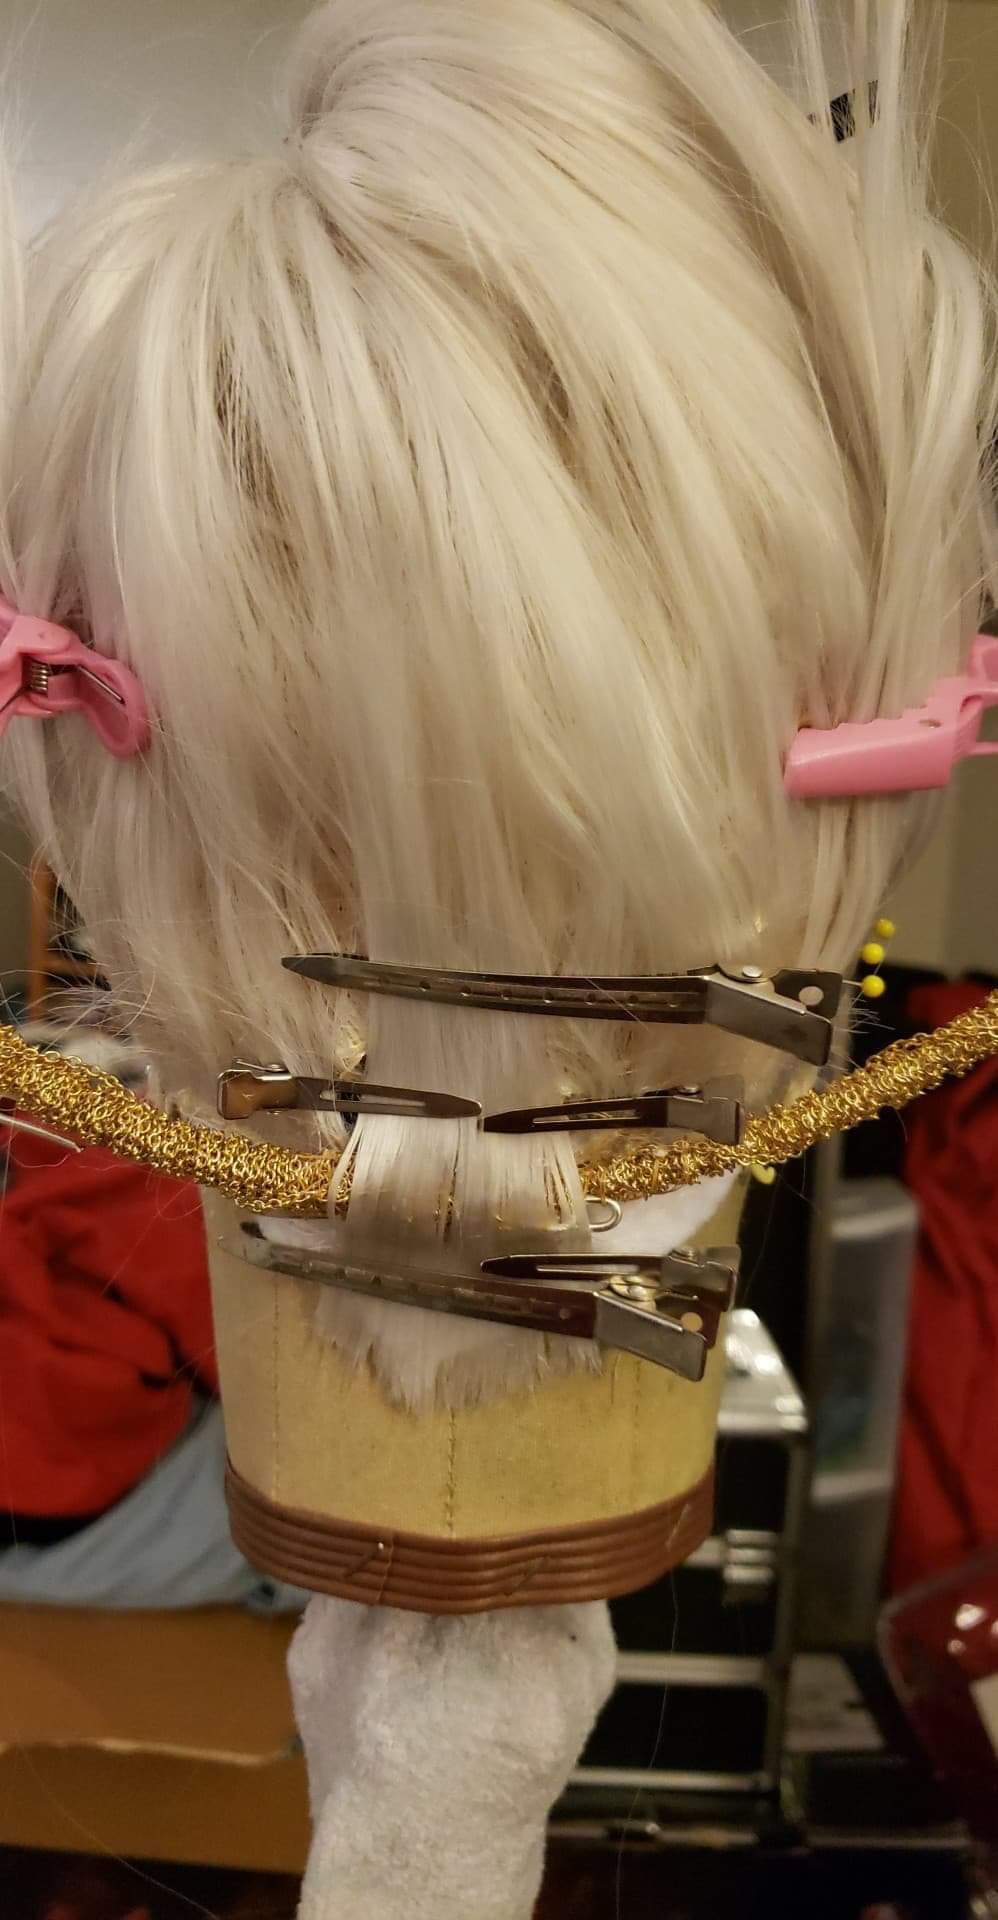
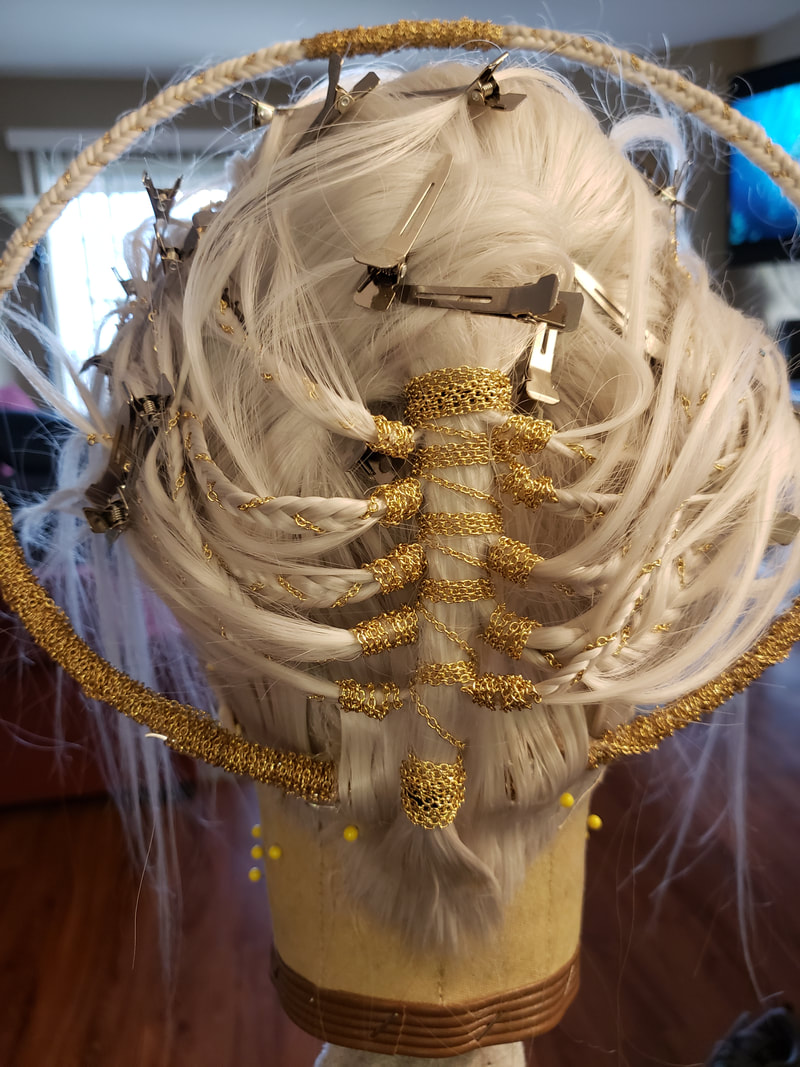
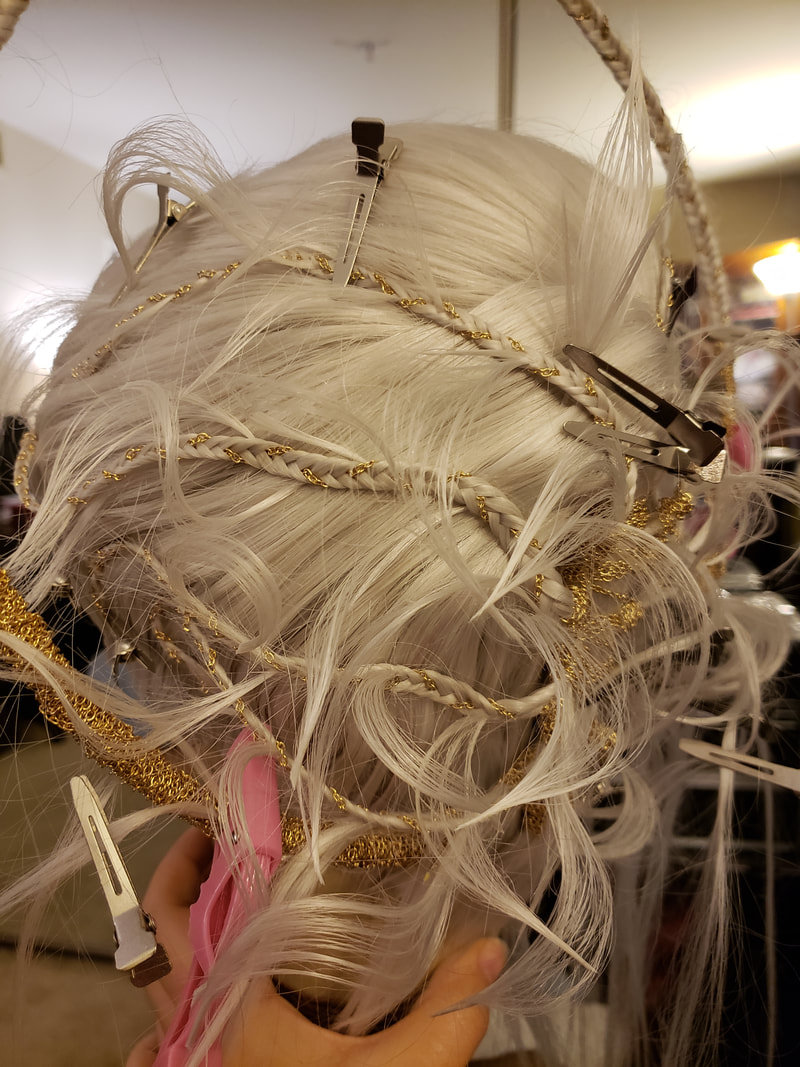
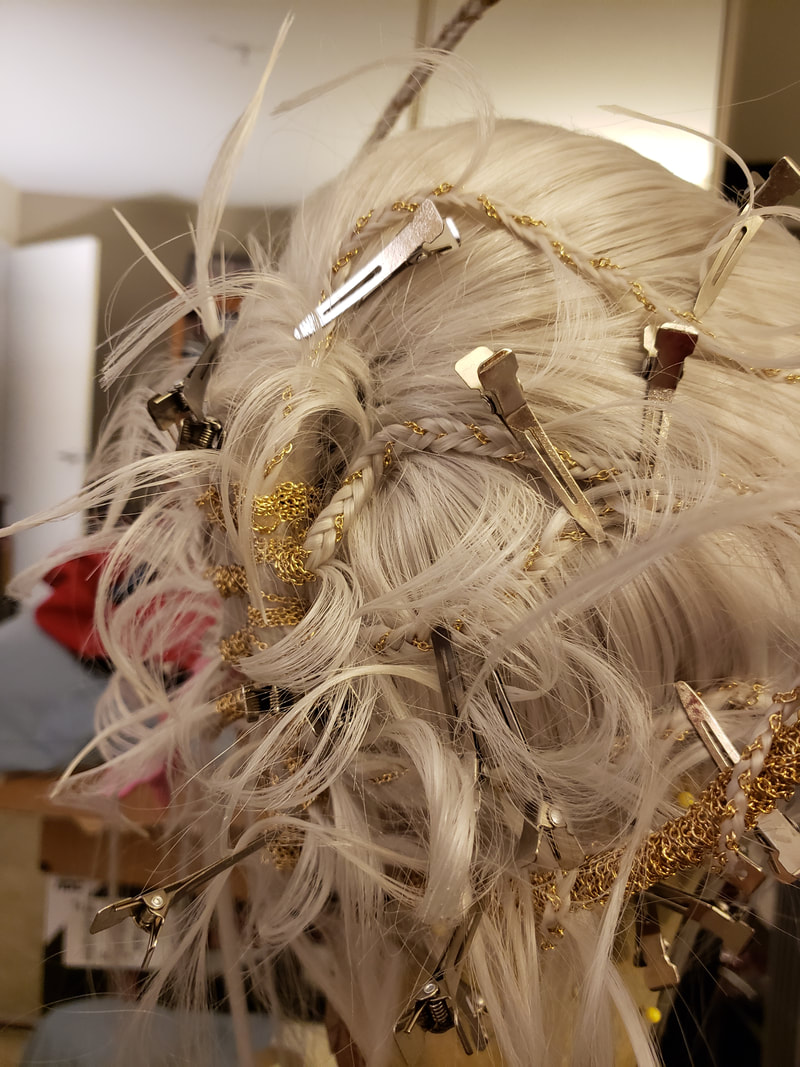
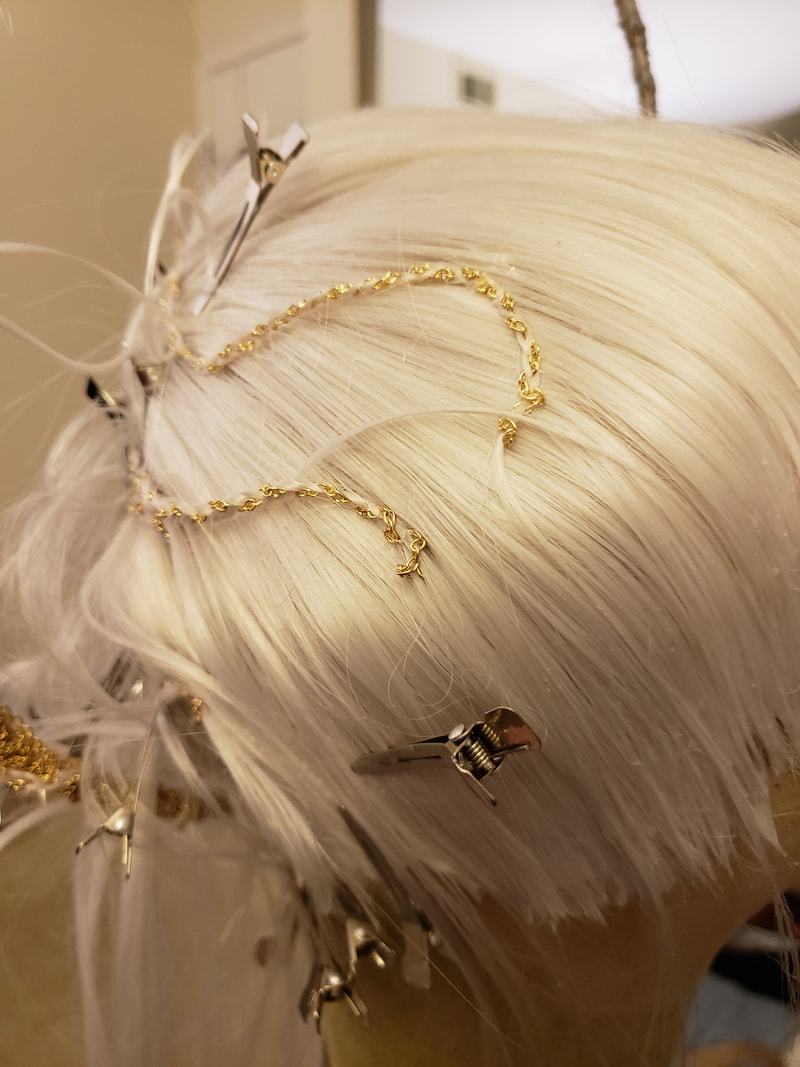
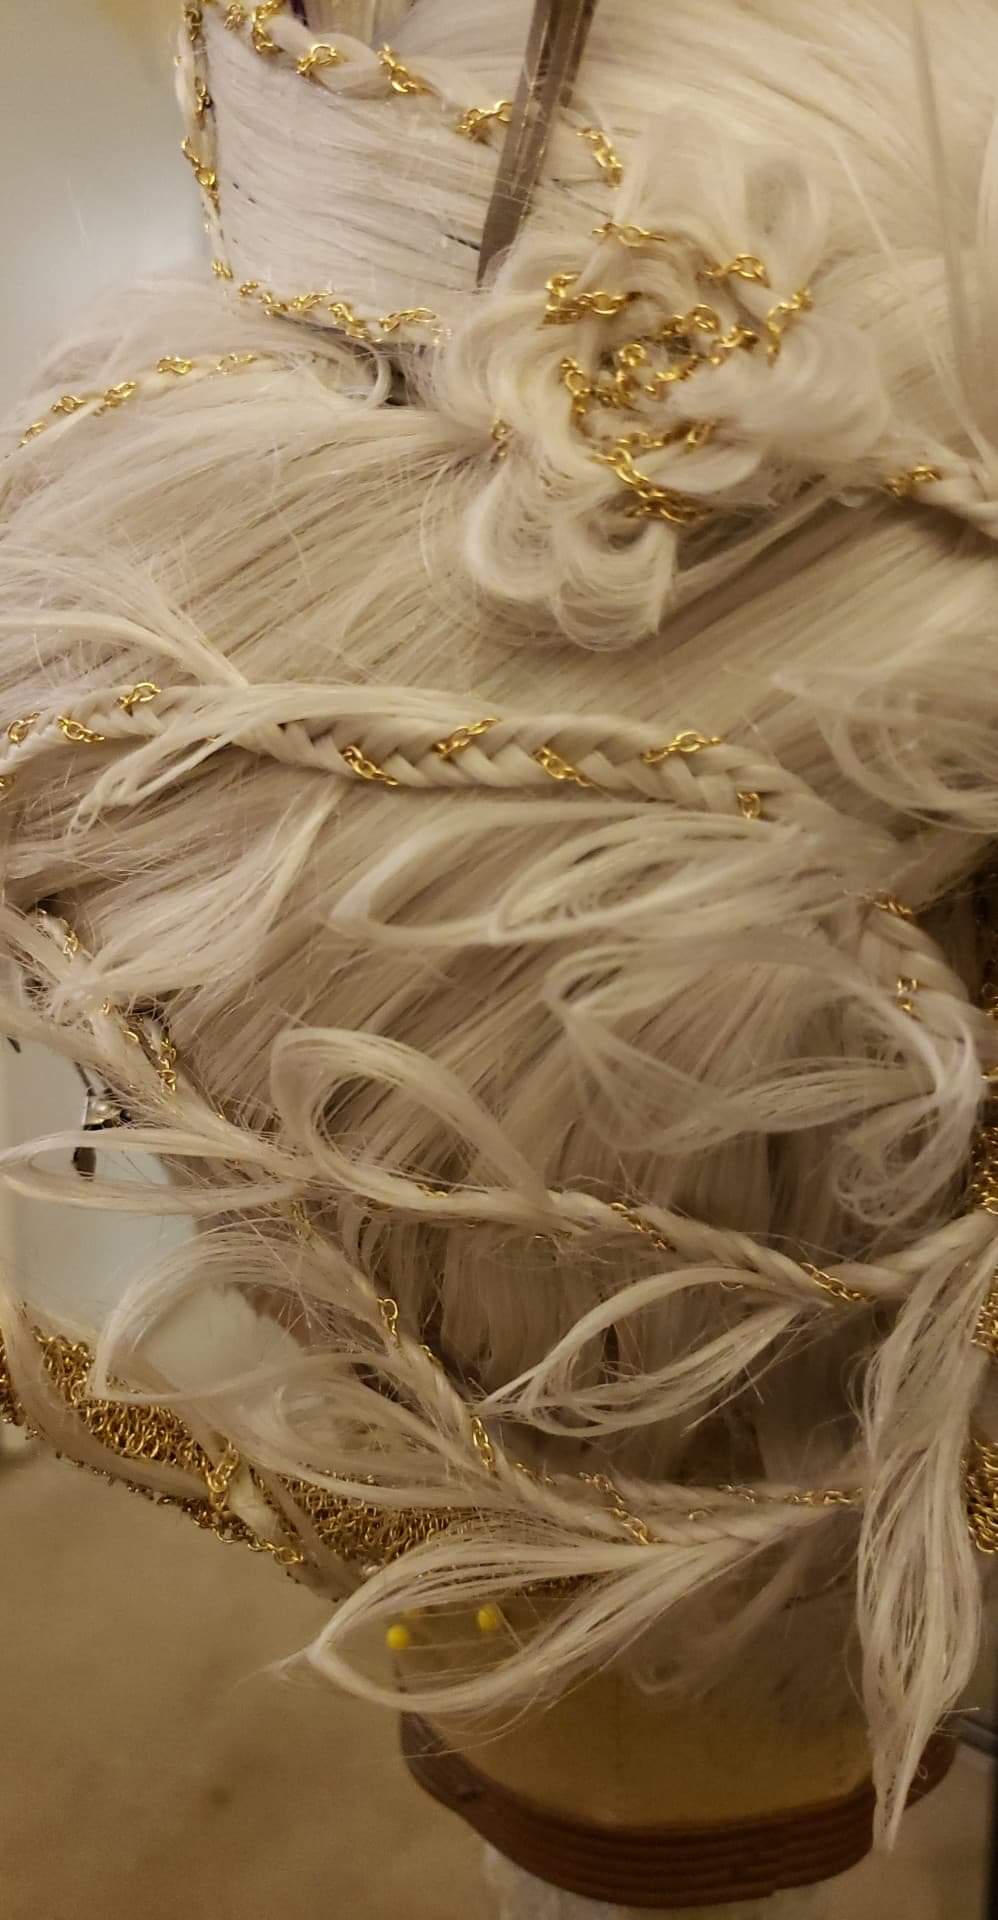
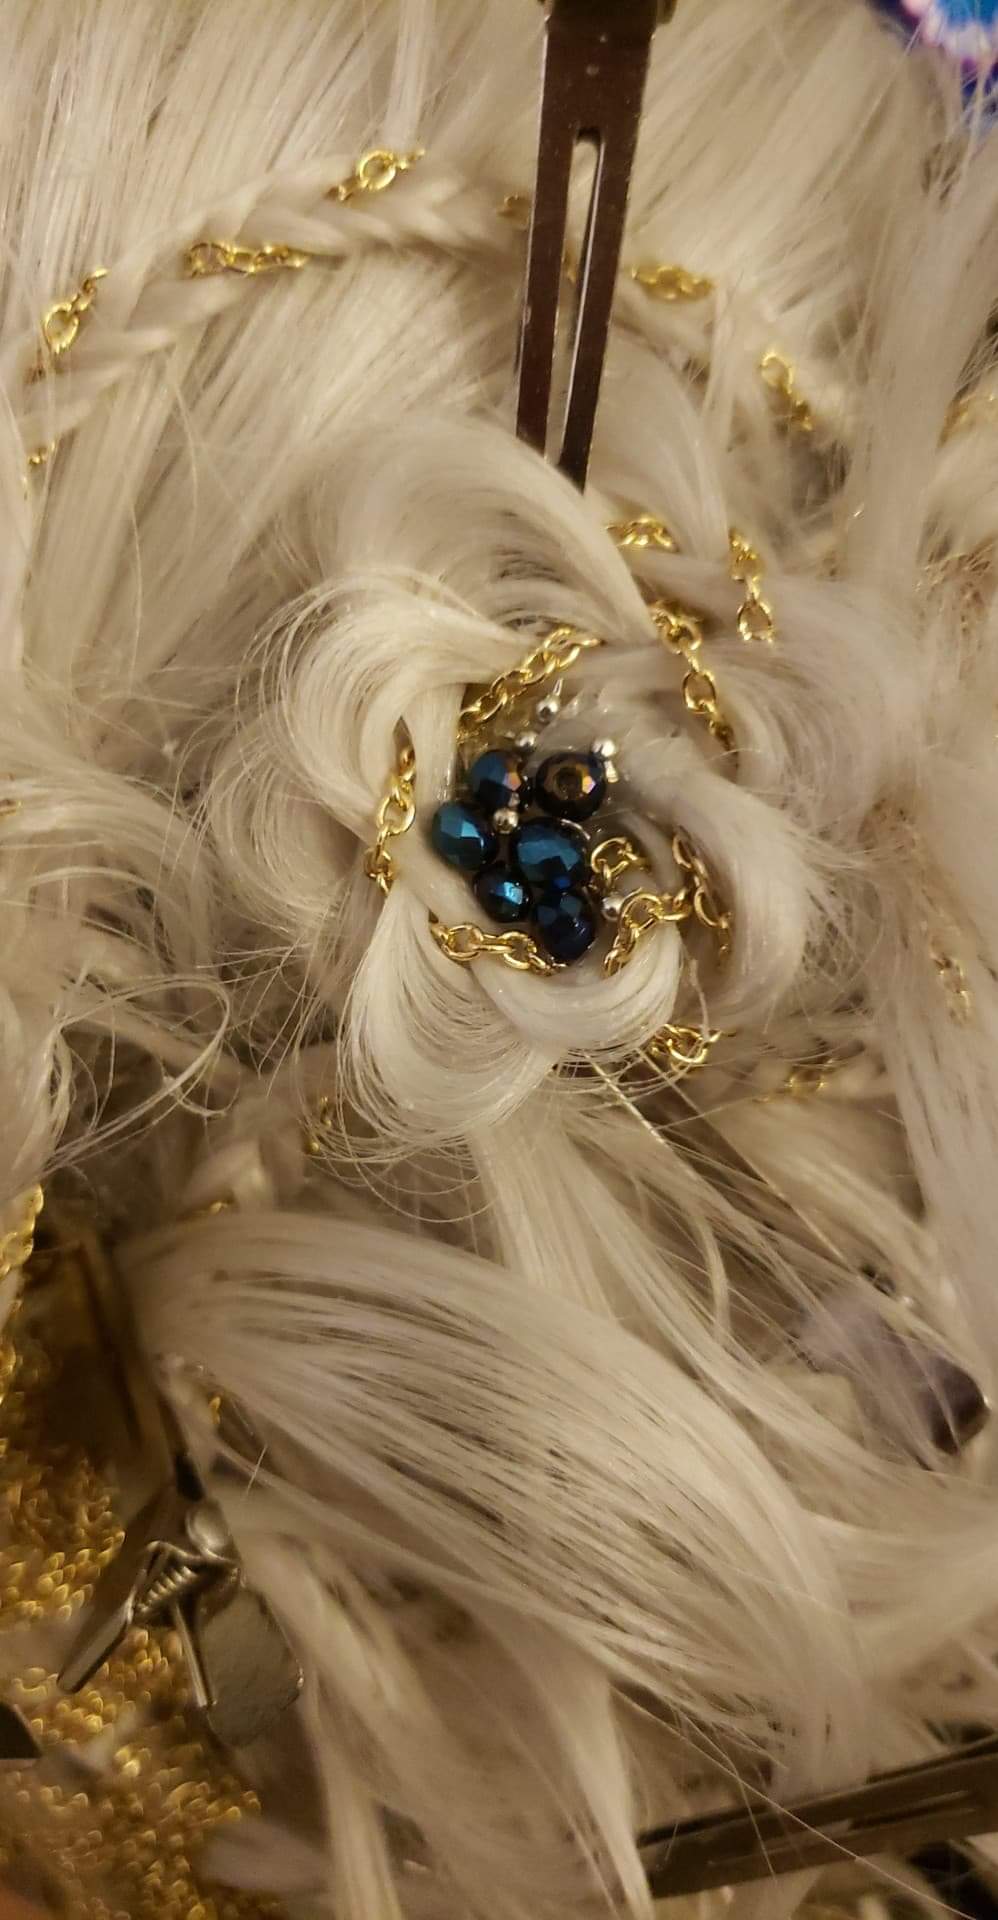
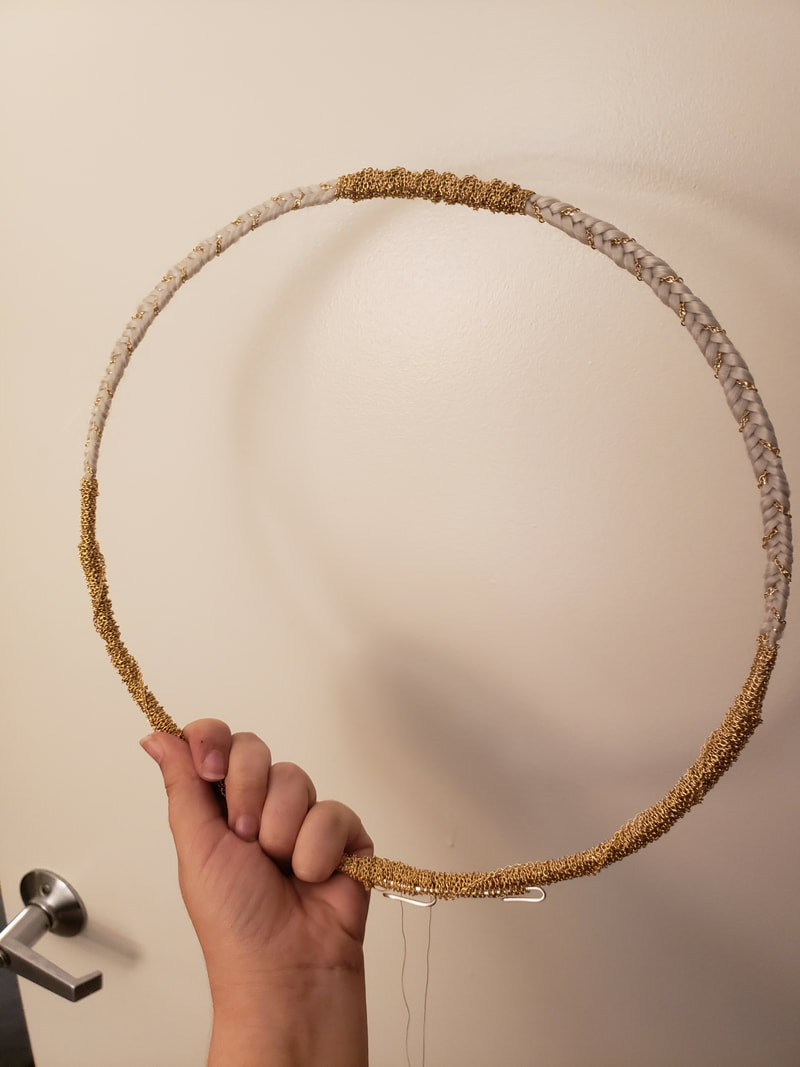
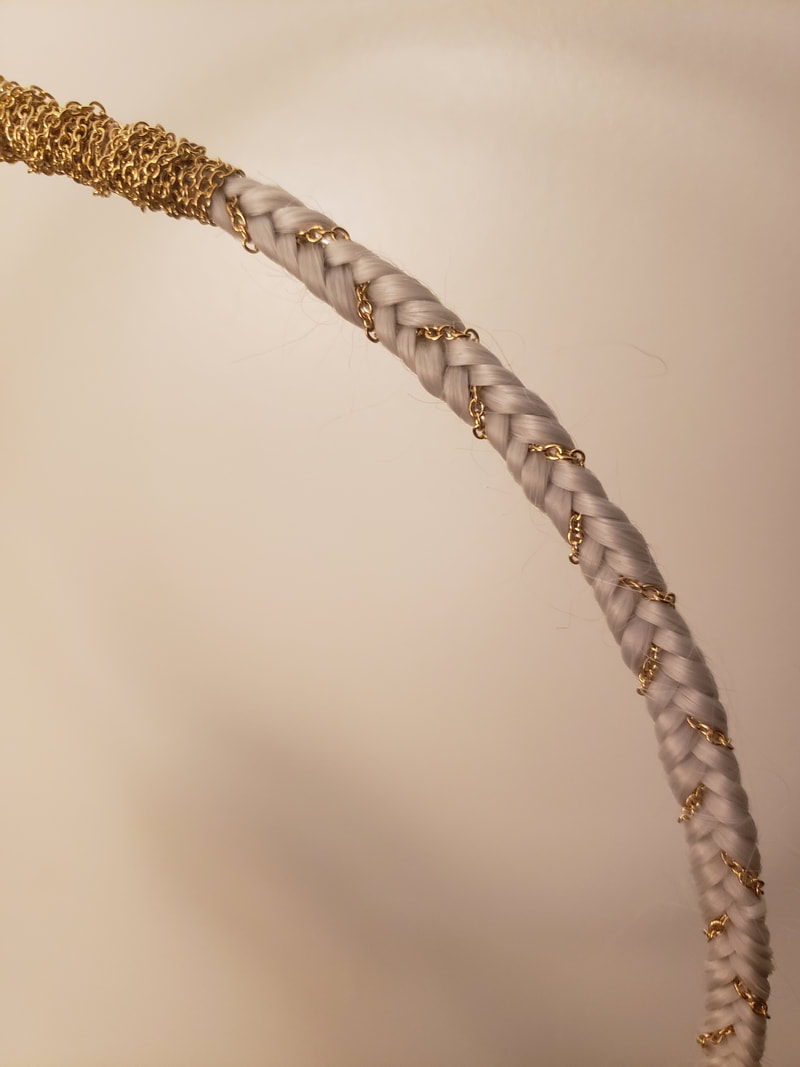
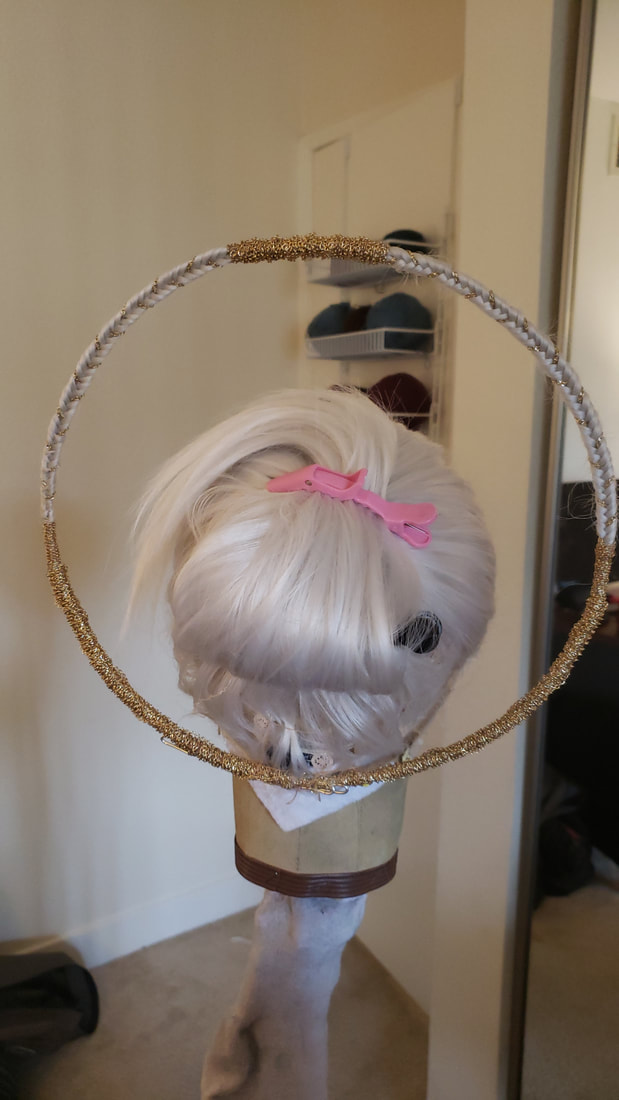
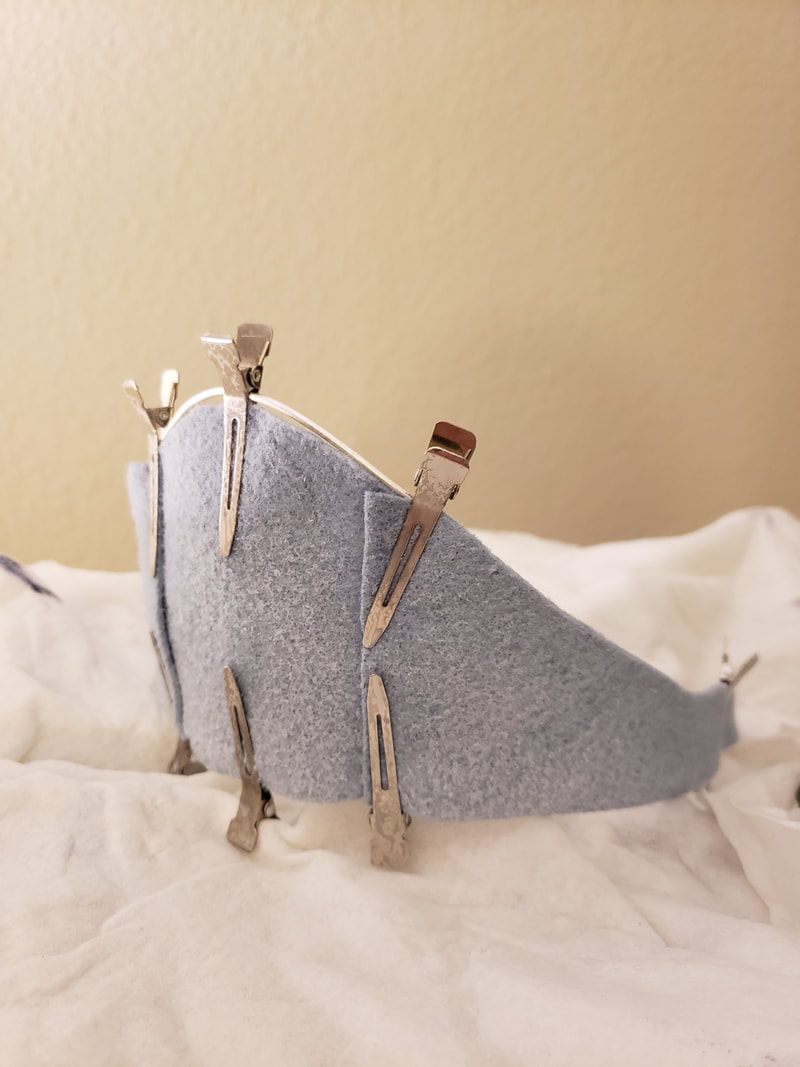
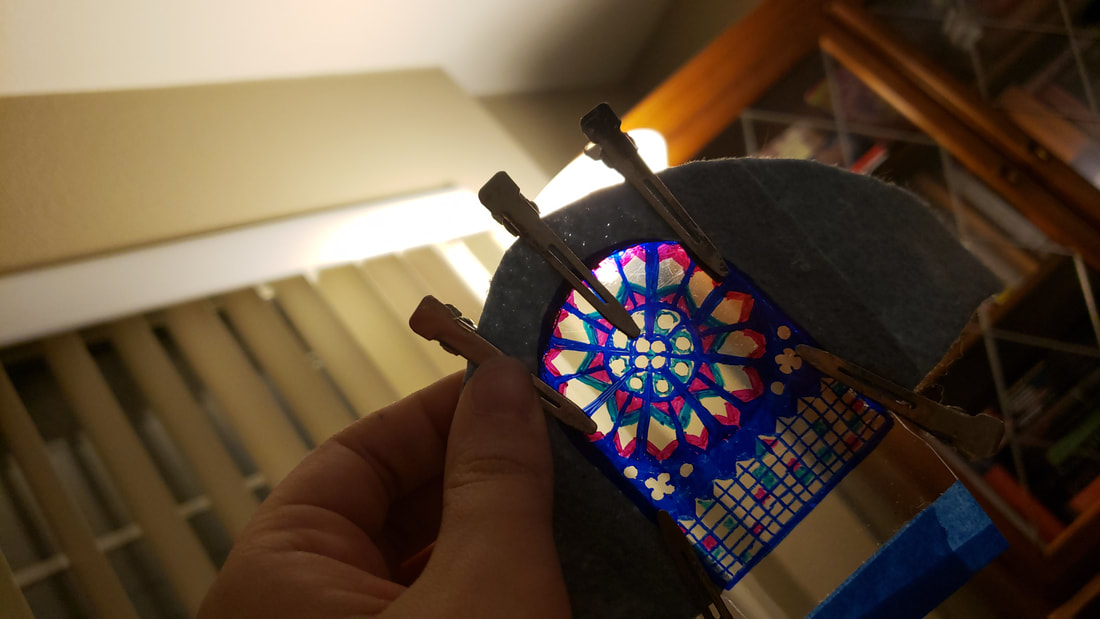
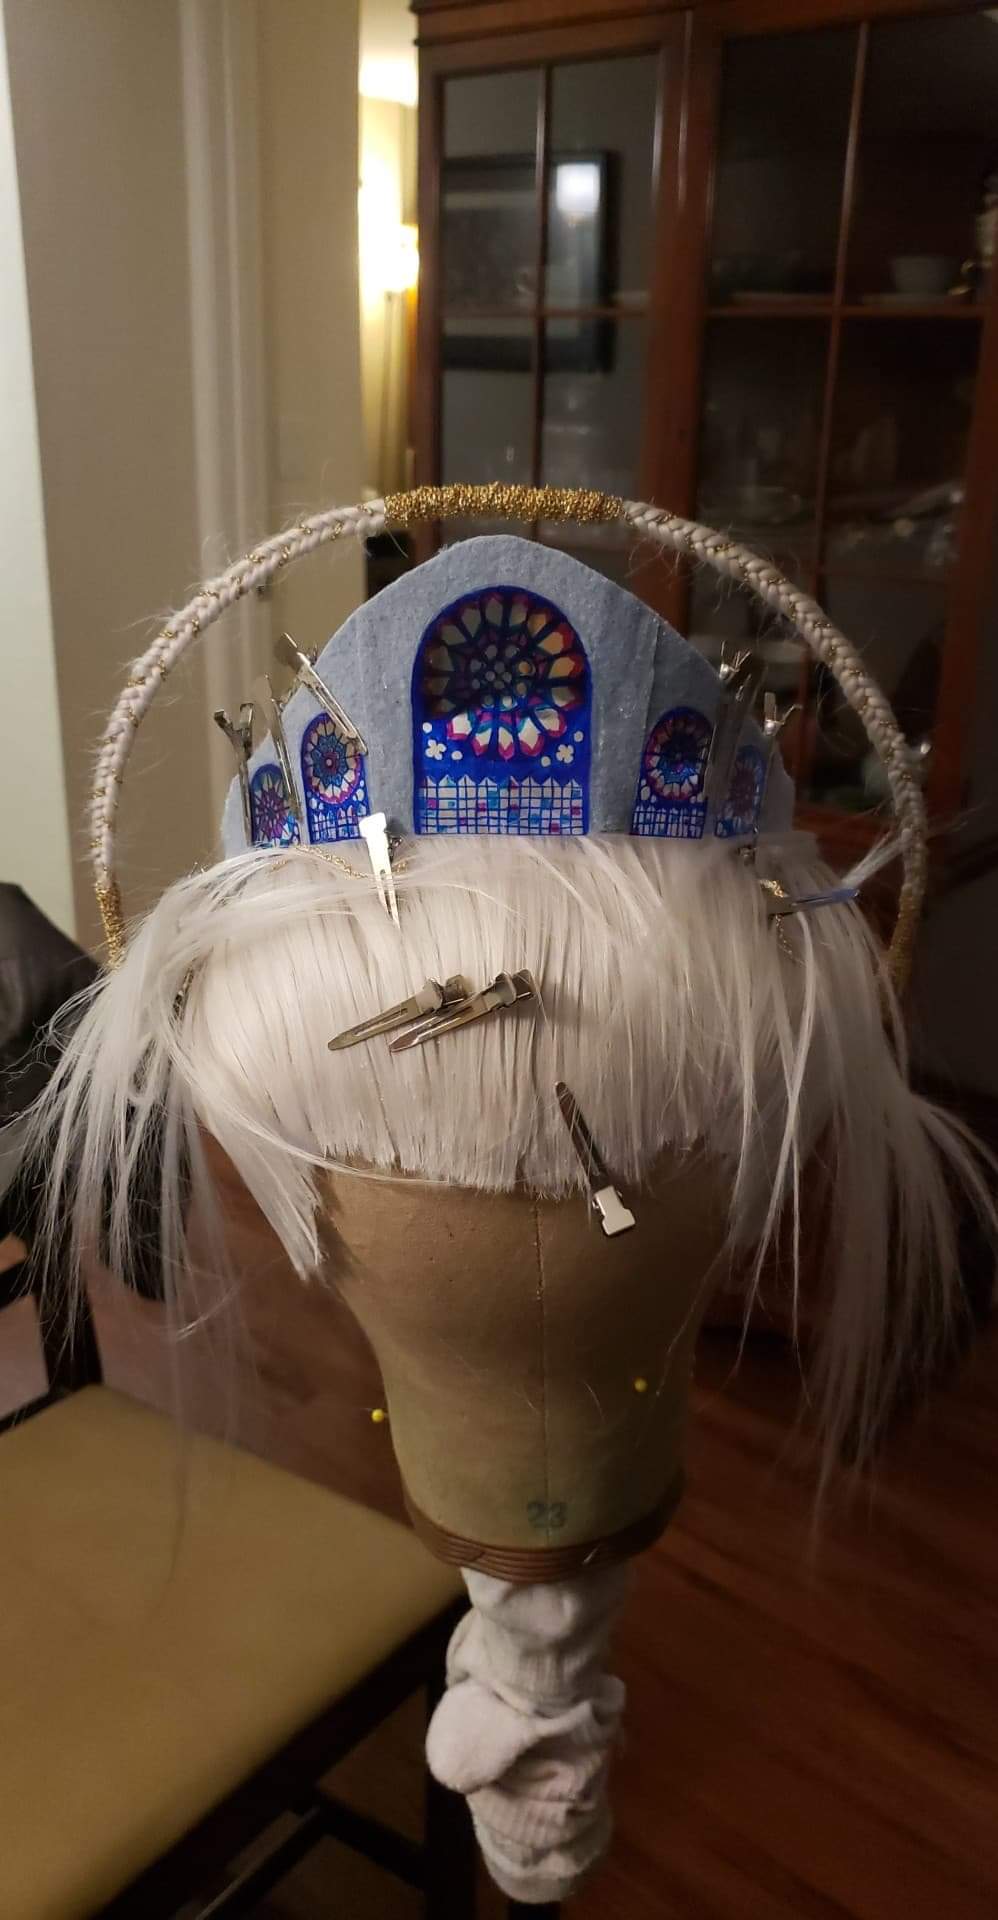
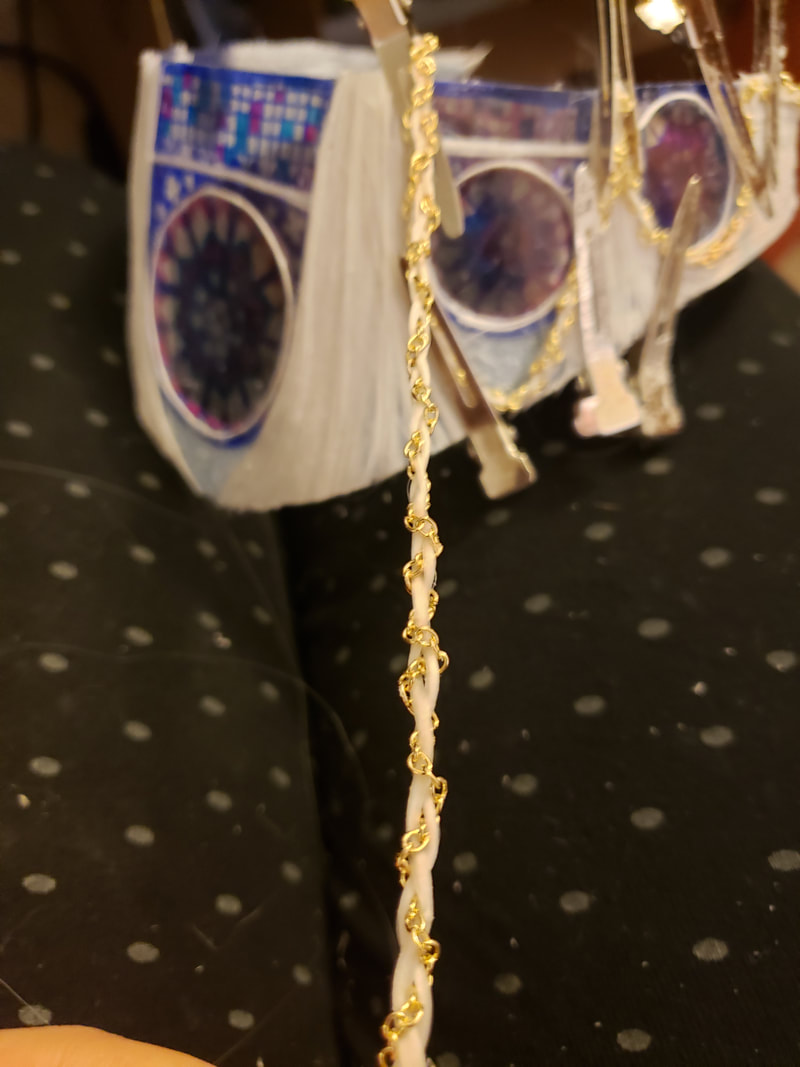
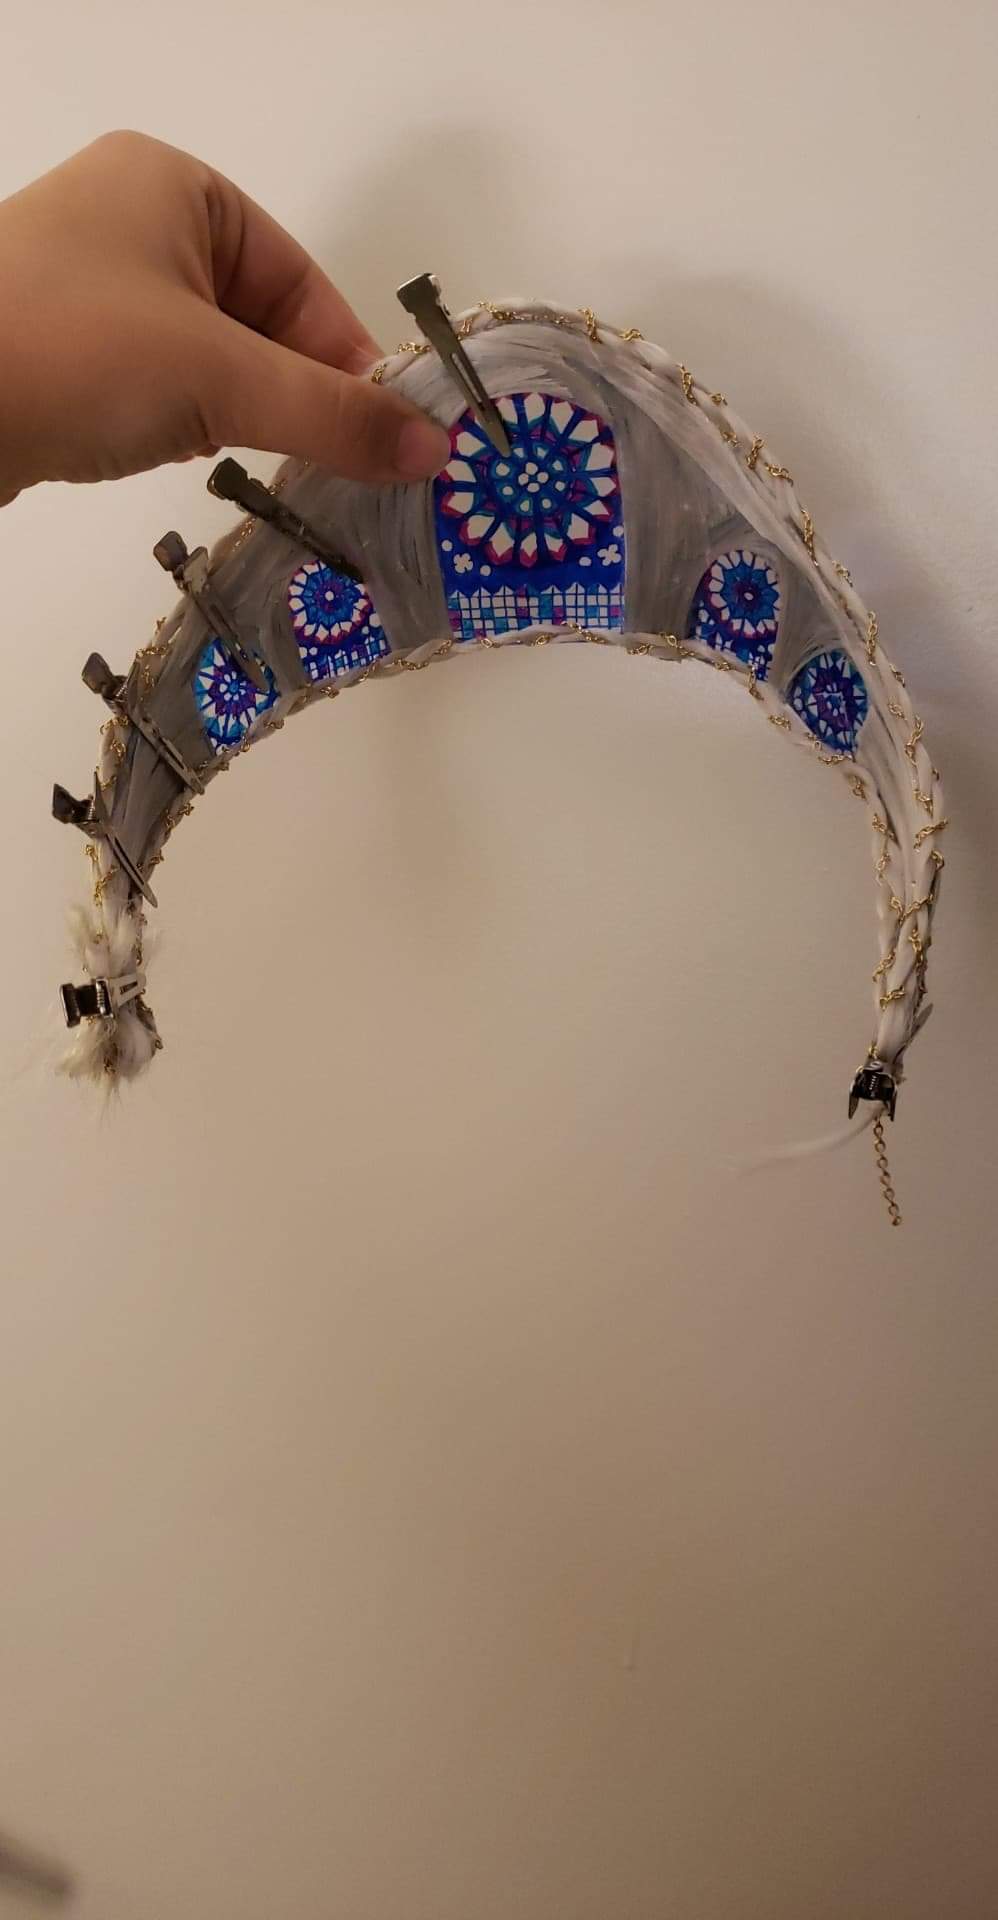
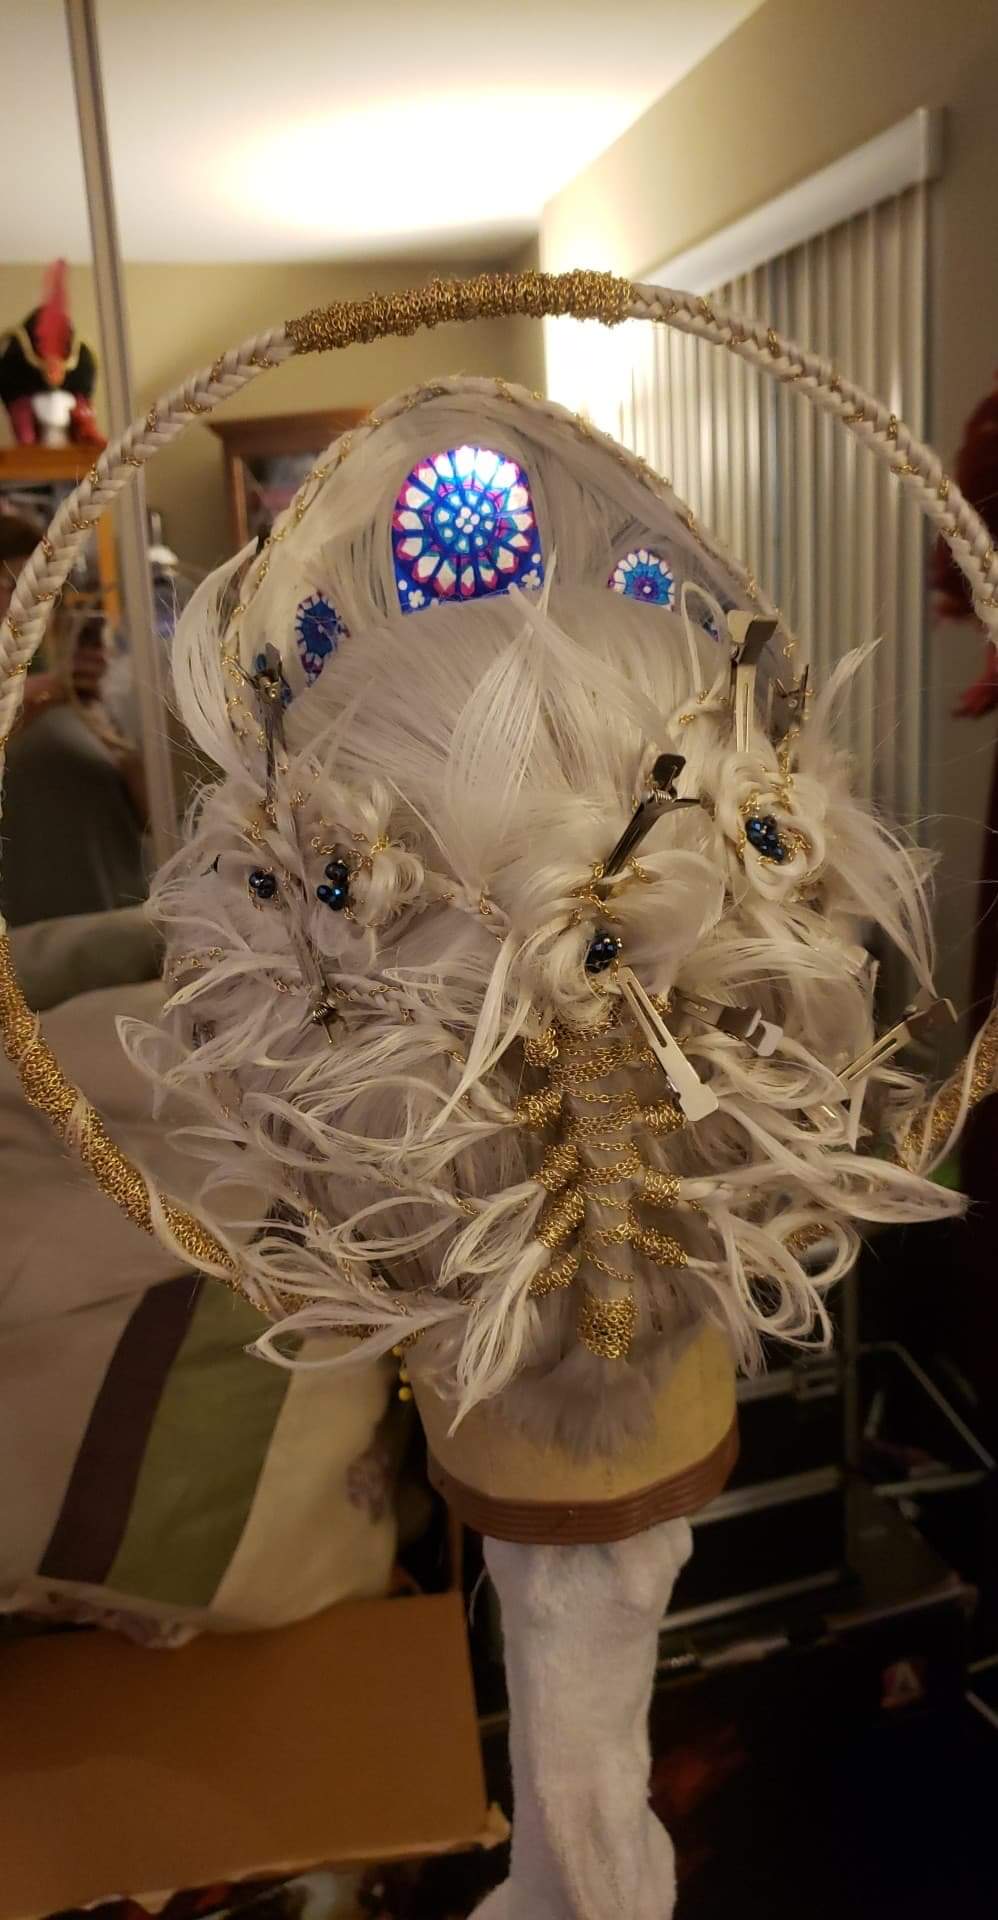
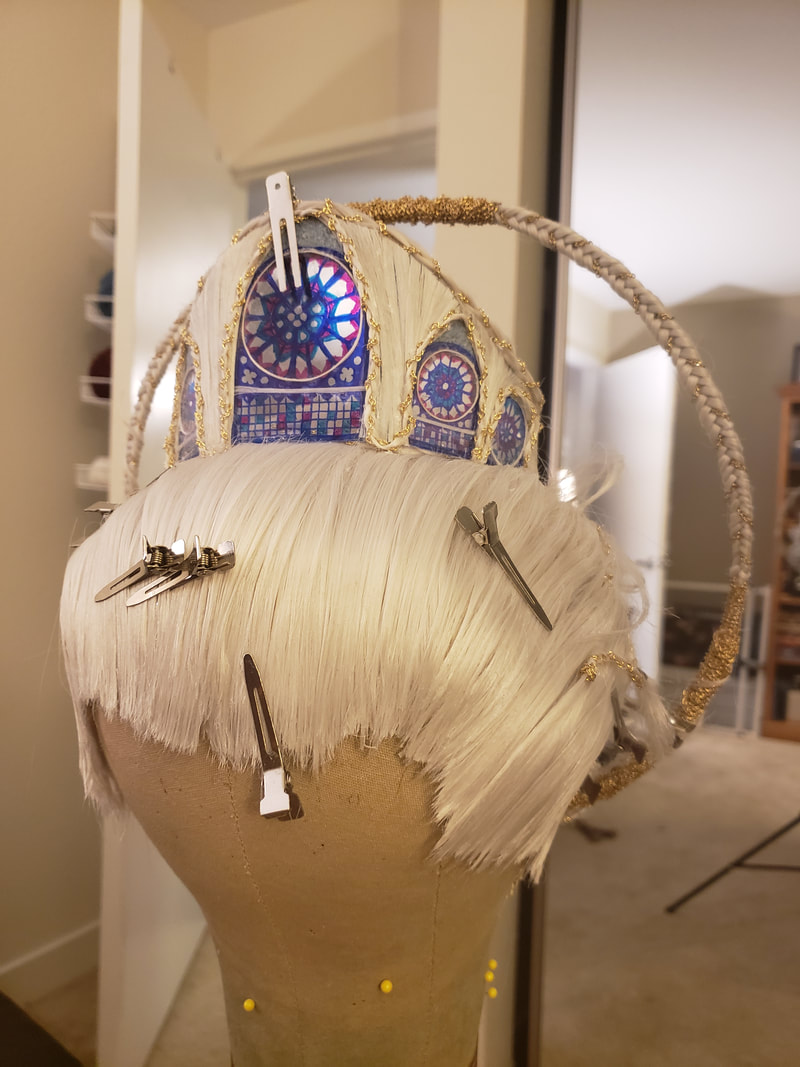
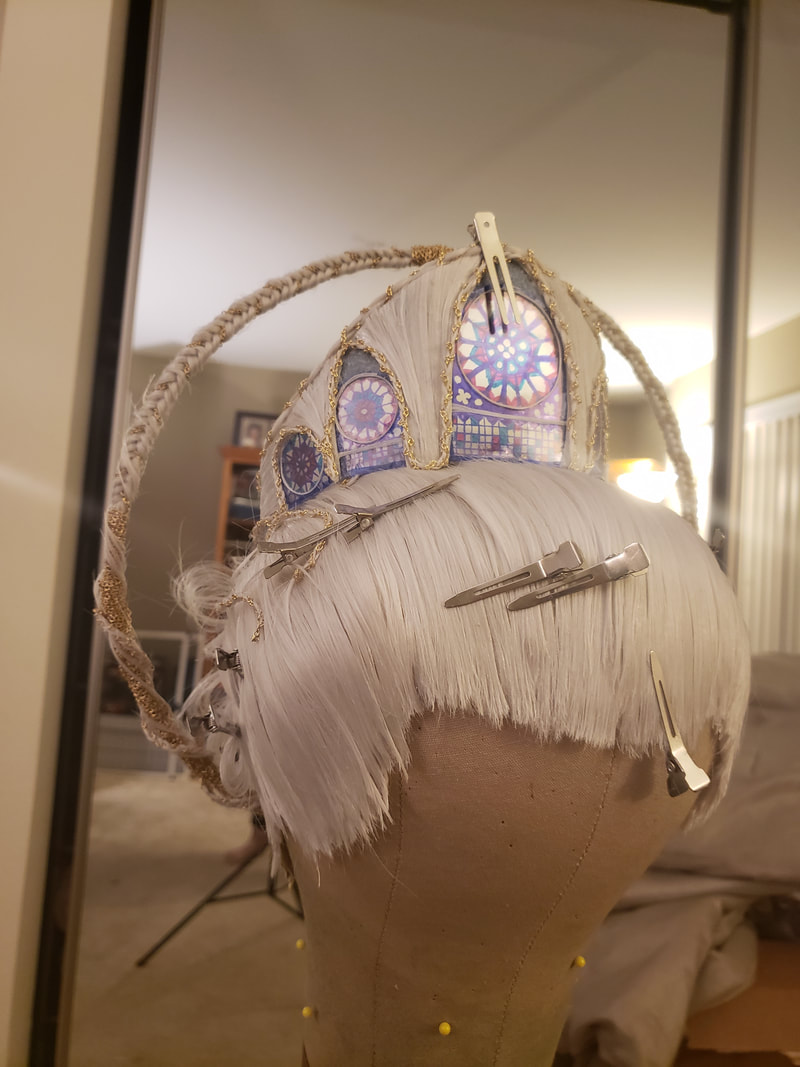
Inspiration: I was inspired by the French Gothic architecture of the Notre Dame and wanted to play this against modern alternative Gothic. My design started with a halo as seen in many Gothic depictions of religious figures. I then wanted to capture the vaulted ceilings of the cathedral which lead to my inclusion of the crown. From there, it seemed only natural to fill the crown with stained glass windows. I used the Rose Window as inspiration for the shape but ended up needing to create my own simplified design. An updo would allow for clean lines and a more regal presence. Process: Base Wig:
Results: You can see how I did here. In short, I didn't win the round, but I didn't lose either! The round definitely set the bar for the rest of the competition. Check out the other contestants too. They are all incredible artists and I am lucky to be creating art with them.
|
AuthorArda Wigs' Iron Wig 2020 3rd Place Winner with wiggy ideas to share. Want to know more? Check out the About Emily page or get in touch! Categories
All
Archives
May 2021
|


 RSS Feed